Claude’s Note: I decided to introduce a new section called Myth or Fact. We will confirm or debunk common survival myths. Let me know in the comment section what myths or facts you want us to tackle next. As always your feedback is greatly appreciated.
The Challenge
A quality Thermos can capture heat and keep it there for hours.
The Thermos has long been the choice for day-long coffee drinkers and tomato soup carriers. That said, we were asked by one of our readers if the Thermos could be used as a viable cooking vessel when you are on the move.
This was incredibly intriguing, and we jumped at the chance to try cooking foods in our Thermos. What follows is a deep dive into a variety of food types and how they fare being cooked with boiling hot water or stock, over time, inside of a Thermos.
Imagine cooking while you are on the bugout. No smoke, no fire, no scent and delicious food ready as soon as you twist off the cap. Sounds like a dream? We are going to find out.
The Thermos
I used a 16oz Stainless King made by Thermos. It promises to keep food hot for up to nine hours, or cold for up to 14 hours. The Stainless King features a screw top and a lid that could act as a cup or bowl. I found the folding spoon that nestles into the screw top to be an incredible little piece of cutlery.
This Thermos is cheap, and ships quick if you are in the market for one of your own. The 16oz model worked best for me because it was big enough to store food inside but also not too big for coffee.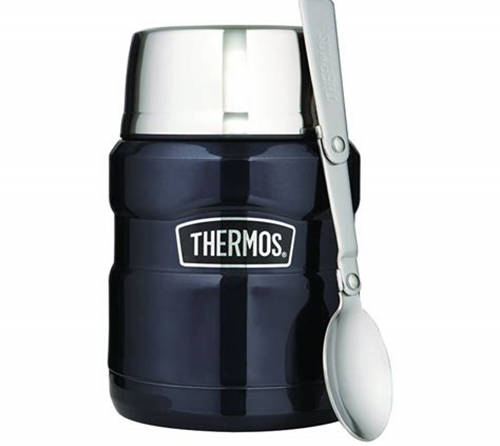
Side Note – While this doesn’t pertain to the article, I also thought these 16oz waterproof Thermos models would be great little survival caches. They are stainless steel, and at $25 each you could bury one filled with ammo, silver or any number of things.
Related: DIY $20 Survival Food Bucket
The Recipe
I used the same simple cooking method for all the items tested except the rice. I brought about a cup of water, or enough water to cover what I was cooking, to a boil. Then I dumped it over the food, stirred it and sealed her up.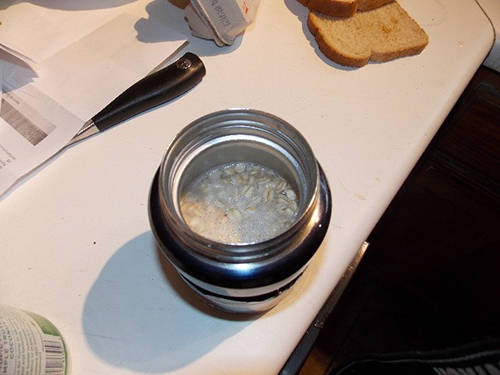
Vegetables
Easily one of the best performers in the Thermos. I cooked nearly every kind of vegetable using this method, with some thoughtful sizing I even managed to cook a few at the same time and have them come out cooked appropriately.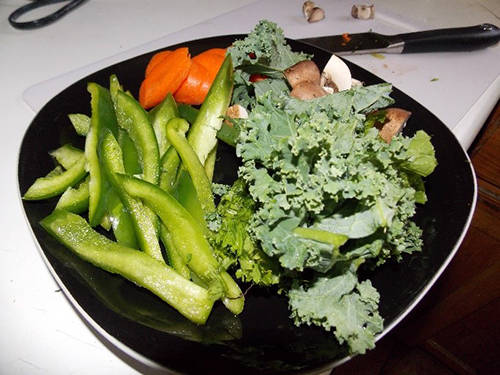
Depending on the vegetable, the holding time really determined what you were going to wind up with. For example, diced potatoes would hold up fine for a few hours in the Thermos, but if you were to drop some green peppers in there for the same amount of time you would be dealing with some serious mush.
For the more delicate vegetables I found that cutting them into larger pieces really helped them keep their shape.
Related: DIY Mini Greenhouse For Year-Round Vegetables
Foraged Foods
Because the vegetables did so well, particularly tubers, it would stand to reason that foraged roots would do well, too. If you were sourcing things like burdock or even cattail, these could be sliced and cooked in the Thermos with flavorings.
I would avoid cooking delicate leafy edibles in the Thermos. Again, they just wouldn’t stand up. For those items you could add them at the end for flavor. Things like wood sorrel or lady’s thumb could make a thermos meal great if stirred in just before eating.
Related: 21 Wild Edibles You Can Find in Urban Areas
Grains and Beans
The ingredient that suffered most in this experiment was undoubtedly the grains. Things like pasta and oats just became a disaster after too much time in the Thermos. While these food items were relatively warm, I think it’s important to mention that most of the warmth is concentrated at the bottom of the Thermos. The tops of rice and oats would be stodgy and much cooler.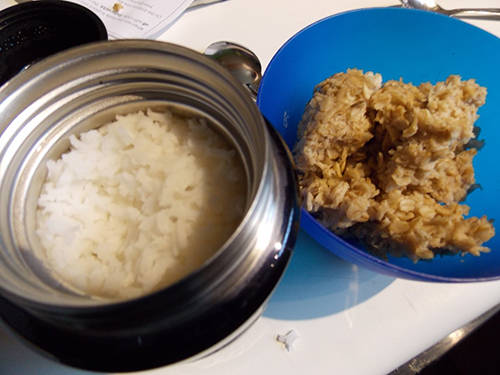
Rice did show some promise, but the 1:2 measurement that we usually use to cook rice turns out to be too much water. You would need it to be closer to 1:1 water to rice ratio.
As far as beans go, even with an overnight soak you simply don’t have consistent enough heat to cook dry beans in the Thermos.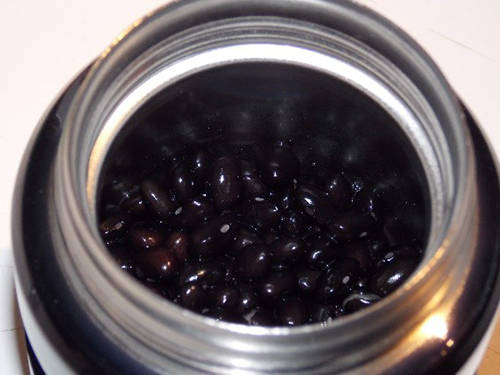
Meats
Depending on how you like meat prepared, you may find the Thermos to be a great tool for cooking it. This was a very important part of this experiment, because one of the most effective means of replenishing energy after a long day of work or hiking or bugging out is meat. There is no substitute for that type of protein.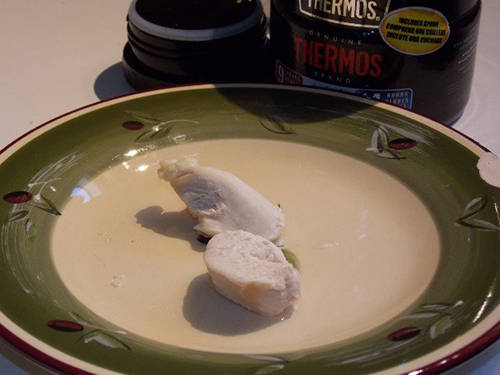
Now, if you are a chargrilled or hard seared meat eater, you may not like this very much because you are essentially poaching all the meat. You cannot do it any other way. I will say that chicken and fish performed incredibly well. The delicate cooking over a few hours really kept the fish together and made the chicken moist and tender.
I thought about beef with a boiled wine and broth mix rather than simple broth. This could add some flavor to merely boiled beef or poached deer.
Food Storage
The Thermos would be a great vessel for cooking food storage. It is really design for the type of cooking you conduct in a Mylar bag of Mountain House. Of course, the Thermos will get the job done better and hold the food longer than a bag.
If you store premade meals of dried food storage in ball jars, this could be a great option for you. While it would work well in the apocalypse you might also find yourself changing up your lunch habits, in the meantime.
Related: How To Store Six Months of Food When You Only Have Space for One
Myth or Fact
It is certainly not a myth. You can cook foods inside of a Thermos and on the go. You cannot successfully cook standard grains, pasta or beans in a thermos. These ingredients seemed to suffer most, and that could have been because of the environment and the style of cooking.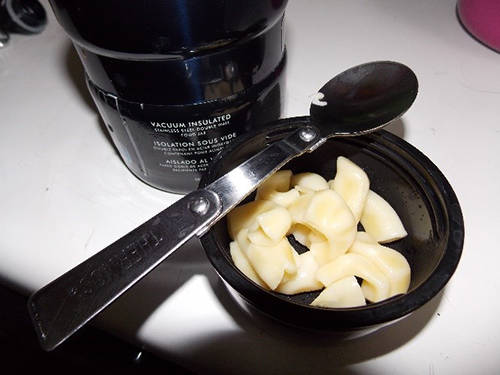
The interesting thing about cooking with a Thermos is that it promotes eating whole, nutritiously dense foods. These foods seemed to work best in the Thermos. When they were portioned appropriately, things like meat and fresh vegetables were just fine. In fact, the poached chicken was tender and wonderful.
Most of the test cooking was done with water but if you wanted to have a better meal and experience by cooking inside the Thermos you could add things like herbs and cook with flavored broths. This would enhance every food item you were cooking.
Thermos cooking presents some serious challenge and the biggest is to remember that the food can spoil, and food safety must remain a concern. That said, cooking food on the move in a Thermos has some serious benefits both to the camper and the prepper alike.
You may also like:
 5 Prepping “Rules” That Are Actually Myths
An Insanely Effective Way to Build a 5 Year Food Stockpile (Video)





I suggest you first heat the thermos by pouring some boiling water and dumping it after a minute. Then pour the boiling water and ingredients for cooking. Oatmeal works great.
I always do this. I either pre-chill the thermos and especially if I want to carry hot stuff, I pre-heat the thermos by pouring in boiling water first. I wouldn’t use boiling water first in a glass thermos, I would use warm water first and then go to boiling. With a stainless steel liner, boiling from the start is okay. Even some of the coffee shops when you go to buy a thermos of coffee will ask you if you want hot water in the thermos first.
I agree. My recipe for cooking oatmeal is as follows: I pre-heat the thermos. Mine is an 18 oz Stanley wide-mouth thermos. I fill the thermos to the brim with hot water and let it sit five minute. I empty the water back into a pyrex measuring cup and put it back in the microwave for five minutes on high. I put in 1/4 cup of raisins, dried blueberries or dried cranberries. I put in 2/3 cup of Bob’s Red Mill steel cut oatmeal in the thermos. When the water in the microwave is at a roiling boil I pour it into the thermos and put on the top. I do this about 9:30 or so at night and leave it all night. When I get up in the morning around 7:00 a.m., the oatmeal is cooked to the consistency I like and is hot enough to eat without adding milk. If I add milk, I nuke the oatmeal in the microwave for 30 seconds to one minute and add the milk.
The oatmeal amount also works with Trader Joe’s steel cut oatmeal that comes in the metal can. I think the brand name is McCann’s.
I believe the measurements are specific to an 18oz thermos. If your thermos is bigger or smaller, you will have to experiment with the quantities. I fill the thermos to the top with water all the time. This keeps the thermos hot for a longer period of time than if there is an air gap in the thermos, so if your thermos is smaller I would decrease the oatmeal a little; larger, increase the oatmeal. I would fill the water to the neck of the thermos.
2/3 cup of oatmeal makes enough oatmeal for both my wife and me in the morning.
One more thing, I shake the thermos after I have put the stopper in to distribute the dried fruit throughout the oatmeal. It stays in place after I do that and doesn’t sink to the bottom which I find interesting but unexplainable.
One grain I have repeatedly cooked in a Thermos is whole grain wheat. It works great. Just put the dry wheat in the Thermos, add boiling water at a ratio of about 1.5:1 or a little less. Put the lid on and let it sit overnight. Open it up in the morning for breakfast. Just season to taste.
It would probably help to put the rice/beans into the container you’re bringing the water to a boil first, instead of dumping them cold into the thermos. Beans can be cooked in a solar cooker, which doesn’t get much over boiling temperature, if that. Small beans, like the tiny red lentils, cook much faster than full-sized ones, too. Quinoa also cooks fast.
That’s a great idea. A lot of heat from the water is going to be lost just heating the beans up until the temperature equalized; if it all starts off at boiling point you should get a few more hours of cooking time.
Did you try pre-heating the thermos with boiling water, to get its insides hot, emptying out that water after a few minutes, then pouring in fresh boiling water and adding your food items to be cooked? You would probably gain a bit of temperature for cooking and have warmer food, longer by doing that.
When the kids were little we’d boil water put in thermos, put hot dogs in and drive to a park. After doing some fun stuff we’d have hotdogs and they were cooked. Was a nice picnic lunch and hot too, no fire, fuel to fuel with.
Oatmeal, Cream of Wheat, and Grits all worked great. Rice not so much. Minute rich doesn’t count though it would cook in the thermos. Not for long-term storage. Haven’t tried potatoes except for instant and they do ok but the timing is tricky.
I was wondering how you knew the chicken got up to temp.
I submit if the water is still hot 12 hours later, the chicken will be cooked. You can cut a piece of chicken in half and examine the interior. If it is all the same color as the outside, it will be cooked. If it is pink, of course it still needs more hot water treatment. Cutting the pieces of meat into smaller pieces will insure that it cooks thoroughly. Boiling water is 212 degrees more or less. A 1/2 inch cube of chicken should be thoroughly cooked in a short while, perhaps half an hour.
You could do empirical testing, but every time you open the thermos to see if the chicken is hot enough you drop the temperature inside the thermos, extending the cooking time.
Wonderful article and yes I am looking at adding this to my repertoire.. May I add a sideline? if you have no way of boiling water you can’t cook your food in a thermos. How about a small solar cooking unit? Siri that’s cooking. She never understands. Anyway what I’m talking about is you can buy a solar cook unit for 2 cups of coffee Siri that’s cooking unit. Sorry. So this gives you the ability to possibly do the same with just the sun. And sgain moo scent, no smoke.
Rydaartist: How about a web reference for the 2-cup solar cooking unit?
Sometimes when I search I get everything but what I am looking for. A url will narrow the search considerably.
this was a great article
I originally posted an article as a reply perhaps year ago about cooking rice and oatmeal in a thermos. I cook steel cut oatmeal over night. My method is to preheat the thermos by pouring boiling water in the thermos and let it sit while I heat the additional water for cooking. I use a 20 ounce thermos rather than the 16 ounce thermos. I use one cup of steel cut oats and fill the thermos to the top. I do that just before going to bed. In the morning the oats are hot and ready to eat. I cook regular short grain rice which my wife and I prefer to long grain rice. and I use the same method. Pasta works the same but you can’t leave it in the water too long or use too much otherwise it does get mushy. I cooked lentils overnight using the same method. I haven’t tried meat yet, but by preheating the thermos the meat should poach satisfactorily. Actually delicate meat like chicken or fish should cook through in about half an hour or so. That’s just an estimate because I haven’t tried it yet.
It definitely is possible to cook many items in a thermos. You do have to adjust your time for cooking. Delicate items don’t need much time in boiling water. Denser items need longer. If you can cook it in a slow cooker, you can cook it in a thermos.
You should try the barocook, it costs the same as the thermos, but it is designed as a cooker. It is a cup inside another. You put the heating material in the larger cup, put what you want to cook in the smaller cup (13oz), then put it in the larger one, and viola, you have a hot meal. They have larger one, but I have the 004 which is 13oz.
The Barocook system looks very interesting, especially for cooking indoors where carbon monoxide might be a consideration. I plan to investigate it further.
Thanks for the reference, Zingster.
If you are interested in some tried and true recipes, check out BackpackingChef.com. Chef Glen has some methods of cooking grains and beans that take a little more prep work, but are well worth the effort. It may not be feasible for larger quantities, but to have a weeks worth of meals in your bugout bag, YES! Also, for cooking without the fire, try the HydroHeat flameless cookers. I get mine at Emergency Essentials, LLC. These work on the same principle as MRE’s. Again, great for a bugout bag.
Sue: Thanks for the url. If anyone is serious about prepping, they owe to themselves to check out the BackpackingChef website. In addition to his recipes, of course, he plugs the products that he is selling, but nothing wrong with that. He also lists other vendors and their websites. For instance, I have long wondered where to purchase the small packets of condiments that we all snitch from fast food joints. Some condiments I would like to have just aren’t available at MickeyD’s. He lists a website that specializes in all kinds of small packet goodies. Eureka!
I’ve also used the hydroHeat from Emergency Essentials. I did some trial runs with lunches at work using Mountain House & other dehydrated jarred meals with great results. Cooked fresh veggies really fast. Will be a useful tool to boil water for safety and to use for thermos cooking. No fire, smoke and light weight. In my bug out bag.
Use a 1L or 2L Thermos that is 24 hour rated.I do beans and rice at least once a month in a 2L Thermos for practice. Works fine. You do need to put boiling water in the Thermos for about 10 minutes to heat it up on the inside. While that is heating up I boil the rice and beans for 10 minutes before emptying the Thermos of that water and placing the rice and beans and the water they were boiling in into the thermos and seal it up tight. If you want you can go an extra step and place some insulation like pillows around the Thermos to retain a little more heat. The beans are tender enough to eat in about 6 hours (rice way sooner).
I filled my thermos with water and put it on the burner. I left it all afternoon and the water was just warm. Must be the insulation? I mean, what gives?
Jethro: You are joking, of course. I
f you are not joking, I suggest that you do no use this method of cooking. You are, however, very lucky, so just trust to luck and you will probably manage.
Wow! I sure didn’t proofread that post!!!
It stands to reason that this method would work given time. It’s basically a crock pot method of cooking things. However, the question in the email was if you can use a thermos to cook food without making smoke. You didn’t say how you heated the water to begin with. If I have to start a fire and bring water to boil the chances are that I can also cook over that same fire.
Castillo: In my discussion in the earlier post that I referred to, I suggested that in a post EOTW situation, smoke in the air will be so commonplace that no one will even notice. That was well before the SoCal fires of December.
My experience in the recent SoCal fires, confirmed that suspicion. It is impossible to tell where the actual fire is when the air is filled with smoke. Every time there was even a trace of smoke in the air the internet was filled with queries about the location of the fire.
In an EOTW scenario, many people will have fires for cooking, heating, light, just to have the feeling of comfort that sitting by a fire gives one. If you build a dakota fire pit or if you use a rocket stove your smoke signal will be considerably reduced. With burning buildings and numerous fires, one would have to be within fifty feet in order to discern a fire. If hostiles are that close, you had better skip breakfast and look to security.
The advantage of cooking in the thermos is as follows: You are on the move. You need to cook food. You stop and start a fire. It is a lot quicker and easier to boil water, pour it into a thermos and get back on the road than it is to sit there and wait for oatmeal or rice or beans or whatever to cook in a boiling pot than it is to let them cook while you are on the move.
In addition, while smoke may be general and in the air and not particularly discernible, the odor of cooking food will certainly be discernible and will attract all sorts of unwanted attention. Even boiling oatmeal or rice will leave a fragrance on the air that will attract hungry folks. They may bypass a small fire, especially if the air is already smokey but the odor of cooking food will draw all sort of new friends you may not especially want to meet.
In the 1970’s Kurt Saxon wrote about cooking wheat berries in a Thermos over night for breakfast. Preheat bottle, wheat and boiling water, and lay the bottle on its side. Add a couple of towels over and under the bottle. Drink the extra water as you eat breakfast. He wrote some weird stuff, I never tried it.
Prepper1’s rice and beans sounds like it’s worth trying with a couple of chunks of ham.
At $25 a pop I sure wouldn’t use a thermos bottle as a cacheing device. PVC with end caps is a lot cheaper and won’t rust in dirt or otherwise deteriorate in my lifetime anyway. Even if I wanted to cache water, I would put .5 liter water bottles in PVC pipe and bury it. While everyone decries deterioration of the bottles into the water, in the dark inside the PVC tube, buried in three feet of dirt where it is cool, the plastic water bottle won’t deteriorate that much. If your choice is dying tomorrow of dehydration or maybe developing some chemical reaction from plastic 25 years from now, I think most of us would go with drink the water, worry about plastic poisoning later.
I’m with you. I’d hate to drop that much money in the ground. …If you did, at least you’d have a great container to keep with you after it’s dug up.
The jar I use is apparently not available at Amazon. I have a 20 oz jar. Amazon lists a 14 oz, 18 oz and a 24 oz. It is called the Stanley Adventure Vacuum Insulated Food Jar. It is a wide mouth vacuum bottle which is what you need for this exercise. My 20 oz holds the heat very nicely at least from 9:30 in the evening until 7:00 am the next morning.
In a bug out situation you prepare your hot breakfast the night before and you are on the road that much quicker the next morning. Even assuming that you start your oatmeal earlier in the evening, lukewarm oatmeal ready to go is better than no oatmeal. My 20 oz jar provides plenty of oatmeal for both my wife and me for breakfast. I would think a 14 oz jar would be sufficient for one person and the 24 oz jar would be enough for four people. Of course, portions depends upon individual appetites
This is a mistake. When I peeled the label off the bottom I found that I had an 19 oz jar, so they are still available on Amazon. Sorry about that folks. Perhaps I can attribute my error to a senior moment.
I have always maintained the way older folks can expound on things that happened fifty years ago with such clarity is because there is nobody left who was around then who can say, “Wait a minute. I was there too and that is definitely not the way it went down.”
This is fantastic info!! It nad never entered my mind! GREAT!!!
Adding other liquids to your water will raise it’s boiling point. So if you cooked your meats or vegetables in half water, half meat juice, the broth would get hotter and cook faster and stay hot longer.
The thermal cooking uses 80% less energy. So less exposure time is where it’s at. You can cook for the day at 2 am. You need to let food roll boil for five minutes for better results. Ive tested many bottles. Food jars, not good performers. They are good for a hot lunch. But it will be a cold supper. Small lid openings keep the heat better. The old Stanley coffee thermos does good, but lid is too small. The later versions are a little bigger and are useful for food. Thermos brand, really good. I do a test on all bottles. Opening is usable, holds heat well. I found an igloo at a thrift store, tremendous performer. But, I don’t like the lid design. It threads outside instead of inside, one drop, bust the lid, trash can. Gott makes a good bottle. The reason I test is to find the best. The better ones will keep from six in the morning, to six the next morning, on to six that next evening. Coffee will still be so hot you have to sip. The thermos brand is top overall. The igloo holds heat better, but design is bad. The thermos always is four degrees more than Stanley, I have a nissan that’s hangs with them. The best food jar performs a third of what a drink bottle will do. I’ve tested fifty bottles or more. Same brands, some do good, some don’t. Example, I have eight Stanley 32 oz bottles, only two will do the 36 hour power hour. Ozark trail bottles work. Look into the half gallon ones. You can have hot water all day. But you must test performance before relying on anything. Some of these won’t last hardly four hours. They get the Sharpie X on them. Plus keep for extra lids and caps.
I use a wonder oven which you can make look it up on the internet. I’ve found when making soup if my meat is a little tough time in the wonder oven tenderizes it. That would probably be the same for tough meat in the thermos.
This doesn’t work well. While thermos units work well for keeping liquids hot or cold, actually cooking something in one of them is a true stretch. If you are going to cook “on the go”, how about manifold cookery? I have done some of that and it is fun and really works.
Jan: Manifold cookery only works if you have a manifold on which to cook. If you are using shank’s mare or a bicycle, manifold cooking isn’t in the scenario for you.
What about cooking a beef stew in the thermos? If the beef is cut into smaller chunks.
Also, the Mylar bags like from Mountain House, are they reusable? Or just a one time thing?
Also, how well does this work with dehydrated foods?
Foods such as dried potatoes, carrots, mushrooms, onions, peppers, jerky. Example: like if your hiking and want to eat it for lunch.
The best way to find out, JoAnn, is empirical testing. Try it now. It is better to try it now before you absolutely positively need it than to wait until that dire moment arrives and you waste a lot of time and very precious food finding out how to do it. It is a simple process and only takes a few minutes to set up. It took me three batches of oatmeal to get the right combo. They weren’t wasted, they just weren’t exactly the way I liked my oatmeal.
I am going to experiment with pasta and will report my findings here. I think pasta can be done in a thermos, it is just a matter of timing.
I think if you are hiking and put the jerky and some dried potatoes and other veggies in the thermos in the morning as soon as you get up, by lunch time you will have a hot meal ready to eat. But try it for yourself. Don’t take my word for it. Your thermos is not my thermos. They may each take different times. Don’t forget to preheat the thermos.
Thank you. I will be hiking parts of AzT this summer and will try it.
While you’re testing bottles, I’d use a food thermometer after 2 hours and again after 4 hours. If the thermos doesn’t keep beans, rice, pastas, and grains – the riskiest foods – above 140 degrees, you’re risking food poisoning for some food after 2 hours, others kept longer than four hours below 140.
I put 180° water in a room temp bottle. After 12 hours, in the best bottle, 164°. Other good bottles hold 160°. If not, I give to somebody that could use a good thermal bottle. But, if I boil it before, I get higher temps. Still safe. But all foods should be boiled 5 minutes before going into bottle.
Not to change the theme, has anybody thought of solar? Once more there is no smoke, you don’t have to worry about boiling water. Depending upon the type used you can use it a slow cooker up to and including brown fresh bread to a nice steak brown char on the outside medium rare in the middle and oh yes it can boil water.
Yes, those methods of cooking work but they require you to stay in one location while the cooking is being done. The advantage of thermos cooking is you can let the heat of the water do the cooking while you are on the move or sleeping.
Suppose you stop for the night. You start a fire and cook your evening meal. At the same time you heat water and get your oatmeal and coffee all set up. In the morning instead of having to get your fire started again, your meal and your coffee can be ready to go. Eat your breakfast, brush your teeth, wash your face and you are ready to get on the road again without having to spend time getting the fire going and cooking, etc etc.
If the coast is clear you can start your midday meal and let it cook while on the move. You don’t know where you are going to be when you get hungry. With the thermos method of cooking you can eat your hot meal without having to stop and gather wood, lay the fire, etc. etc.
If you have a secure location at midday you can get your evening meal started with your solar oven and eliminate having to have a fire at night when it might be more visible.
It’s just one more way to address the nutrition issue if you have to bug out. Hot meals add to our comfort level and can help ward off hypothermia.
This strikes me as a variation of classical thermos cooking of which the late Kurt Saxon (Survivalist, Author, wrote The Poor Man’s James Bond, etc.) was a fan. It was an article by him where I first read about it. He used the technique mostly to make oatmeal and such in the thermos to have for lunch at work to save money and eat something nutritious. I also found out that boat owners use this a lot to prepare meals with little heat thus reducing costs.
Rice and bean really take a lot of heat. The rice has to soak in the boiled water on simmer and then steam in the pot. And bean, unless pre-soaked and cooked like the canned variety take hours. I wouldn’t even consider trying to make those foods this way.
I would use instant, minute or quick cooking rice – whatever brand you choose. Beans I would cook the on the stove and just pack before I left. They can cook on the gentle heat and be nice and soft when you’re ready. It’s NOT the same, but you would have a portable hot meal. I like those short containers by Thermos. Used to eat ravioli or spaghetti out of them as a kid. And now we use the metal ones if we need to be at the hospital or are travelling.
Thermos cooking works. While I am preparing dinner for tonight I set a pan on for lunch the next day with whatever I want. Rice, beans, meat, herbs etc. Bring it to a boil for 5 and shut off heat. Pour into thermos. Next morning while I am making coffee and breakfast (bad idea to mess with me before coffee) pour the meal back into the pan and bring to a boil. Return it to the thermos, by lunch it will be done. While traveling I require fire twice a day. A small survival stove or campfire, a small hot fire makes little smoke which can be dispersed. I also keep a thermos of coffee which has more anti-oxidants than orange juice.
Senior moments my ass, the story lost all resemblance to the truth the 3rd or 4th time you told it. History itself should probably be listed as fiction. How come libraries don’t have a “truth” section?
You can get far better results by heating not just the water but ALL of the ingredients to cooking temp THEN dump them in the thermos. When using just hot water the temp drops because of the cold ingredients, and “cooking” is more difficult. My Sis, who travels a lot with her hubby in a caravan, has a large “Dream Pot” (which is like a hay cooker – Cooking pots with an insulated bag – plenty of other brands have them too) thermos system, keeping the food cooking. She can prep a meal in the morning, travel all day and stop to a deliciously hot meal, ready when they are. Because it has separate pots within they can have meat and veggies or mains and dessert, all done while on the move. Another advantage is you cut down on the amount of fuel you use – just heat to temp and the thermos pots do the rest. A real bonus if it comes to a SHTF situation. Of course you CAN improvise. Its a way of cooking often used in third world countries where fuel is at a premium. A Hay Box, basically any large box packed full with anything that offers good heat insulation, and a cooking pot with a tight fitting lid. Bring pot and contents to cooking temp, place pot in box surrounded by the insulation, top with more insulation (straw, old blankets, newspapers, anything really) and wait.
Use a travel cooking pot OR THERMOS that is AS FULL AS POSSIBLE for better heat maintaining qualities.