It is no secret that we are amid an economic crisis affecting people worldwide. Living expenses and costs are rising and have reached an all-time high in many areas.
Eating healthy can be challenging when your rent, mortgage, and bills use up more than three-quarters of your monthly income. Add increased food costs to this already dire situation, and you have a recipe for disaster that only worsens with time.
Currently, economic fallout is one of the most likely ways things can go wrong for humanity. The impact of a financial crisis is significant in terms of monetary losses and human suffering.
While we may not be able to avoid the full impact of this widespread issue, there are things we can do to prepare.
One of the first places a recession is felt is in food access. A grocery bill that was once manageable is now astronomical. A simple trip to the grocery store has increased in cost, and many people find it challenging to make ends meet, let alone feed their family a healthy, balanced diet.
Related: Looming Economic Crisis Threatens To Push Millions Of Americans Into Starvation
Thankfully, if you start now, you can prepare for things getting really tough.
While stocking up on toilet paper, canned goods, medications, and essentials is always a good idea; you need to consider the bigger picture. Canned beans and survival crackers are not a long-term solution.
The effects of any type of crisis could last for weeks or even years, but life will inevitably continue. If you hope to be able to live in a relatively normal state, you will want to have healthy, hearty meals on hand.
The good news is that you can create these meals today while you can still afford the ingredients. Preparing now means you will have meals on hand later if you are in a situation where you can’t afford to buy food or cannot safely access it.
⇒ The ‘Superweed’ That Saved Large Communities During The Great Depression
Here are some easy-to-prepare meals that can be stored for extended periods, so you are ready when SHTF.
Turkey Dinner In A Jar
Even amid chaos, you can enjoy turkey dinner with your family if you prepare.
Ingredients:
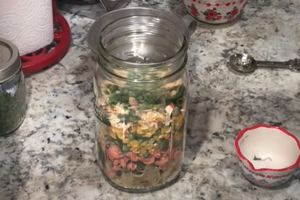 1 cup freeze dried turkey
- 5-7 tbsp chicken or turkey gravy powder
- 1-2 cups seasoned stove top stuffing
- dehydrated vegetables – carrots, celery, onions, etc.
- salt and pepper
Layer the ingredients in a large mason jar, vacuum seal, or add an oxygen absorber. Store until needed.
Cooking Directions:
To make this meal, boil 4 cups of water and add the mixture from the jar. Let stand for approximately 10 minutes, adding more water if required.
Related: 5 Instant Dry Soup Mixes Every Prepper Should Have In Their Food Storage
Simmer this meal for 20 minutes, allowing it to soften and the flavors to absorb.
Tacos In A Jar
Tuesday night tacos become so easy with a stored dry mix.
Ingredients:
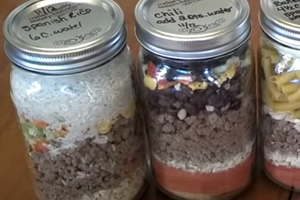 2-3 tbsp taco seasoning
- salt and pepper
- 2 tbsp tomato powder
- freeze dried onions, beans, corn and other vegetables of your liking
- dried chilis or pepper flakes
- ½ cup freeze dried hamburger
⇒ Click Here To Learn How To Can Hamburger Meat For Long Term Preservation
Layer all ingredients in a mason jar and seal. Add an oxygen absorber if you are not using a pressure canner. Store in a spot that is away from heat and light.
Cooking Directions:
Dump the mixture into a pot and add 6-8 cups of water. Bring the mix to a rapid boil, then turn the heat to medium for 15-minutes to thoroughly cook the beans. Add more seasoning if required.
A longer simmer will create a thicker mix. Serve with tortilla chips or put it on a taco shell with sour cream and salsa if they are available. You can also eat this meal as a taco soup by increasing the water and creating more liquid.
Super Simple Sloppy Joe’s
Sloppy Joe’s are always a family favorite and easy to make. In a crisis, you can still enjoy this favored meal if prepared ahead of time.
Ingredients:
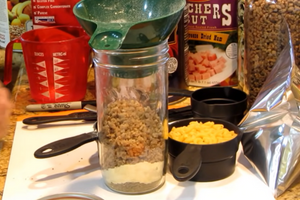 1-1 ½ cups freeze dried ground beef
- ½ cup each freeze-dried tomatoes, onions, and peppers
- ¼ cup each freeze-dried celery, corn, and tomato powder
- 3-4 tbsp Sloppy Joe’s flavoring powder
- salt and pepper
Layer all ingredients in a mason jar and vacuum seal using a pressure canner.
Cooking Directions:
Boil 4 cups of water in a saucepan. Add the mixture to the water and reduce heat to medium. Simmer for 25-30 minutes. Serve on hamburger buns for a filling, flavorful meal. If fresh bread is not readily available, this meal is also great on its own or served over crushed tortillas.
You can create extra sloppy joe sauce by combining minced onion, garlic, dry mustard, celery salt, and chili powder in another container and adding water when you are ready to serve. Put these ingredients in a baggy and store them within the jar for easy access later.
Fantastic Fajita Casserole
Rice, beans, and delicious flavors form this simple storage meal. You will want to make extra jars because the whole family will love this creation.
Ingredients:
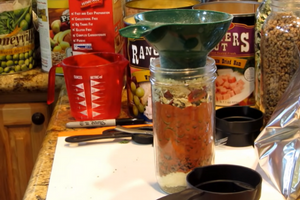 1 cup each red and black quick-cook beans
- 1-1½ cups of white rice
- ½ cup of tomato powder
- 1½ cups of taco seasoning
- ¼ – ½ tsp each dried garlic, onion, chili powder, red pepper flakes
Layer ingredients into a large mason jar. Cover with a canning lid and vacuum seal. Store in a cool, dry place until needed.
Cooking Directions:
Empty the contents of the jar into a large casserole dish and cover with 6 cups of boiling water. Bake uncovered for 40-minutes
You can top this delicious dish with freshly grated cheese or serve it with sour cream if available. Alternatively, you can add cheese or sour cream powder to the mix to allow for a creamy delight even during an emergency.
Mac And Cheese In A Jar
Mac and cheese is the ultimate comfort food, which may come in handy during a crisis when tensions are high. This simple storage version of a favorite family classic is perfect for your preparedness kit.
Ingredients:
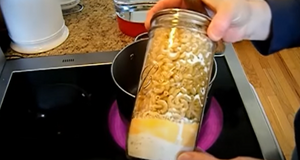 cheese powder
- butter powder
- milk powder
- salt and pepper
- elbow macaroni
Add dry ingredients to a plastic baggy and vacuum seal, or remove as much air as possible. Fill a jar ¾ of the way with elbow macaroni and place the dry ingredients baggy on top. Add an oxygen absorber.
Vacuum seal the jar or allow the oxygen absorber to do its thing and wait for the jar to seal itself. Store the jar in a dark, dry place until needed.
Cooking Directions:
Remove plastic baggy and set aside. Add elbow macaroni to a pot of boiling water and cook for 8-10 minutes. Once the pasta is cooked, set aside approximately ½ – ¾ cups of the pasta water.
Drain the remaining water from the pasta and return it to the pot. Pour ½ a cup of the pasta water back into the pot and add the dry ingredients from the baggy. Stir until thick and cheesy, adding more water if required.
You can use other kinds of pasta, but cooking times will vary. You may also want to add some freeze-dried veggies to make this meal more nutrient-rich.
Taste Of Texas Chili
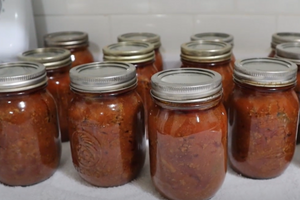
Chili is the perfect meal on a crisp fall day, and it is also an excellent option for a stored meal that is easy and affordable to create.
The best part is that it is fully cooked and ready to serve or store. Feel free to spice it up, add more veg, thicken the sauce, or experiment in other ways.
Ingredients:
- 1 can of kidney beans, drained or two cups of dried beans, cooked and drained
- 1-1 ½ lbs ground beef
- 1 onion or dried onion flakes
- 1-2 cloves of garlic or 1- 2 tsp garlic powder
- 1 tsp oregano
- 1 can of crushed tomatoes
- 1 tbsp chili powder
- 1-2 bell peppers, seeded and chopped
- ½ a can of root beer
- chili flakes and any other spices you like
Cooking Directions:
Cook ground beef in a pan with onion, peppers, and spices. Add the ½ can of root beer to the meat halfway through cooking and continue until the meat is browned and the root beer is beginning to thicken a bit. Add the kidney beans and tomatoes, simmer for 10-15 minutes.
Pack the cooked chili into heated jars, leaving 1-inch of headspace. Wipe the rim, add the lid, and seal in a pressure canner for 1 ½ hour. Store in a spot that is dark and cool.
Savory Beef And Potato Stew
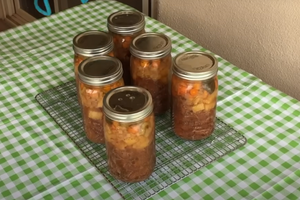 Stew is an excellent meal for storage.
It is nutritious, filling, and easy to prepare, the perfect combo in a crisis.
Related: Canning $5 Amish Stew
Make a delicious beef and potato stew today and store it for an emergency.
Ingredients:
- 1-2 lbs ground beef, venison, or sausage meat
- 2 tbsp Worchester sauce
- 1-2 tbsp cornstarch
- 4 cups beef broth
- 1-2 cups cooked, cut potatoes
- 1 cup carrots, baby carrots, carrot chunks, or frozen
- 1 cup frozen green beans
- 1 cup frozen corn
- 1 large onion sliced and diced
- garlic powder, onion powder, salt, pepper, and any other spices you like
Cooking Directions:
Cook the meat with your choice of spices. Heat the broth to a boil in a pot. Add the spices to the broth along with Worchester sauce.
Related: How to Safely Store Homemade Broth for 6 Months (No Canning or Freezing Required!)
Mix the cornstarch with cold water and blend until smooth; add this to the broth mixture. Without fulling draining the meat to preserve the flavors, add it to the broth, seasoning as desired.
Throw all your vegetables into the broth mixture and simmer over low-medium heat until the vegetables are fully cooked and the flavors are combined. It is best to add the potatoes during the last 10 minutes of simmering, as they are already soft and cooked.
To store this meal, add it to jars, leaving 1-1 ½ inches of headspace. Let the jar settle, wipe the rims, and place the lid on top. Seal using a pressure canner. Store in a cool, dark space.
Why Store Food? What Are The Benefits Of Food Storage?
People often take for granted that they can go to the grocery store and purchase the items they need to create a healthy meal.
What happens if this ability were to vanish suddenly or if you simply didn’t have the money to purchase food?
As you probably know, this is not such a far-fetched idea. The risk of impending doom makes having a stockpile that includes hearty meals essential. Storing food, especially ready-to-eat meals, is an excellent idea with many benefits.
A critical aspect of any prepper’s strategy, food storage can mean the difference between life and death. However, there are things to remember when looking to store foods for extended periods.
It is also essential to consider how many people you will be feeding, and it is a good idea to store extra food in case someone manages to access your stock, you fall ill, or something terrible happens.
Remember, being prepared may become the only way to survive when SHTF.





Excellent article. Well written with great ideas.
The chili recipe is similar to what I make, but I have never tried root beer in it. but I do use LOTS of cayenne pepper 🙂
Just curious why the need to pressure can the meals with feeeze dried beef? But not the Turkey? I thought if freeze dried, there is no need to pressure can. Confusing.
Peace
MadFab
I don’t think you do need to pressure can freeze dried beef, unless you use it in a cooked recipe first, then you would probably need pressure can for safety.
The Taste of Texas Chili, which I referenced above, uses ground beef. This recipe would need to be pressure canned, unless you can’t resist devouring it first. Good chili, cornbread, and a warm fire are my wintertime memories and enjoyment.
Can the water bath be used in place of using a pressure cooker?
What other methods could also be used for that process?
you don’t just throw it in a Mylar bag with o2 absorbers
Bob,
If it has meat in the recipe it cannot be safely water bath canned.
If in doubt check with your county extension office.
The people there are master food preservers. Very knowledgeable and it is free to ask questions and recieve help.
Peace
MadFab
Pressure canning kills pests in grain, legumes, and so on. niio
There isn’t!!!! The heat of a pressure canner would ruin anything freeze dried.. imho
There is a mystery to diehard Texas chili lovers of beans or no beans.
Does the bean thing really matter, as it should be your choice. What is the real original recipe from Texas, immigrants from other several countries? Was the chili recipe from wherever, adopted to that time period of the local cooking tastes?
I’ve seen recipes where some add alcohol like beer for flavor.
Tend to like chili either way. How do you like your chili?
The best chili is always the kind that someone else cooks. Betty Crocker had a Chili Con Carne recipe in a cookbook from pre 1980 that was pretty good. As time went on, I would take that recipe and add more cayenne pepper, a couple of habaneros, an various different items just playing around. I like my chili hot, but not tongue burning. Fix cornbread the only acceptable way, in a cast iron skillet. I never cook less than 5 lbs of ground beef, and 10 lbs is pushing it because it gets too hard to stir and mix everything properly.
As far as leftovers? What little is left over gets frozen, to be eaten on the next cold winter’s night. I give some to friends, but most of them are not “pepper bellies”, so they don’t usually want much.
When there is not enough chili left, I will fix some hot dogs and pour the chili over it and add cheese and more onions.
I have a couple of recipes that I want to try using cubed beef, but haven’t gotten around to it yet.
BTW.. I prefer beef chili and that is the only meat I use. I thankfully have never had turkey or tofu chili, and some chilis I don’t even want to know what the “meat” was.
The earliest Americans traveling in West Texas and the Southwest reported that the Vaqueros and other working class Spanish lived off a stew of beans made in a fiery hot chili sauce they scooped up in tortillas. So the 1st Texas chili was beans, no meat. Southwestern Indians used chili pequines (probably the original native chili pepper) as well as some some simple cultivars they developed in lots of chili dishes with meat. One of my favorites is to season a hunk of meat ( they used venison, mutton, bear, I use a chuck roast) with salt, pepper, and garlic, brown in a little oil in a dutch oven, deglaze the pan with beef stock and reserve it for later. Pour a layer of chili pequin on a sheet of foil, lay the meat on top, put a layer of chili pequin on top of the meat, wrap it in the foil and bake it several hours til the meat falls apart. You can season the stock and use it Au Jus, or thicken it for gravy. Even I scrape the chilis off before eating this, it is so hot and the flavor is unique. Another great chili recipe from the various Pueblos is Carne Adobada, New Mexican Chilis roasted and blended with a bit of oil, water, and spices to make a deep and rich red sauce in which the meat is submerged and slow roasted.
We’re too old now for that kind of rich cooking, now I make the traditional Texan Chili popularized by Tolbert, Fowler, and Shelby in their boys club down in Terlingua in the 1960s, brown ground beef, pour a couple cups of stock and tomato sauce in a heavy pan, pour in a box of Wick Fowler chili mix, add extra chili powder, cumin, and Mexican oregano, a whole sweet onion and a couple fresh jalapenos, dump in the beef and simmer 3 hours adding water as necessary, then you thicken it with Masa Harina. No beans, Perfection!
Pepper IT reports putting left over chili on hotdogs, this is wonderfully
good. Also wonderful is Frito chili pie, Fritos in a bowl, chili, cheese, microwave. Also, in my Texas chili recipe, of course you chop the dang sweet onion first.
Someone asked about beer in chili. Beer goes in mouth.
Bob, traditional chili was chilis and meat with tomatoes. Beans are always served as refried. Meat is your choice. niio
Poetica: Chili beans are not chili con carne. It’s a variant of refritos. It also dries well if you need to pack up for a few days. We use corn chips, not crackers for anything. niio
Generations back didn’t have pressure canners and used the water bath cooking the meat for 3 hours at a time. One can cook old hens, stew meat, sausage that way. Invite your company at church and bring them home and warm up the meat for the meal . That is how it was done in the 30s and 40s. Everyone survived as far as I know. It is the 3 hours that is the key. My mother-in-law did the old hens. They were too tough for ordinary cooking, only good for stewing or canning and apparently flavourful too.
Bob, to honestly answer your question about other methods for canning chili, it can absolutely, positively be water bathed….for 3 hours at a rolling boil and with at least 1 inch of water over the tops for the entire 3 hours. Start with ***STERILIZED*** jars AND lids, not completely tightened rings. Screw them down good when you pull them out.
One can can anything if you know and use the proper methods. My motto is, if you can buy it in a can or jar at the store, you can can it at home. You have to keep cleanliness as the number one thing. In fact, I boil my jars and everything that comes in contact with the inside of the jar or the rim. Not necessary if I’m using my pressure canner.
The USA is the only country that commonly uses pressure canners; they aren’t readily available in many countries. Many recipes and methods aren’t recommended not necessarily because they are unsafe. but because the USDA hasn’t tested them. In my opinion the USDA is not the be all know all organization on the planet. I trust master canners and tried and true recipes that have been passed down for generations. I know of people that safely can milk and butter!
Not everyone has a freeze dryer or can afford one.
I bought a Harvest Right freeze dryer for $4,000 and we could never get it to work. We spent 2 months back and forth with the company trying to get it fixed. It never got fixed. It was useless. We finally got our money back. I would NEVER EVER buy one of their machines!!! Trash.
What other kinds of freeze dryers are there that are good? Anyone?
I bought a freeze dryer a few years ago, back when I was making a nice salary. Today I would not be able to. The freeze dryer I purchased has been wonderful for some of my family with food sensitivities. I have a couple of people who are not able to eat commercially packaged foods. A room full of commercially freeze dried foods would not do my relatives any good, no matter how hungry they might be. This machine has been operated at a relative’s house for years but I haven’t heard anything about operational problems.
A freeze dryer is an investment. It might be worth it to find a couple of other people to share one with, if you really are interested. It does take some mechanical ability to keep up with maintenance and such, as there is the actual freeze dryer box along with a noisy compressor that needs to run long hours. If you live in an apartment, the noise may not be appreciated. Unless you have a family to feed, for many it is more economical to purchase commercially prepared freeze dried food.
The name says it all FREEZE dried, I have accidentally done with his to some meat mince I left in the freezer to long.
What has peaked my interest, is that most of the recipes here are for filing, comfort foods, that everyone in the family would enjoy, and it provides an easy way to serve it up in good portion on short notice without starting from scratch under duress with assorted no 10 cans. The only thing that would not work for me, is the storage of hundreds of individual prepared and packed glass mason jars. I would need another method to repackage the ingredients that would be easier to store and take with me if I needed to leave.
City Chick,
I think you would be able to do the freeze dried meals in food saver bags. Easier to store and could be grab and go in those situations.
I thought I might give a couple of the recipes a try and see if grandboys like them. If so, will make a few batches to have on hand for weeknights when I have way too much on the schedule.
Will be a nice change from my usual Grandma is tired and still have to make dinner for 4 grands. Pancakes/ waffles is my go to. Lol ?
Peace
MadFab
Anything you store in a jar can go in a maylar bag…Not as pretty but they store and transport well. And the added bonus of no light degradation!
Hi, all of the recipes have measurements except for the mac and cheese.
Could somebody please tell me how much cheese powder, butter powder, and milk powder to use?!
I believe they are referring to using the pressure canner to vacuum seal that meal not pressure can the meal. Some people use a pressure canner to bring a vacuum seal to the jars I’ve never personally done that process to vacuum seal.
Buying freeze dried food is just as expensive right now as “normal” food. Buying in bulk when food is on sale and canning it or pressure canning it, is the cheapest way to go right now. Even buying a pressure canner is cheaper than the other options of preserving food.
Really? Who has the money for a freeze drier? Or freeze dried food to put in these recipes?!?! I can EVERYTHING. I’m on a fixed income and have to make do.
Pray for our country!
Me. I bought one a couple years ago. But it wouldn’t be worth doing these if one had to purchase the machine and/or the pre-packaged powders. (butter powder has a limited shelf life and is expensive)
The dried ingredients in a can save a lot of space compared to the prepared recipes, though I package all of my FD food in mylar bags.
I also ‘invested’ in one, as part of my retirement plan. I took money from my IRA. Couldn’t be happier with that decision. My plan, as I am blessed with good health now, is to grow and freeze dry 5 years of basic food every year for the next 5 years. This should get me through the rest of my life and allow me superior, nutritious food. Also, it allows me to eat well even through multiple garden season failures. I am also freeze drying a LOT of meat and cheese that I am picking up on sale. Today, I am making a huge batch of black beans and rice (I have some older beans that need to be cooked up) for the freeze dryer. It’s healthy, just the way I like it, and can be seasoned then stored exactly the way I like it. I can pop open the jar of mix and not have to add a single thing except water. I can put it in a jar big enough to allow for expansion so I can keep an emergency jar of it at work (or in my car) – just add hot water. The problem I had with buying the freeze dried basics is that they were always out of stock. I have complete control making my long-term storage foods and individual ingredients. My goal here is to avoid becoming a little old lady eating cat food. ?
These look great, but the chili recipe has an issue:
“1 can of kidney beans, drained or two cups of dried beans, cooked and drained”
That’s got to be an enormous can of kidney beans to equal 2 cups of cooked beans (after cooking about 6 cups!)
“Can” measurements in recipes without specifics can be fairly useless.
Yes, and I would add a little dry mustard to the recipe for the Mac n cheese. That’ll give it a little zing.
Under the “Sloppy Joe” recipe there is a high lighted phrase “vacuum seal with a pressure canner”. When I click on the link “7 deadly canning mistakes” comes up and no mention of “vacuum sealing with a pressure canner”. Was that a typo or can you vacuum seal dry foods with a pressure canner?
John L, I had that same question. Not sure “how” one would pressure can such an item.
There is no need to pressure can a jar meal with 100% freeze dried and dehydrated food. Use a pump and seal or a brake bleed to suck the air out. Or drop in an oxygen absorber. Pressure canning is needed to can fresh meat and vegetables. Water bath can only be used for high acid foods like fruits and jams.
See comment below about sealing jars with only freeze dried and dehydrated foods. Pressure canning not necessary.
Sorry, both these both ended up in the same place.
Similar to others who have commented, as I read the article I kept wondering, if I open up freeze dried meats and use them in this method, how does that impact the storage life of the meat? FD meat ain’t cheap. So, for example, if my FD hamburger has a storage life of 25 years and I open it up and repackage it with other ingredients, does that decrease the FD hamburger to 3 years, 10 years, or no impact at all?
Also, like others, I have heard too many negative reviews about the home Freeze Dryers and the awful customer service from the manufacturers, so I am not willing at this point to pay such a large amount of money for what may prove to be an unwise investment.
I read this blog but many times the titles are not exactly in keeping with the writers’ content. In this article I think the part about “affordability” given the price of freeze dried meat may be a bit off. Overall good ideas for those who can afford FD meats.
Agree and interesting article – almost all of my items were put in Mylar bags properly or came in #10 cans that are good for 20-30 years. Mylar bags have rice, beans, spices, and other such things that were purchased in bulk, 25-50 pound bags. The #10 cans have meats, vegtebales, cheese, and etc. – why open any of these container to build meals in a jar that one doesn’t know how long they will be good to use down the road, I.e. shelf-life. Plus, what type of chemical reaction would happen in the jar once all of the items are combined?
Glass jars take up more space, easyly broken. With that stated, once someone opens a #10 can (s) then it might be a good time to make some glass jar meals. I’ve done this and used my vacuum sealer. I keep plenty of empty jars (various sizes with lids and rings) in the attic in the original boxes that they were purchased for safe storage. Use what is needed at the time of the need.
Have 5 gallon buckets with everything needed in them containing multiple Mylar bags (sugar, salt, pepper, spices, beans, rice and etc…) that are kept in a dark cold room behind a very solid door. When something should happen, one could just remove one of these 5 gallon buckets and a few #10 cans to make a few good health meals. Glass jar time at this point.
I put nothing in glass jars for long storage but have them available. I have a few 1/2 pint and full pint jars in my cold room for when I do my dried herbs throughout the various seasons. They are labeled with contents and dated.
Loved see the different recipes and will keep on record for future use.
Enjoyed reading this article and all the comments, thanks.
Overall a good article, Thanks Katherine. Some comments here:
Mac & Cheese in a jar – Easier to buy the little boxes, empty contents into pint jar, and vacuum seal the lid. Cheese stays dry in the foil packet. Worry later about reconstituting dry milk and butter. A couple dozen like this are easy to work into the weekly budget, and production is scalable.
Quick cook beans may be difficult/costly to find, and cooking your own, then dehydrating is lots of work. You need to know which bulk beans you have or can get, and how long they need to be soaked and/or pre-cooked, or you’ll undercook the beans or overcook everyhing else.
I question the 1.5 Cups Taco Seasoning in the Fajita Casserole recipe, sounds lika a LOT, Please verify! Add a tin of canned chicken to make it even better.
Seek out DIY recipes for Taco Seasoning
Saving fully cooked portions by pressure canning should include a mention of shelf life.
The titl of this article sucks. “While you can still afford it?” Really. Then tell the greedy republicans to stop votong against the people. When the Dems pt forth the bill to cap corporations from price gouging, the republicans voted against it, then cmplained about inflation. Not the brightest bulbs in the box.
Why did they vote against it? Was there a lot of add on junk bills etc.?
both parties hate you
And neither are you!
Poor Lisa, you just can’t fix stupid!!!
Wrong. Read the Bill. Dems wanted to put another bunch of items in that had nothing to do with capping big corps. But make themselves richer. Read the bill. Stop believing that box you watch.
Lisa, who do you think owns these mega-corporations? They give 10-15 times more donations to liberal politicians than to conservatives. Liberals take a little from the mega, then give tons in return for ‘donations’. It all fake news when dems claim they want to help us. Do you like the dem economy? It’s called the Weimar Republic scenario. The WR did just what the dnc is doing to set things up for hitler. Why do you support nazism?
No one is price gouging, and whenever the government sticks it’s nose into the market, the fallout is predictable and usually disastrous. Locking down the economy led to the prices of everything skyrocketing, amid the breakdown of the supply chain, as well. To make matters worse, the governments started printing money, making it more and more worthless, which then added to the cost of everything, which in turn raises the price of everything. If it now costs a baker $2 to make a loaf of bread, do you think he should have to sell it for $1?
The Republicans didn’t create the inflation, and know full well that installing price controls is a sure way to raise the costs of everything else, until it spirals out of control. We’ve seen this happen before, most notably in the Weimar Republic of Germany after WWI:
“The rising cost of goods combined with a dramatic increase in the money supply created perfect conditions for inflation. Before World War I, the exchange rate was just over four marks to the U.S. dollar. By 1920 the value of the mark was 16 times less. It stabilized at 69 marks to the dollar for some months. The Weimar government was still in a position to get a grip on the economy; instead, it chose to print yet more money in order to pay the reparation debt. By July 1922 prices had risen by some 700 percent, and hyperinflation had arrived.
The government had to print million-mark notes, then billion-mark notes. By November 1923 one U.S. dollar was equivalent to 1,000 billion (a trillion) marks. A wheelbarrow full of money couldn’t buy a newspaper. Shopkeepers couldn’t replenish their stock fast enough to keep up with prices, farmers refused to sell their produce for worthless money, food riots broke out, and townspeople marched into the countryside to loot the farms. Law and order broke down. The German attempt at democracy had been completely undermined. Conspiracy theories sprouted, and extremist political views became acceptable. Ultimately, hyperinflation enabled Adolf Hitler to gain power.” hyperinflation in the Weimar Republic
Read the book by Jan Kozak ” And Not A Shot Is Fired”.
It explains how the Czech”s voted themselves into communisum in 1948. Exactly what the dems are doing to America right now. He was one of the communists by the way.
Can y’all make some of the jar meals that don’t use freeze dried items?
Yes, but meat will have to be done separately. You should freeze any grain or legume produces to kill insect pests. niio
The economy of this is problematic if you aren’t already set up for canning foods in jars. The cost of the jars, canning pots, shelving etc needs to be taken into account too. Especially given some of these meals (Mac n cheese) have a limited shelf life even when canned. You are working very hard to put these meals away to save a possible 10-20% price rise on key ingredients but still having to eat them in the next year or two.
And I don’t know what good quality canning jars cost in the US but here in Oz each of those jars would be $4 each or so on a good day/sale.
Great if you have the resources lying around, but you can probably save individual ingredients for longer and then cherry pick the ones that will be most expensive in the future.
(This is based on the idea that this article Is about saving money, not about long term storage for SHTF disaster prep. If you are doing disaster prep then remember: Bugging out with heavy glass jars is a mugs game.)
So starve ? At some point you have to understand your behind the curve and need to do something. So either shit or get off the pot
That’s a rather vitriolic response!
I’m not saying ‘don’t prep’ but I am saying “If you are doing this to avoid price rises in the near future then it’s going to cost you more to set up to do this, for no real gain.”
But I guess some people just like to pick a fight?
If you already have the freeze-dried foods and want to make these meals in a jar, any glass jar with a tight fitting lid can suffice.
Thrift stores often have canning jars. In some places they are cheaper there than bought new; this is not true where I live, do it pays to know how much new costs in your area so you can figure if the price for used is good or not.
Craigslist or Facebook marketplace might also be a good place to look for jars. Local yard sales might be another good place. One can also search for canners in this same manner. Or, ask people you know if anyone cans and see if they will share the equipment and show you how, if you don’t know how.
Yes, there is a startup cost, and the cost of jars and lids have risen sharply over the last two years. However, if you take care of the canners and jars, they can be used for years, so the cost over time decreases.
I know the same argument can be made for buying a freeze dryer, although I suspect having to plunk down several thousand for a freeze dryer is more out of reach than a couple hundred for a canner, canning tools, and boxes of jars
I have seen canning supplies on Craigs List Free section. Garage sales often have canning jars. The thrift stores do have them but seem to always charge as much or more than new jars. When purchasing used jars, always run your finger around the top ring to check for chips or nicks that will affect the rubber seal. A couple of years ago, I purchased some nice new boxes of jars when harvest season was over and the store put half-price on them.
A freeze dryer is pricey but it was necessary for my family. One of the best delights that came out of that machine was thinly sliced tree ripened peaches. I have never tasted anything better!
It doesn’t have to be jars, either, for the dry ingredient meals. You can use mylar bags with OAs, as i’ve been doing since buying a book called Meals in a Jar several years ago. Works great. Also, for the short term (usually less than 6 months) you can use the FoodSaver and bags They do allow oxygen in eventually, though, which is why they are usually used for freezing foods to avoid freezer burn. But even they would be a hedge against inflation, and I’ve had them last more than 6 months on several items. The point is to seal your dry food away from heat, light, and oxygen, and the more you do so, the longer they will last.
Sandgroper: Are the jars glass capped or metal capped? If glass capped, be happy because we (US) pay twice as much for them. I can buy bail jars cheaper and we use a lot of them and on regular jars, harvest guard lids. In Arizona, drying is still the best bet. niio
A question. If you already have all the dried ingredients on hand, what’s the benefit to combining them now? If you left them separate and just had the recipes, then you could use them to make these meals, or something else if you wanted to. Specially if you had a garden which might give you some alternative fresh foods.
This article is helpful if you have freeze-dried foods and are wondering how to use them. The ones I’ve seen say that once the can is opened, the ingredients need to be used up in a year.
If I’m using FD foods only for emergency purposes, I’d copy these recipes and put them with the FD items. I’d also make them with fresh ingredients to see if my household liked them.
You can can meals in a jar with fresh foods. They won’t have the 25- year shelf life of FD foods, but they can keep several years without too much nutritional loss. Canning the ingredients separately can give more options when wanting to combine them. Canning tomatoes by themselves mean I can use them for stewed tomatoes, add to souos or stews, pour over meat, or cook down a bit for tomato sauce.
Canning different kinds of dried beans meanni can have them on the shelf and ready when I need them. I can flavor them as I like it add just a little salt and flavor more when I open the jar. Again, if I do them separately, they can combine with different items. Dehydrating cooked beans isn’t a whole lot of extra work. After cooking, you put them on the trays and let the dehydrator do its thing. You can do the same cook then dehydrate method for rice, bulghur, barely, and other grains and pulses. It won’t likely keep as long as the FD food, but I’ve eaten dried apple pieces that we’re five years old and still tasty.
The dehydrated items are lighter weight and store more compactly than FD foods. As with FD food, when it’s time to use the dehydrated foods, you’ll need water or another liquid. Storing these foods in mylar bags then placing the bags in say a clean 6-gallon metal trash can with a tight fitting lid would keep the foodstuffs from rodents and allow a person to carry them easily if evacuation were needed.
These are some good recipes.
I just purchased a small Freeze Dryer from Prep SOS website for under $2800. Harvest Right as that is all that is available for non commercial charges and sizes. (on sale!, With a kit including oxy absorbers and seal pouches) While that is a LOT of $$$, I feel it will pay for itself in 6 months or sooner.
I plan to FD meat. I did a search, and only found one source for organic freeze dried meat, and that was only chicken: $153. for ONE pound!!!!!
Other, non organic meat was about $80 per pound. It will freeze 4-7# at a time, saying *800+ pounds per year.
I feel at that price I can recoup my cost in just a few months, especially as I found a meat delivery service that has organically grown and processed meats (not certified). AND I can get SOME meats organically grown (certified) from the local grocer
FYI: The meat delivery is from Wild Pastures:
It is a relatively new business
I was purchasing meat from Butcher Box, but the only organic they carry is chicken, not beef or pork. The company is VERY nice, but I do prefer organic when I can get it.
This company, Wild Pastures, is ALL pasture raised and organically grown and processed. Beef, chicken and pork. They have beef bacon! It and regular bacon is sugar free also!
I do not remember who put this advice on here , Put thank you,
I had a friend give a bunch of rusty wrenches and they said Vineger take off rust,
Well it worked like a charm i thing faster then coke cola .
Thank you for that tip on this site,
It started working in a bout 10minunts and in a half hour they were looking like new,
Vary little wire bruching,
While it would be good to have a freeze drier, no, too costive. But, this is Arizona where the sun that fries our brains also dries our food. Dried food, and I don’t care how it’s dried, should still be frozen in case of insect pests. A few days will do it. Then can it or store in barrels with tight seals. If possible, soak and cook grain and legumes before drying. Raw, they tend to dry out and take forever to soak and cook. Corn is usually made into posole (aka grits) washed well, and ground and dried, or dried. But, it’s still frozen before and after because of insect pests (millers and weevils).
Leather Britches
Not for everyone, but,
A handful of dried green beans
pound of ham
carrots, potatoes, onion, black pepper, garlic
Soak beans overnight, then cook. add in all but the garlic and simmer. When done, add garlic.
This is a very old country favorite.
Chili, always roast peppers to bring out the sugar. Heat index is up to the cook, but I suggest roasting outdoors. Beans should be refried and served on the side. Beer is a good accompaniment.
Baked beans a la American Indian (sugar free)
1 slab beef (or meat of choice)
2 lbs pintos, soaked, washed, cooked. Drain the beans.
2 qt salsa
3-5 sweet red (fully ripe) peppers, cleaned
1/2-jar nopalitos (not the juice)
onion to taste
Spices to taste.
Mix onion and nopalitos in with beans. Put meat on beans, pour salsa over them, peppers go on skin up.
Roast at 200 till beef is done. Allow peppers to begin to blacken.
Remove peppers and beef, skin and mash peppers then add to beans
If making refried beans omit salsa and reserve some broth.
This recipe with salsa tastes like it has sugar and molasses in it. niio
Nice recipe, red!
After my food has been dehydrated, I don’t freeze it, but I do pasteurize it by putting the contents in my oven at the lowest temp (currently that’s 170°F) and keeping them in there 15-20 minutes, then allow to cool down before putting in containers. I do tend to condition the food, too, in case a few pieces aren’t as dry as the others.
I skipped conditioning once with sweet potatoes and got mold throught the jar 🙁
I grew up in central PA. My dad hunted & did his own butchering..and with our huge garden my mother canned. And she & dad canned Alot of the venison he harvested. There were 8 of us in the family. Mom NEVER used a Pressure Canner. Never heard of them till just last few years when i wanted to can again. I do realize Why pressure canners were invented – to shorten the energy use of waterbath canning something for 3 hrs. And supposedly kill botulism!
We NEVER had any issues. If it didnt seal – it was used/ cooked asap. If it didnt look or smell it was put in the compost or trash. But i dont ever remember bulging lids or funky looking contents.
Could you use a food sealer and put the dried ingredients in a “Seal a meal bag” instead of pressure cooking jars of food? I realize that I would not seal ingredients like stewed tomatoes and other liquid items. I am just talking about dried ingredients…is there a drawback to using air-tight bags?
I’d love to try the fajita casserole, however, it seems like a cup and a half of taco seasoning is an awful lot. Is that really correct or did you mean one and a half tablespoons or teaspoons?
Hi, I love the idea of your Fantastic Fajita Casserole and the recipe calls for 1½ C taco seasoning. Is that a mistake? Did you mean tablespoons? teaspoons?