I don’t know how many times I open my pantry, filled with all kinds of ingredients and a surplus of canned goods, and still have difficulty coming up with an idea for a meal.
I stock up on canned items when they are on sale, so I have a variety on hand at all times, along with home-canned items, rice, pastas, and even seasonings.
But, there are times that I simply just draw a blank. Nada. Nothing comes to mind and I just end up closing the doors, hoping that when I come back, an idea will jump out at me. That usually doesn’t work though.
Or, maybe it’s not so much about a mental block on what to make, but an issue of time. There are many times that I wish I could just open a bag and heat it up for a few minutes and have a meal.
That’s much easier to do with a freezer. But, what if you don’t have room in your freezer for a few of these ready-to-cook meals? Or, don’t have a freezer at all?
Meals in a bag are a great idea for everyone…from the super busy family to the prepper who needs meals for survival. There are a lot of recipes for beans and rice.
Related: How to Dry Can Beans and Rice for 20+ Years Shelf Life
But, I like a little variety…a little spice in my life, so to speak. Combining that thought with all the protein bowls you see on menus and advertised lately, I thought…why not turn that idea into a meal in a bag?
So in this article, I am going to provide a Sweet and Spicy Protein and Rice recipe that can be stored in a bag for long-term storage.
And, look for variation options at the end of the article.
Needed Supplies
For 1-2 servings:
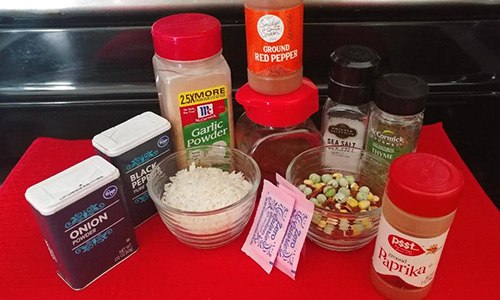 1-2 tablespoons of meat protein powder (see how to make that here)
- ½ cup rice
- 1 tablespoon sweet and spicy seasoning (see recipe below)
- ½ cup dehydrated veggies (I used a pack of peas, corn, tomato, and bell pepper)
Ingredients For The Sweet And Spicy Seasoning Blend
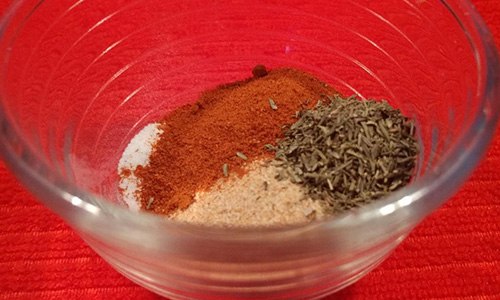 paprika (2.5 tablespoons)
- garlic powder (2 tablespoons)
- 1 tablespoon salt
- 1 tablespoon onion powder
- dried thyme (1 tablespoon)
- ground red pepper (1 tablespoon)
- one sugar or 3-4 sugar packs (you can omit this and add later if you prefer)
- one tablespoon black pepper
You could always use the spices of your choice, or a spice blend on hand that you like instead. The above mix is just a suggestion.
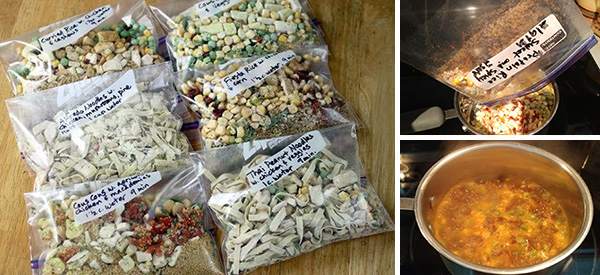
How To Create This Easy Meal In A Bag
There are a couple ways I would recommend the following process, depending on what type of rice you use. For example, if you use instant rice, all the ingredients can be mixed in one bag.
However, if you use a long-cooking rice, I would recommend separating the dehydrated veggies in a smaller bag within the bag, so they can be added later in the cooking process. Otherwise, they would be mush.
Related: Meal in a Bag: Hamburger Gravy and Mashed Potatoes
OK, let’s make the meal in a bag:
#1. Pour the rice into a sealable baggie.
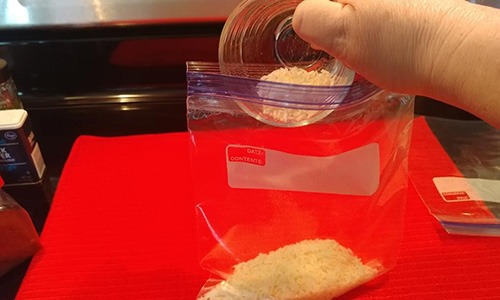 #2. Add the veggies.
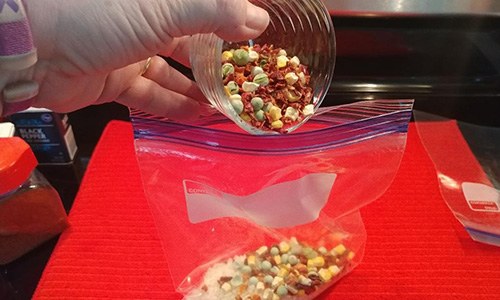 #3. Put 1-2 tablespoons of the meat powder into the baggie.
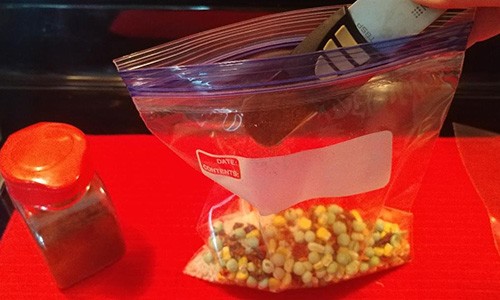 #4. Put 1 tablespoon of the spice mix into the baggie. You can add more, depending on how spicy you want it.
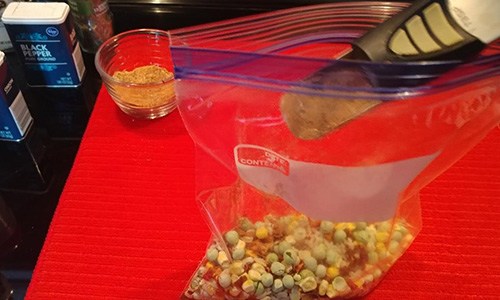
#5. Seal the baggie.
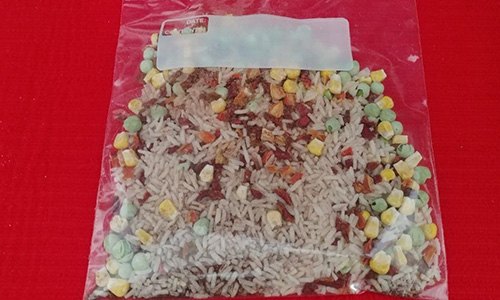 #6. Label the bag with the name of the meal and the date you put it together.
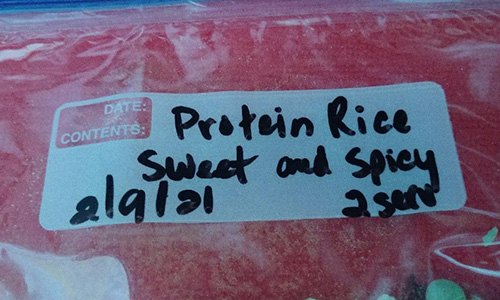 All the items in the bag have a shelf life of about 2 years, as long as they are not opened.
So, you can use a sealed baggie, rather than a food saver option. The only reason to consider using the food saver option would be to keep the seasonings fresher.
But in a sealed baggie, they will last at least several months, as long as it remains sealed until use.
Preparing the Meal
When you are ready to eat this meal, it’s very easy to make.
Pour the contents of the package into a pot (hold off with the veggies if you want, at this point).
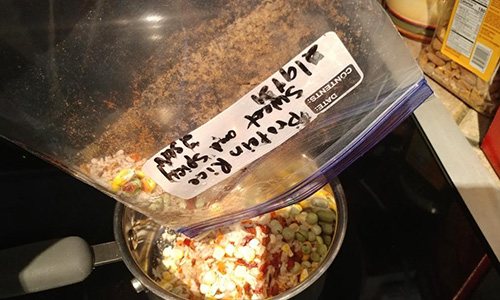 Add about 1 cup of water.
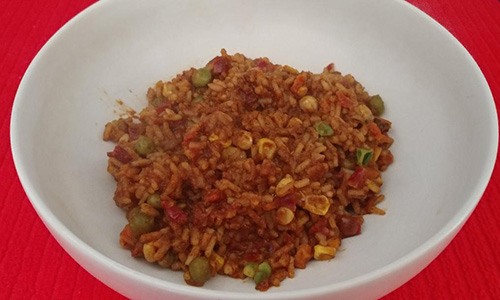
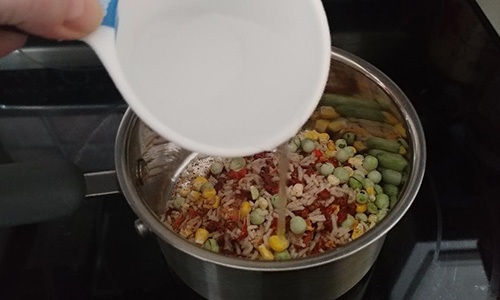 Bring to a boil and cook until the rice is tender.
 Enjoy your quick and tasty meal!
 Variations
If you would rather add fresh meat, instead of the meat powder, you can do 1 of 2 things:
- Add fresh cooked meat, such as tuna, chicken, or beef to the cooked rice meal and mix.
- Add fresh meat to the baggie, as long as it is in its own sealed bag, then place the finished meal bag in the freezer. If sealed properly, it should last in the freezer for up to a year.
You could also add texture and more flavor by adding peanuts and/or fresh veggies when serving. Do this by adding the veggies at the end of the cooking process, or top with peanuts just before eating.
This is a really simple meal in a bag to make, in both prepping the bag and making the meal. Obviously, you can omit or add ingredients to your own liking. For example, if you don’t like the seasoning, change it up. Or, if you prefer to add some fresh veggies from the garden, add those and adjust the cooking time accordingly.
But, having a few meals in a bag on hand will be of great benefit in multiple circumstances, whether it be you’re a busy household, or for when SHTF, they are handy to have around. Just make sure that they have a good shelf life, like the one in this article.
You may also like:
 Delicious Recipes Using Cattails – “The Supermarket of the Swamp”
What Happens When You Pour Sugar Into An Onion (Video)
10 Survival DIY Projects You Can Start on Your Property Right Now



Hello, interesting read. In the seasoning ingredients, you list “one sugar or 3-4 sugar packs”. Would that be one tsp sugar or one tbs sugar?
One of those paper sugar packs is about a teaspoon (tsP), and there are three teaspoons to a tablespoon (tbsp).
Ahhh…. when you said meal in a bag, I thought of ‘cake in a bag’, which a very old lady told me about. She said that in camps, when there was no oven, they would put a pot of boiling water on, make up a cake recipe, and then put it into cloth,(such as a dish cloth, drop into the boiling water. I tried it, and it was definitely good, it didn’t look all that great, but it was delicious. I used the vegan wacky cake recipe, not many ingredients: 1.5 cups flour, 1 cup sugar, 1 teaspoon baking SODA (not baking powder), add 1 cup water, 4 Tablespoons oil, 1 tablespoon vinegar. Beat with a spoon until smooth. That’s it.
How long do you boil the cake in a bag?
Cake in a bag is an alternative name for the traditional English boiled pudding. If you have access to vintage cookbooks (and there are a lot of them you can download free on Amazon Kindle) just check under pudding recipes. Filled dumplings are another vintage dessert that can be boiled or steamed.
Townsends, on youtube, does a video about boiled puddings. Townsends is a business that supplies the colonial reenactment folks. They also sponsor an 18th century style cooking and information channel on youtube. Very interesting topics besides cooking is presented. I have no affiliation with the company at all.
You never want to put food that is real dry in a plastic bag. Plastic allows moisture to penetrate throughit. If you want long term storage a glass jar with a metal lid and seal is the best and next is aluminum. You can purchase aluminum lined pouches at Walmart for $9.00 for 100 0f them. You heat seal the opening with a sealer you can purchase or you can use a regular iron (for clothes) and seal the bags. Moisture will penetrate any plastic no mattwer how thick it is. It is just a temperare and humidity and time for it to penetrate.
I can’t raise it, I do not want it. Amaranth is much better than rice, as is Indian rice grass, quinoa, and so on, and have flavor
An old-school sopa seca, dried soup, is drained of liquid (which are used elsewhere) and dehydrated. Refried beans, same. Chili, menudo, beef and barley, and others work very well with little change in taste.
Parched grain (dry roasted) is often sweeter and better than boiled. Do not overcook! Experiment with small batches. Unsold sweetcorn was always boiled, then parched-dry for a very good cornmeal. Roasted beans are often sweet, as well. Mesquite roasted becoming caramel-flavored. Honey locust (not black locust, which is toxic) pods, as well are sweeter. Grind for flour; it’s precooked. niio
Thank you. I appreciate these kind of offerings because it always gives me more ideas. And if you vacuum pack, especially in small mylar bags, I’d be willing to bet that you can get 15-20 years of shelf life out of these types of meals in a bag IF you choose your ingredients properly.
I remember reading about these premade meals and the explanation for separating ingredients was that if one part of the meal was on the shelf longer than you were comfortable with, you wouldn’t have to toss the entire thing and could just replace the questionable part.
would this also work with some beef jerky or pemmican instead of the powder?
I would imagine it would be ok to put beef jerky, or any jerky as long as it was dehydrated really well. Also, knowing how to identify Chicken of the Woods would be handy. Foraging is a great way to make a dehydrated meal have more protein and other essential vitamins and minerals. Earthworms could also be dried on a rock in the sun. Grind up to a powder and put in as a high protein addition for soup or energy bars.
Jessica: While I do not like eating earthworms, call it cultural, but I was taught how to prep them for eating. They have to be boiled to clean them. If not, you risk a lot of diseases and parasites. Dry them on a rock only if baiting birds. Hang them like jerky over a smoky fire and they’re tasty. Once smoked, they can be kept for several days. Warning: If on a survival test do not let the sergeant catch you! I earned the nickname sneaky half-breed, and my boys after me. 🙂
Maybe take advantage of the 17year cicada coming out this year. I’ve seen a couple of articles online that claim they’re good to eat. Certain types of grasshoppers/locusts are edible too, if properly prepared.
I haven’t tried bugs yet, but it’s nice to have the information, and it’s on my bucket list.
Miz Kitty, how do? I hope all is well up there near the North Pole. No need to send a box of toys this winter, but the barbecued reindeer was good. Next time you climb on the roof with the deer rifle, please remember LEAVE THE JAR IN YOUR ROOM.
No cicadae here, but we have something even more plentiful, mosquitoes. In spite of the drought, we have them. A neighbor up the road decided he wanted his lawn to grow green, and is watering it. A lot of skeeters can lay eggs in mud that will hatch only if it rains–or someone irrigates. The wrigglers can dry out and revive once that lad is soaked. I should put up a chicken light, a light with a cloth sack under it and a small fan that drives the bugs into the bag. If nothing else, the bugs are high-nitrogen fertilizer.
And, remember your arthritis meds. Cold, damp winter air is bad for you, let alone the kick from the shogun. Good thing you had such deep snows the other year. niio!
Red:
Yep, gotta keep the jar of antifreeze handy while in the deer blind, but Santa was surely appreciating the change from milk and cookies. A spot of “sweetener” in his coffee, and a fried spam and egg sandwich and he was good to go. (Santa’s a prepper too, doncha know?) Didn’t have any magic feed corn for Rudolph and company, but found a bag of BBQ corn nuts. They liked them, but Santa e-mailed me later to say that the reindeer all had gas as a result and he had to bail out over Guam. Took the deer til Inchon to realize the old guy was missing.
I worked at a resort several years ago, and one of the grounds keepers demonstrated the edibility of worms to her team by digging up several, brushing off the dirt and chowing down. Those college boys surely were grossed out!
But pointing out that they carry parasites is important – so do other bugs like crickets, grasshoppers, locusts, etc. Knowing how to properly prepare ANY foods to make sure they are safe to eat is essential to survival.
Miz Kitty: From West Texas to the Rio Colorado and points south, Santa rides a horse. He gets a Mexican shot glass of tequila (think small water glass) and the horse a gallon of beer with a side of corn shucks. If in the event Mary and Joseph come to your house begging shelter, you need to give all the carolers and the donkey she rides a little beer. Arizona nightingales (donkeys) like to sing, too.
Red:
Like the song says, “Whiskey (or tequila) for my men, and beer for our horses.”?
Miz Kitty, and I never met a horse that would turn down a beer. 🙂 niio