This post was gladly contributed by Practical Primitive.
The oil extracted from birch bark can be produced easily and in quantity, and in my opinion it makes a superior product to traditional pine pitch.
Good survival is all about metabolic efficiency (expending your calories wisely), and considering the ease with which it can be collected and processed, Birch Tar is ideal!
Here is the procedure for extracting this wondrous sticky substance that can, in addition to the traditional bonding agent, be used for fuel, medicine, waterproofing, leather treatment and wood preservation.
Step-by-step Instructions for Making Birch Tar:
Step 1
Obtain two empty metal cans, one that has a tight-fitting lid. Paint cans work great for this, but pay attention, since a lot of paint now comes in plastic cans. It’s best if the two cans are close to the same diameter, since the concept is to create an oxygen-free environment in which to heat the bark. Of the two, the one without the lid may be of a smaller diameter.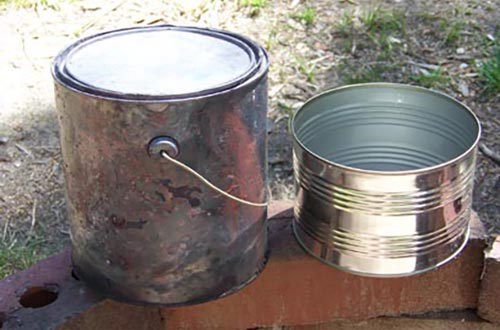
Step 2
Punch a hole in the center of the bottom of the can that has a lid. (The easiest way to make your hole is with a hammer and nail.) A hole about 3/8″ in diameter is good. This will be your “condensing” can.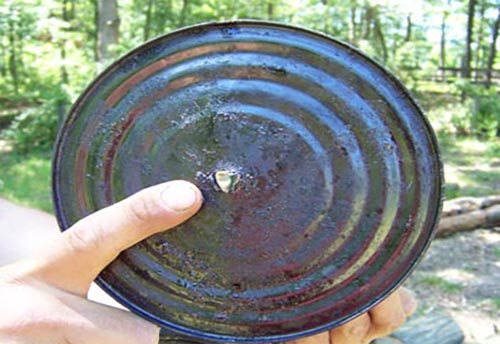
Step 3
Cut your birch bark so that when it is standing on edge it is a little shorter than the height of your condensing can. Roll up the strips all together and stand them on edge in the can — be sure you don’t cover up the hole you punched in the bottom! (In the photos we used six strips of bark that were 6 inches high and 18 inches long.) Once all the bark is inside, place the lid on the can and close it up firmly.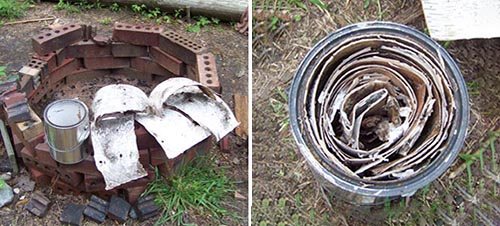
Step 4
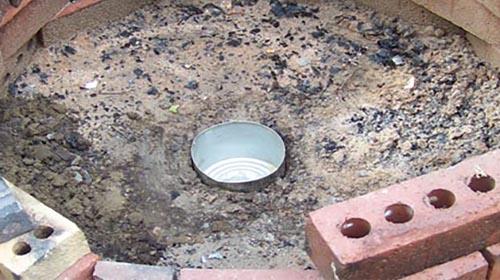
In the center of your fire pit dig a hole deep enough that your second can (the “collecting” can) will sit with it’s rim at or below ground level. (We used an economy-sized tuna can in the photos.)
 Related: 10 Trees Every Survivalist Should Know and Why
Step 5
Place your collecting can in the hole, making sure that it sits stable and level. Be careful not to get any dirt inside! Now place the condensing can so that it sits directly on top of the collecting can. There should be NO air gaps — remember, we’re working for an oxygen-free environment.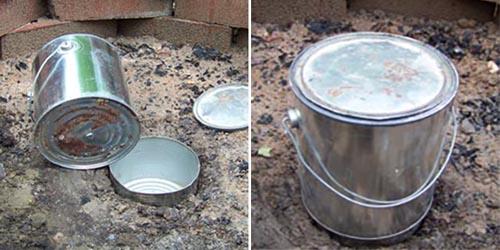
Step 6
Use soil to carefully create a light seal around where the two cans come together. Not so tight as to seal in the gasses, but enough to keep the two cans in place so that you don’t knock the condensing can off of it’s perch, or get any dirt into the collecting can. The collecting can should be completely covered at this point. (Don’t pack down the dirt. Too tight a seal may cause the expanding gasses to blow the lid off your condensing can!)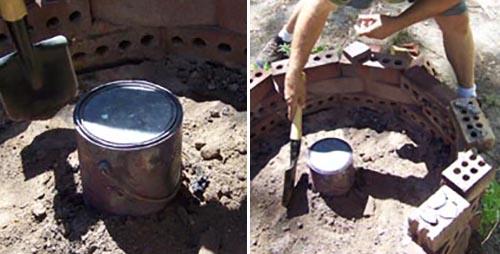
Step 7
Start a fire over and around the condensing can and keep it burning. It does not have to be a huge fire, but should surround the can well on all sides. The condensing can will glow red (just like when you’re firing pottery) and you will probably hear the tar start to run once the can reaches a high enough temperature. If not, just keep the fire burning for an hour or two.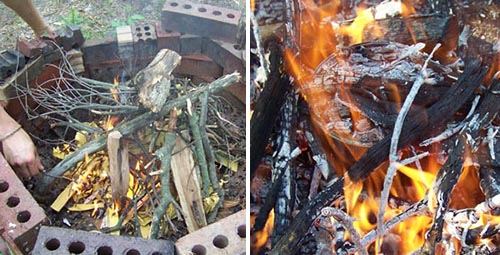
Step 8
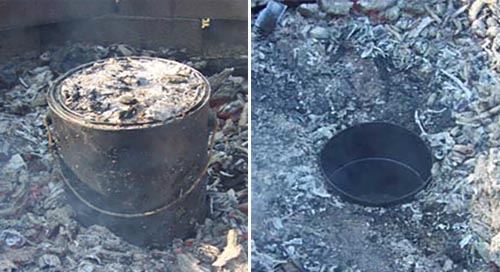
Allow the fire to burn down, then once it has cooled, carefully scrape away the ashes and soil from around the two cans, being mindful not to allow dirt or ash to fall into your new tar.
 Related: Do You Recognize this Tree? [All Parts are Edible]
Step 9
Then, using tongs or welding gloves, remove the condensing can, and look at all of that beautiful birch tar that has collected in the bottom can! After the condensing can has had a chance to cool, carefully remove the lid to see how little is left of your original birch bark strips.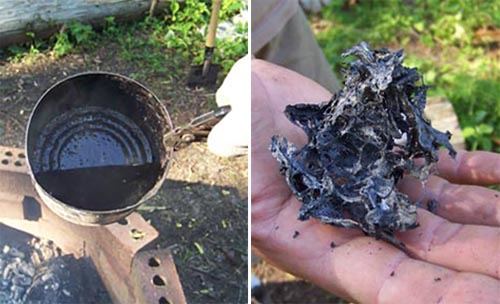
Step 10
In it’s “straight-from-the-fire” state the oil can be used for waterproofing, wood treatment, and medicine. With a bit of further refinement you can easily create fuel, other medicines, and bonding agents.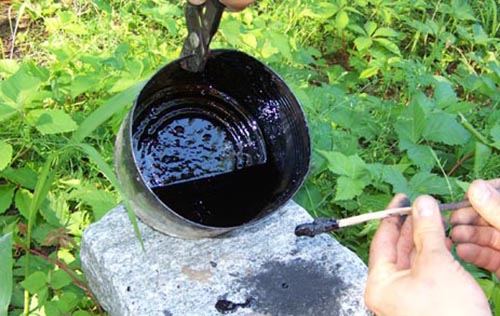
Step 11
To thicken the oil into something more pitch-like you simply need to simmer off the volatile (flammable) substances. Slowly simmer the oil over a low heat for about an hour or so until it becomes quite gooey, and is about half the original volume. When the tar will firm to your desired consistency remove it from the heat and allow it to cool. This material can now be stored and used just like pitch. (Stirring the oil occasionally during the refining process will cause foam to rise and will hasten the process, but be careful not to allow it to boil over or flame up.)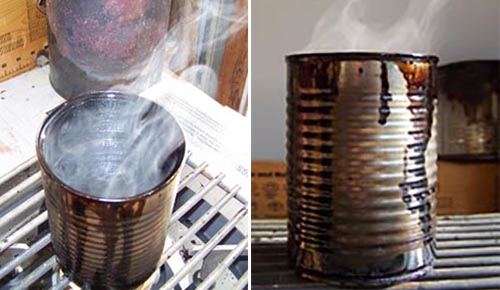
Next time you see a downed birch be sure to snag some bark and give this one a try. Easy to make and lots of bang for your buck, it smells better than pitch too! So Distill Away, and Have fun!
This post was gladly contributed by Practical Primitive.
You may also like:
 Trees That Can Be Tapped For Sap And Syrup
H2O Dynamo – The Awesome DIY Device That Turns Air Into Fresh Water! (Video)


Looks messy, I love it
misleading article in that it explains (and very well) how to make pitch, but not how to refine it into a fuel–except that pitch/tar is flammable, as well as the oil. how is it rendered in to a usable (and reasonably safe) fuel and how long can if be kept/stored before it evaporates?
This guy don’t know he just said that to get our attention an read the other bullshit he wrote
medicine for what?
I think it is aspirin. I would need further research.
I’ve not yet tried this but I will. One interesting side thought will be to test the carbon residue from the bark to see if it can be used to help start a fire. If my thought is correct, using a spark from flint and steel or old lighter, the activated carbon should readily start to burn slowly. If it does burn gather some dry tinder around it an blow gently to start a fire
So how do you make fuel? Very miss leading. Maybe you can do better next time .
I suggest careful use of a waterproofing substance that is also a very good fuel…oh wait that’s oil..
Ok oil is ok so how do you refine it to make fuel ?
This story is missing a lot of info, make part 2 please.
I expect that the oil will burn quite readily as it is.
I expect that the oil could be refined by distilling it but be careful.
Seems like a lot of time-consuming work for a minuscule amount of product. The source is “The Practical Prepper.”
This whole procedure doesn’t seem very practical to me. I would rather read a book on plant foraging which I think has a lot more practical application than a teaspoon of birch tar after two or more hours of work.
If you want a fire starter, let me describe the fire starters I made. I cut a 3/4 strip from a signature of a newspaper. A signature is one folded section. The newspaper I used is 23 inches high, unfolded. The signature was four sheets. You can use as many sheets as you can comfortably cut with a pair of scissors or hand paper cutter. I chose 3/4 inch because it was a handy size. Roll the strip into a tight circle. Put a rubber band around the circle of newspaper to keep it together. Put it in enough water to cover the paper. Come back the next day and take it out. Let dry. Come back a couple of days later. Take the rubber band off. Put the dried circle in a jar with a lid and cover the circle with any kind of vegetable oil you have. You are done. Total time involved including cutting the paper, about 15 minutes.
Now you have a fire starter. To light your fire, take length of the paper, about a foot or so. put it under your kindling and apply a lit match to the oil soaked paper. Voila!
A lot less work than what was outlined above and you have enough fire starters for quite a few fires. You will get a feel for how much oil soaked newspaper you need to start your fire.
So why not just soak the newspaper in the oil and forget the intermediate step you ask. Well, by soaking the paper in water and drying it in the rolled up condition, it maintains that shape and is more compact to store than if you just soak newspaper in the oil and let it go. Even if you rubber band the roll of newsprint before dropping it in the oil, the roll won’t stay together. The water soaking forms the roll and by doing in the rolled form, maintains its shape even in the oil.
When I am looking at procedures for survival, I try to find the easiest, least work possible to achieve the end result. I don’t want complicated, time-consuming, manufactured products intensive processes. You don’t have to use newsprint. Any kind of paper will do. Old rags will do. I suppose I could drop long, thin slivers of wood in the oil to make fire starters. I haven’t tried that yet.
Did similar in Boy Scouts. Only tied with cotton string and dipped in paraffin. Burns quite a while so as to dry out went wood and get a fire started. Works really well.
When reading some of these comments notice one thing missing! When in SHTF situation one tries to do several things while not doing just one thing at a time.
|i.e. you have a cooking fire or a heating fire and while having this fire you can be cooking this.
How long does it take to gather the bark? Put it into a can put it on the fire and go about your business. You need to gather firewood for heating or eating, good time to do it! Sew something you have a hole in it! Oh so many other things that could be going on while cooking up this concoction.
Now where did the Indians get the tar to patch their canoes of other type of boats?
How did they make their glues for their arrows?
of other type of boats?
How did they make their glues for their arrows?
This process is almost no different than making glue, tar for boats, or charcoal or a gasifier. Have you stated these are a waste of time?
This may not be on the important list of to do now, but it should be on a list of possibilities for the future. Like when cotton balls and Vaseline run out.
Why is it so important to have steel and flint but there is so many lighters and matches around? Doesn’t flint and steel go into the category of a waste of time?
Excellent article. I love it! niio