You’re ready to survive an EMP attack. Your well-stocked backyard root cellar is designed to double as a bunker if there’s a nuclear war, and the food stored in it will keep you and your family going through the winter following a total crop failure. You’re armed and ready to defend your property if society collapses, and probably have enough firepower to fend off a zombie apocalypse.
But you’ll still be stumbling around in the dark if the power goes off.
It’s surprisingly easy to be prepared for the worst that could happen, but be caught out by the merely annoying. A sudden power blackout isn’t much compared to the world as we know it ending in a hail of nuclear weapons, but it happens a lot more often and it’s still a problem that needs to be dealt with.
A lot of preppers have their own generators they can use if the grid goes down, but even they might need some light to work by while they get the generator going and switch over the power. If you don’t have a generator yet, you need light sources you can rely on until the power comes back. Otherwise you’re back in the Middle Ages, unable to do anything much between dusk and dawn.
The Proper Box
The best solution to this problem is to keep a black out kit ready. That way, if the power goes down, you know exactly where to find all the emergency lighting you need. Most of the stuff in it is probably gear you have already, but having it in one place is a lot easier than rummaging around for a flashlight in the dark. A black out kit is also easy to pick up and take with you, so if you have to be away from home for a few days you can just take it with you.
A good black out kit needs to be in a container that’s easy to pick up and take with you, and lets you access all the contents without having to rummage around in the dark. A toolbox is ideal. Get a keyring with a betalight and fasten it to the handle with a small karabiner. Betalights contain radioactive tritium gas and will glow constantly for 10-15 years, and having one on your black out kit serves two functions. First, you can see it in the dark to help you find the box easily. Second, once you have it you can unclip the betalight and use it to illuminate the kit as you start grabbing what you need.
Finding your way around
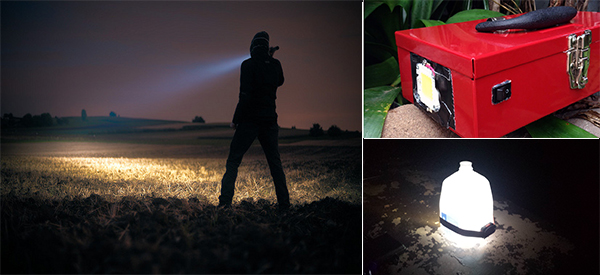
Now you have your box and a way to find it. The first thing that should go in there is a good flashlight. Go for something big and powerful, so you can provide maximum illumination quickly. A Mag-Lite is good; my personal favorite is the Mag-Lite LED flashlight in the two D-Cell size. This light is very bright and pretty much indestructible. Its LED lamp also gives it great battery life and means you don’t have to worry about bulbs popping. Another benefit is that it’s slim enough to fit in the top tray of most toolboxes, so it’s to hand as soon as you open the box. If you can fit clamps on top of the box and mount the flashlight in those, that’s even better – you’ll be able to see it in the betalight’s glow and put your hand straight on it.
The other thing to put in the top tray is a head lamp. The big advantage of these is that they leave you with both hands free, which is great news when you’re trying to set up the rest of your emergency lighting.
Related: How To Make Survival Lamps With Used Cooking Oil and Mason Jars
Next, pick up some more LED flashlights. They don’t have to be the same quality as the big one; they’re so you can hand everyone in the family an adequate flashlight and have a couple of spares in case anything happens to the main one. Look in places like Home Depot, which often have multi-packs of LED flashlights with batteries included for under $15, or on Amazon. The cost of these can work out at under $2 per light, and they’re easily bright enough for finding your way around the house.
Light some lanterns
Getting around with a flashlight is OK, but if you have any work to do – and life doesn’t stop just because the power’s out – it’s going to become a pain pretty quickly. You’ll soon get tired of either working with one hand or trying to prop up a flashlight to illuminate what you’re doing.
LED technology hasn’t just been applied to flashlights; there are some great LED camping lanterns too. Look for multipacks of collapsible mini ones; these run on three or four AA cells and collapse to smaller than the size of a soda can, but a couple of them will illuminate the average room. Most also double as flashlights, and you can get a four-pack for under $25. You can easily fit ten or a dozen inside a good-sized toolbox.
As well as the lanterns put in a bag of tealight candles and a box of matches. Open flames have their dangers, especially if there are kids in the house, but tealights are cheap and give some extra illumination if it’s needed.
Finally, add some Cyalume light sticks. The long-life ones aren’t very bright, but they’re great for marking risky areas like stairs.
Related: 5 Ways to Make Survival Candles From Household Items
Keeping it working
If you’re using a lot of flashlights and LED lanterns, you’ll need spare batteries. LED lamps give good battery life but it isn’t infinite, so batteries will have to be replaced. Unfortunately, in a blackout, rechargeables aren’t an option, so stick with good-quality alkaline batteries. Put in a good supply of every size the items in your kit use. The fewer sizes you use the better; if all you need is D and AA cells, that’s perfect.
There are some other things you can add, depending on your own circumstances. A battery-powered radio is a good idea, as it will let you stay informed about news and weather; if a storm caused the blackout you’ll definitely want to know what the weather’s doing next. Handheld radios are also handy if you have a big property and want to stay in touch with home while the cell towers are dead.
If your emergency power plan is to run a cable in from an external generator, you can replace most of the LED lanterns with extension cables and power strips. Then you have all the kit you need to start plugging things into the generator.
Like any kit, a blackout kit needs to be properly maintained. Check it regularly, at least every three months, to make sure everything works and no batteries are leaking anywhere. While you check it re-evaluate the contents. Do you need everything that’s in there? Is anything else you need missing?
Obviously you need to store your black out kit somewhere it can be easily found in complete darkness. A shelf at the back of a closet is not where you want it to be. Instead, tuck it in a corner in a part of the house you can easily find in the dark. As soon as you have line of sight on the kit the betalight will guide you to it, and that’s you ready to bring some light back into your life.
You may also like:
How To Make 30 Hours Survival Candles with Soy Wax
US Nuclear Target Map. Do You Live in The Danger Zone? (video)
Turn a Car Battery Into an Emergency Power Source For the Home


good article Fergus