The pioneers taught us much about what we know when it comes to campfire cooking and cast iron cookware. They cooked most every meal in these types of skillets and Dutch ovens.
It was also very important that they cared for these items because the Walmart was not a short car drive away. Amazon did not deliver to the homestead in the 1800s.
It is not uncommon to find some old cast iron cookware in at yard sales or flea markets, but most of the time it is rusted or crusted with the use and storage. Some pieces of cast iron cookware can be very disheveled looking, and you might wonder who would ever buy something so beat up?
Well, if you know how to restore cast iron cookware you can wind up with an entire inventory of high quality, durable, cookware that was nearly someone else’s trash!
Benefits of Cast Iron Cookware
Modern cookware is pretty bad. Its cheaply made, like most things, and you can get about 3 years out of it, at best! Cast iron is incredibly durable and is made to take a beating both physically and from the heat of an open fire.
Cast iron is also much safer to cook on because modern cookware is designed to assure that foods don’t stick rather than other factors.
So, chemicals like Teflon and other cheap metals are used to create the pans that you feed your family with each day.
You will also absorb some of that iron from cooking in the cast iron pan which can be great for your overall health.
Related: The Lost Art of Scratch Cooking
Restoring Cast Iron Cookware
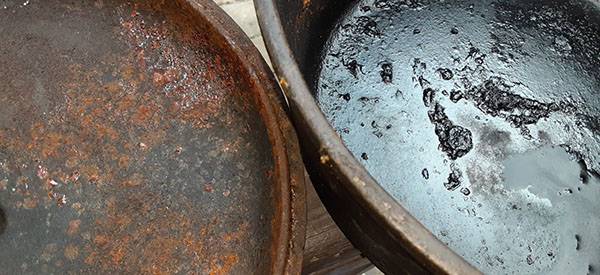
There are several steps in restoring cast iron cookware. Depending on how bad off it is, you might be able to skip some steps or spend less time on them. I have seen varying degrees of cast iron cookware. Some so rusted and crusted with debris that it’s hard to tell what they should look like?
Others are just a little rusted and that can be worked off pretty easily. Let’s look at the steps:
Assess
Before you begin anything, you are going to want to assess the condition of your piece before you begin step one. This will be a time to decide what tools you might need. At the very least I would have the following tools for this job.
- Wire Brush or Dremel
- Towel
- Oil
- Coarse Sea Salt
Cleaning Debris
#1. This is likely to be your most involved step. The worse off the piece the more weapons I bring to the fight. If I am going to restore multiple pieces of cast iron cookware that are in pretty bad shape, I will first place them in the oven and run them on a full oven cleaning cycle.
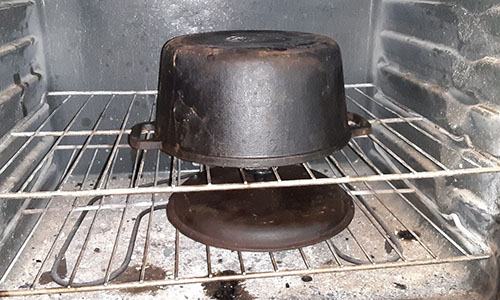 Never hurts to run the old oven cleaning cycle, right! Your oven probably needs it anyway.
After the cycle is complete, I will let the cookware cool down before starting to get at it with elbow grease. If there are still thick layers of stuck on debris and rust, you may need to employ the help of a Dremel or a wire brush. You could also use a wooden spatula to knock off a good amount of the buildup.
If you are dealing with light rust, then you can simply pour some salt and oil into the ban and scour it with a dry rag.
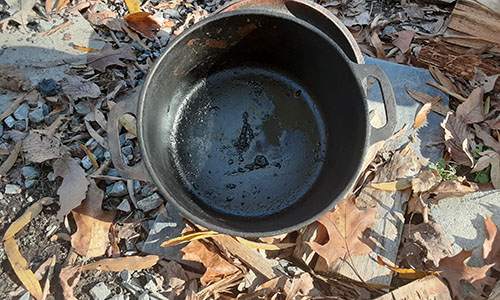 In fact, if you had no power or no access to power tools you would eventually wear anything down with this method, as long as the cookware is warm.
Warm Salt and Oil
#2. Once I am through with the initial debris removal, I like to move to another round of oil and coarse sea salt. This time I am going to look to “polish” the edges and really get this cast iron looking good. Some people say they use sandpaper, but I just count on the salt.
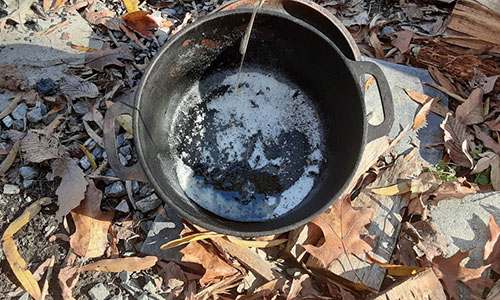 Be sure the pan, salt and oil are warm, and it will make all the difference. Work the inside of the pan the edges, the bottom, and the sides. They all need the love.
Seasoning
#3. Wipe the pan out with a dry rag and remove all the salt.
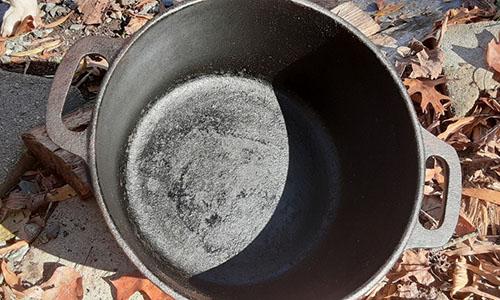 You are now going to reseason your pan. After all this work the pan needs a good seasoning. Preheat the oven to 450 degrees.
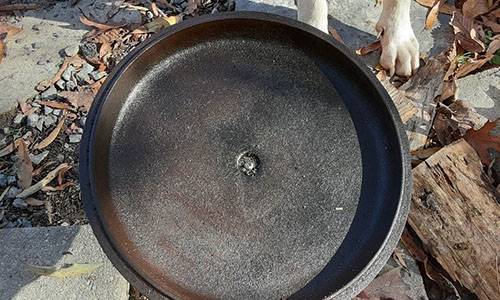 Using corn or vegetable oil you simply coat the entire piece of cookware in oil. Both sides. Buff it a bit with a dry rag as you do not want the oil dripping off the cast iron and onto the bottom of the oven or that will start a fire.
Place a sheet pan on the lower rack of your oven and place the pan, mouth side down, and bake it for 30 minutes. Repeat this process a few times until the pan has taken in all that good oil.
Storing and Use
#4. The most important part of this process is to use the pan regularly. Its easy to spend all that time and effort on making the pan look good and store it in a drawer till it looks rusty again. The key to storing cast iron properly is to not store it too long! This is high quality cookware that you should use each day or at least each week.
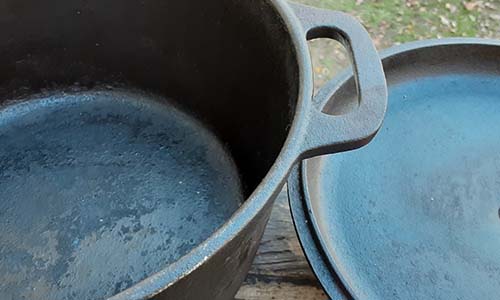 The more you use it the better seasoned it becomes.
If I know I am going to store a piece for a long time, like my cast iron wok. I will just reoil before long storage. We don’t always break out the wok here so it can go away for a month or so at a time. The coating of fresh oil keeps the rust at bay and also keeps the pan seasoned.
Related: 10 Advantages Of Using Cast Iron Cookware When SHTF
There is really no substitute to the durability and capability of cast iron cookware. Teflon coated pans are dangerous and often thin bottomed which is just a nightmare in the kitchen. Expensive cookware is beautiful and polished but would be ruined over an open flame.
Cast iron cookware can get the job done over a conventional range or a campfire. It really doesn’t matter. For preppers, survivalists, and campers there is no better set to have on hand.
You can often save lots of money if you know how to restore cast iron cookware. Flea markets and yard sales are full of pieces that people have long given up on and assume are little more than fodder for a few bucks or could be used as decorative pieces at best.
You may also like:
 18 Vintage Homesteading Tools to Search for at Garage Sales
10+ Survival Skills That Our Grandparents Knew (Video)



Thank you for the article on how to clean cast iron, now I will look for it at every garage sale until we have what we need! Wonderful!
Never, ever use a Dremel.
My brother cleaned garages, my father used a dremel, since he was picky about clean. Then mother would season the inside. I’m using those skillets 20+ years after they were rescued. Great stuff.
Thanks for your tips. Have a few pieces from my in laws and remember some restoring steps from them.
Well said! Our main skillet is 40+ years old and gets used multiple times a week.
Both my wife and i have won prizes for our cooking in Dutch Ovens (mine is iron hers is aluminum which she says is better of the two for baking)…
your cleanning procedure is reall pretty much SPOT ON…
If you don’t want to scrub it or it’s rusted really bad, and/or you don’t have time right then, you can get ahead start by soaking them in vinegar. It’ll eat the rust away. I put mine in an old cooler, it takes awhile, but then I’m in no hurry. Also the rust foams up on the top of the vinegar and you just skim it off and through it away.
If my cast iron pots and pans are rusty I’ll use a wire brush and then boil them out with hot water.
I would never use salt in them.
After cooking, I clean them with boiling hot water and if some food sticks, I’ll let it soak in hot water and use a wooden spoon or a plastic putty knife to scrape with so I don’t destroy the coating.
After cleaning I put the pot or pan back into the oven and turn the heat on so it can dry out then I oil them again.
I like to use a rotary wire brush and my cordless drill to remove all the rust and grime. A lot of used cast iron is coated with a brunt on mess. It removes easily with the wire brush leaving the real patina in the metal. Always re-oil after cleaning.
I did the Lye process to get some old nasty food off the iron. Then I used vinegar to get any rust off. Then Immediately put oil on them and then seasoned. They were like new.
Is sand blasting too rough? How about blasting with soda or ground walnut shells?
Old decrepit cast iron usually looks so bad because of cooked on burned on grease, inside and out. I have a large wood furnace for winter heat and any cast cookware looking nasty gets the following treatment. Wait until the furnace has a deep bed of glowing coals and I have a tub of wood ashes beside it. Bury the ironware in the coals for about a half hour. Then fish it out with the fire poker, in dim light it will be glowing a dull red, carefully bury it in the ash tub and leave a couple hours to slowly cool. when you remove it and dust off the ashes it will look like it just came from the store. Reseason with oil and enjoy your new cookware.
The intence heat along with the reducing atmosphere of the charcoal fire removes all rust and burned on deposits.
A whole lot easier than all that scrubbing.
that’s how I do mine just on a fire outside.
If you have a dishwasher with a sanitize setting that is another step to take to remove debris and built up gunk. You can sand blast or use a grinder, a cast iron is cast iron all the way through, but you might need to polish after a wire brush or grinder. Impatient gringos have been known to use a grinder to break in molcajetes, too.
Some people polish with oil, sea salt, and potato peels over high heat. This and all seasoning activities are best performed over a camp stove out of doors, it gets pretty stinky.
Carbon steel restaurant pans are getting popular, too, like the Matfer Black pans, you treat them just like cast iron but they are a bit lighter and stick less, and better quality than a Lodgestone pan, which is to say heat is more evenly distributed across the bottom and sides.
Cornbread cooked in an old cast iron skillet, yum.
I found a skillet at a yard sale that was really cheap. It had a really rough surface inside. Almost impossible to use a spatula in because it was so rough. I used a “flap wheel” on my grinder to take a lot of the rough texture out of it.
Did I ruin this cast iron pan ??
Joe: Is the bottom smooth? Than no. If it was a Lodge, they give the inside several coatings of canola oil and burn it on so it’s non-stick. It wears off after a while. niio
I have a hand me down cast iron skillet that has a very worn and cracked enamel coating on the outside only. Can I still use the cleaning setting on my over to clean it?
If it didn’t have a Wagner or Erie or Griswold logo (or any of the other collectables) … probably not. I’ve used a flap disk to turn some newer lodge skillets into usable non stick, slick pans.
Farmer: I can’t recall who but know there are still small foundries in coal country that was turning wheel hubs and such into cast iron cookware. I’m not a fan of FB, but the Marketplace has a lot of cast iron pans and sinks for sale. In AZ, eire was a popular choice, as was Griswald. Wagner, I saw a lot of that in Ohio (of course 🙂 and Colorado.
Are the cover crops greening up yet? this is our major growing season. Schifferstadt radishes, cereal rye, and peas in bloom right now. In 2 months, the sun and wind will burn most down but it’ll set seed. Man, those radishes are getting spicy now, and wild pigs avoid them–aka Germany horseradish. 🙂
niio
No you did not. All you did was get down to good surface. Now use salt and oil on the pan warmed up to clean then just wipe a coat of oil over it and bake at 350 for an hr. Then start coking with it. The old food build up is where a lot of the seasoning that people like comes from. I have an old cast iron skillet that I do not clean except when I forget and rust starts on it. It has been over 2 months since I cleaned it. LOL What I do is after using it to cook something I just wipe it out while it is hot. Then let it cool and put it up. When I cook in it next time I just put a coat of veg oil on it. preheat it to 350 then cook what ever. Preheating it kills all the germs if you are worried about that.
Good recipe for corn bread is this:
1 1/2 cups of corn meal
3/4 stick of butter
1 egg fresh if you can get them
1 cup milk
Preheat cast iron skillet and while doing this throw that stick of butter in to melt, use butter in mix and add veg oil to pan about 1/8 inch covering in bottom. Then put a egg slightly beaten in with corn meal, butter and a little of the milk. Mix in milk until a batter that is not too thick so it will spread in the pan easily.
Once you have it mixed take a spoon and drop a little of the mix and see if it fries and browns fast. That tells you the pan is ready.
Just pour batter into pan and put on middle at 425 degrees. It will fry as you pour it in. let cook for about 5 minutes then check it if it is good and brown on bottom put it on top rack and turn oven on broil and finish browning top. Best darn bread you have ever had.
Your cast iron pand
I have a couple of pieces that date back to my grandmothers grandmother… precivil war. They still cook as good as new. I also have pieces I’ve reconditioned. I have an 8 quart pot I bought off of someone for $13 and a frying pan that was in an auction group of things I did want. Both need a light cleaning and reseasoned. I have no need to reseason the frying pan. For the 2 of us I don’t need it. Still I may hang it on the wall. I love the look of cast iron.
Definitely decorative. I collect cast iron, brass, copper, zinc when I can find that. We live in the desert and cast is the best way to get iron in the diet. Stay warm. did you get the heater running? niio
I have iron that belonged to the grandparents. Some went in storage, and grew rust. Best way, as southern pointed out, is bury it in hot coals for a while, then ashes. It always comes out looking new. When seasoned, no salt!, it’s non-stick and a joy to cook with.
Lodge is coated, which is why it’s bumpy. No need to scrape it off, it’ll wear off. It’s canola oil, I think, sprayed on when the iron is still smoking hot. niio
what about seasoning with flaxseed oil
I’ve used flaxseed oil w/HIGH success. Scrub the skillet in hot soapy water; rub well w/the flax oil; then into a 400o oven for an hour. BEAUTIFUL finish.
Please NEVER use a wire brush. You will get spots(shines) that won’t take a good season. Found that grape seed oil, olive oil, flaxseed are great. Also easy bezy stick does a great job. Love cast iron. 108 pieces and still collecting.
most preppers have alternative cooking for the outdoors – at least they better have >>>
a BBQ grill or even a firepit >> suggest you do that seasoning outdoors vs using your kitchen oven …
Well, I wasn’t going to comment on this article, but one can acquire a chainmail square cast iron scrubbing pad which is better than using a electrically driven wire brush.
If you are going to wire brush, use the old method, hand/arm power driven wire brush. That’s what the chainmail scrubber does. It requires hand/arm power and you run out of power before you damage the surface of the iron pan.
It’s why you don’t put your bore brush on a power drill to clean the bore of your one-of-a-kind, hand-made target rifle. I hope you don’t do that. Do you?
In fact you don’t do that even with the battlefield pick up Chinese SKS that you bought before 1986 for $49.95 plus $9.95.
I’d done a lot of these over the years and to add to this excellent article:
After step #2, get a can of yellow Easy-off spray and spray the heck out of the pan. Then wash in hot water. This will remove any old seasoning. Next you can follow the directions in the article, except IMO to season the cast iron, flaxseed oil is the best.
Just my 2¢
Thanks for the article and all the follow up comments. I picked up a huge baking dish at the local tip which someone had ditched and I’ve been using it for shell grit in the chook yard because I didn’t know how to clean it well enough for use in the house. It had layers peeling off the bottom of the pan, I thought it was rust but now I’m thinking it was baked on food residue.
Just had a look and that’s all gone from the base now, the hens have cleaned it up nice. Now I just need to find the girls another sturdy dish for their shell grit and get stuck into cleaning this. I hope it fits in my oven…
My favorite way to season a new or refurbished cast iron Dutch oven is to cut up a 1# package of cheap bacon, the only time I buy the fattiest package in the case. Spread it out inside the Dutch oven, put the lid on and put it in the fire pit or on a burner. One of the big propane burners works well. Let it cook for a good long time, until the bacon is beyond crispy and the fat is rendered out and has splattered all over the inside of the oven and lid. Turn off the heat and let it cool off gradually. When it is cool to the touch, throw out the bacon (sacrilege, I know, but what are you gonna do?) and, if needed, rinse and repeat. When it feels seasoned enough, wipe out with paper towels and put away or wrap in newspapers or waxed paper if it is going into long term storage, such as putting it away until next camping season or hunting trip.
Never wash with soap, but hot water and a good scouring with a stainless steel Choreboy scrubby pad is a good way to clean it if it has burned on residue. Before trying to scrub out the residue, pour in clean water and put it on the heat to boil for a few minutes, then let it soak for a few more. Be sure to get it clean before calling it a night, dry with cloth or paper towels, then put on low heat to dry completely. That shouldn’t take more than a minute or two. If it is new, let it cool, then rub some oil on the inside with paper towels or waxed paper and wipe off with a clean paper towel. Do not let it sit overnight with water in it. Do not leave it outside overnight where the dew can get it damp (Don’t ask me how I know this) or where it can get rained on. (Don’t ask me that one, either…) I like to use olive oil or peanut oil on it. I find that corn oil goes rancid too easily and too fast.
I had a blacksmith make a pair of steel trivets that fit inside the Dutch oven so I can layer two pie pans inside It keeps one elevated an inch off the bottom and the second one stacks on top for a second pie. I used to win “Camp bake-offs” at Rendezvous with my fruit pies baked in a Dutch oven in an open fire pit. My secret – a sploosh of Bourbon or Cream Sherry in the filling. Yum!
I’ve restored three dutch ovens, two kettles and about a half dozen frying pans. All were garage sale purchases and were crusty with built up baked on hard as diamonds crud. I tried hand powered wire brushs and steel scouring pads, but the result were disappointing. Next I tried a wire wheel on a drill motor and it worked well with this being the easiest method for removing the deeply layered crud. It does take some time depending on the pan size and how much crud has built up. Caution…do this outside and wear a mask along with eye protection. I also tried sand blasting and blew thru the crud and finish to the gray of the cast iron. Neither the wire wheel or the sand blasting caused any damage to the cast iron of those I personally worked on. Sesoning was with vegetable oil, but may switch to Flax Seed after reading this article.
RR: We just put them in a fire. That burns away years of neglect, even rust. When they cool, wash in hot soapy water, then dry well, add what seasoning you like and overheat them on the stove. niio
I thought linseed oil was also flaxseed oil.
“Linseed oil, also known as flaxseed oil or flax oil (in its edible form), is a colourless to yellowish oil obtained from the dried, ripened seeds of the flax plant (Linum usitatissimum). The oil is obtained by pressing, sometimes followed by solvent extraction. Linseed oil is a drying oil, meaning it can polymerize into a solid form. Owing to its polymer-forming properties, linseed oil can be used on its own or blended with combinations of other oils, resins or solvents as an impregnator, drying oil finish or varnish in wood finishing, as a pigment binder in oil paints, as a plasticizer and hardener in putty, and in the manufacture of linoleum. Linseed oil use has declined over the past several decades with increased availability of synthetic alkyd resins—which function similarly but resist yellowing.
“Linseed oil is an edible oil in demand as a dietary supplement, as a source of α-Linolenic acid, (an omega-3 fatty acid). In parts of Europe, it is traditionally eaten with potatoes and quark. It is regarded as a delicacy due to its hearty taste and ability to improve the bland flavour of quark.”
For the non-physicists, a quark is a subatomic particle. I will let it go at that. Quark is also an Old German word for soft curd cheese (cottage cheese???)
During boot camp we spent hours rubbing linseed oil into the stocks of our M-1s. Handrubbed (for endless hours) linseed oil walnut takes on a lustrous glow which makes a a fine stock finish for rifles. Actually the skin on the palms of your hands is a very fine abrasive and also helps polish the wood by “sanding” it while rubbing with linseed oil. Sure wish I had that old M-1 now. I had to leave it on Okinawa when I left. It was a Harrington & Richardson, now collector’s pieces with a beautiful hand-rubbed linseed oil finish on the stock and hand guards. It had been fired less than a thousand rounds when I turned it in. Probably got sent to Vietnam in the early days.
You could buy a pretty good new AR15 just for the value of the walnut stock and hand guards you were allowed to polish all those hours. I’m not much of a gun guy but I have looked at collectible Garands, my favorite rifle, sadly my shoulder pocket is full of loose change, bone chips, and degenerating cartilage and shooting larger calibers (bigger than Red Ryder) ain’t no fun.
This is a great article! Cast iron as strong as it is, needs the right TLC. I have printed this out and placed in a pot which will be passed on to the family. Thank you very much!
Just take a wire wheel to it or bench wheel if it’ll fit. 10 times faster and a lot less hassle. And easy to do while stoned!
Area: If I dared clean cast iron even with steel wool, I risked getting Mom’s broom broken over my head. That does sting, then she’d make buy a new broom LOL. Best thing is hot soapy water and scrub with a plastic pad. Then dry well, put it on the stove and burn it till it turns gray, or the best, build a fire outside and burn it clean. We always burned cast iron each spring and again in the fall. Wipe it out, then heat it up and heat a tablespoon of lard or tallow in it till it wants to burn. The pores open in the iron to absorb the grease. And we always had non-stick after that. niio
I’d get a 4″ medium soft wire wheel on an angle grinder going on it if it was so bad it needed it. A Dremel is too small a tool for that. Just clean the surface off and don’t keep at it as soon as you got the crud off. Without doubt steaks and burgers taste better on CI than to do other pans. I don’t care for the high maintenance CI presents myself, so I found mine a new home.
What Lodge does to their cast-iron is not seasoning…. it’s called ruining. The rough texture on Lodge as well as some other brands need to be removed and the pan seasoned properly.
Please, please, please, do NOT use Canola, corn or vegetable oils on your cast iron! Use lard or bacon fat, beef fat or tallow, or even butter (NOT margarine) to season it.
I only use bacon fat or beef fat or butter when I cook and when I season. Coconut oil would be acceptable as well. Corn and vegetable oils are so unhealthy for our bodies and will turn rancid fast.
After cooking, while the cast-iron is still warm, I wipe it out, or use a scrubby with only water and scrub bits out, then add the bacon fat to the already warm pan. I use my cast iron pretty much daily, and when I‘m ready to cook again, will add a bit of butter to the bacon fat already in it and cook.
So, basically I season it after every use.
I love cast iron, and have probably around 100 pieces. Unfortunately, I can’t pass up any cast iron when I shop thrift or antique stores!!! Some new, some old, and my favorites are 2 Wagners and a Griswold. Smooth as a baby’s bottom.
I have a couple that have nothing to indicate the brand, one of them looks as good as the Wagner or Griswold. Probably European made
That’s why I’m not fond of Lodge: I know they are USA made, but they are so rough; not properly made or whatever. I have never heard of Erie….
I can’t believe that not one political comment was made in all the replies to this post!
I cannot believe that not even one political comment was expressed in the replies to this post! Amazing.
Red Man, I’ll gladly fill the “political agenda” narrative:
“America First!”
“USA! USA! USA!”
How’s that for political?