Buying a gun and hitting the range once or twice a year is not good prepping discipline. A firearm is an important part of most preppers’ kits. But knowing how to use your gun quickly and accurately under stress, when it counts, is what matters most.
Practicing good marksmanship frequently – we mean on a weekly, even daily basis – is the only way to get confident behind the trigger. But we get it, ammo is expensive. And in times of civil unrest or outright disaster, every round counts. Finding time to go to the local range is never easy, either.
You need to train nonetheless. You can practice certain shooting drills without wasting ammo. In fact, there are plenty of drills you can practice that require no ammo at all. This article will show you how.
Related: Frugal Prepping: How to Get Cheap and Reliable Ammo For SHTF
Shooting Drills that Don’t Require Ammo
Warning: Practicing these drills effectively means dry-firing your weapon. You must ensure your weapon is free of live ammo. For dry-fire exercises, we strongly recommend using a snap cap in your gun. A snap cap is a fake rubber or plastic bullet with no primer or propellant. Dry-firing your weapon empty will damage it. A snap cap eliminates this risk.
#1. Trigger Squeeze Practice Drill
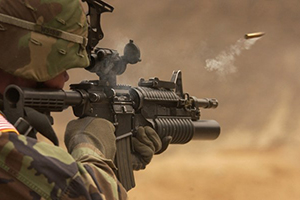 This is a shooting drill that sounds silly, but it’s incredibly effective at teaching consistent trigger squeeze and keeping a good sight picture through your shot. Even the U.S. Military uses it to teach new recruits trigger squeeze and sight picture without wasting rounds at the range.
First, grab a penny. Next, grab the pistol or rifle you want to practice with. This can be done prone, kneeling, or standing. We recommend practicing standing – it’s the most likely scenario you’ll find yourself in.
Make sure your weapon is empty. Load your snap cap.
With your weapon ready to dry-fire, place the penny atop the barrel, as close to the muzzle as possible. Assume a good shooting stance with your feet approximately the same width as your shoulders, facing your target.
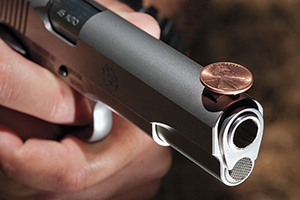
Aim, and grab a sight picture. Start practicing your trigger squeeze, working your way through the pull until it breaks and you fire. If you’re practicing good trigger squeeze and sight picture discipline, you should be able to break the trigger with your sights on target, without the penny falling off the barrel.
Trigger Squeeze Tips & Tricks
If the penny falls off the barrel, don’t get frustrated. It takes a lot of concentration, steady hands, and a perfect squeeze to keep the penny from falling. If you’re using a handgun with a flat slide and find this too easy, stack four or five pennies atop each other.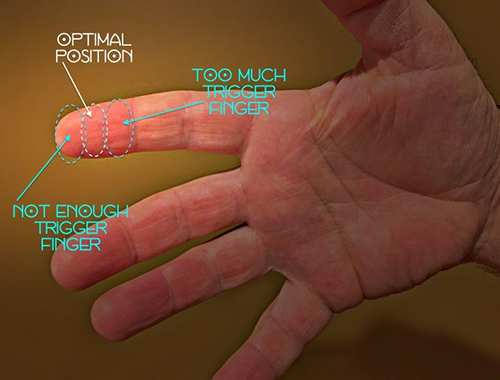 If you’re pulling your barrel to the left, then you’re probably doing one of these four things:
- You’re pushing into the gun, anticipating recoil;
- Your trigger finger isn’t on the trigger enough;
- You’re tightening all your fingers while squeezing;
- You’re jerking the trigger instead of smoothly pulling it.
And if your barrel’s falling to the right, you might be doing one of these things:
- You’re squeezing your thumb around the grip while pulling;
- You’re pulling the trigger with the joint of your finger;
- You’re tightening your entire grip while pulling;
- You’re heeling, or pulling away from the gun, anticipating recoil.
Keep in mind, these “symptoms” are reversed for left-handed shooters.
Related: Firearms for Emergency and SHTF Situations
#2. The Quick-Draw Drill
You can’t effectively dispatch a threat when the clock’s ticking, if you can’t get to your weapon quickly and safely. You need to practice and master a good quick-draw. Your attacker isn’t going to give you fair warning.
This drill can be performed with or without dry-firing. We strongly recommend following through with a dry-fire shot with each draw. This will help to work the entire process of defensive shooting into your muscles and bones. Trust us when we say this: if you ever must pull the trigger to defend yourself, you’ll be operating largely on instinct and muscle memory.
Again, make sure your weapon is empty. Load your snap cap.
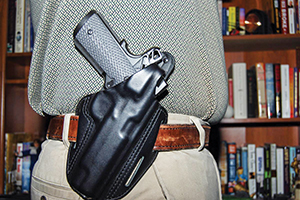 Now, it’s time to start practicing your draw. Don’t rush into this. Practice each step, first. The point is to first make sure your weapon and holster are set up correctly. If you don’t, you’ll be practicing poor marksmanship and reinforcing bad (possibly deadly) behaviors.
First, Check Your Holster Setup
Before quick-drawing, make sure your shooting arm and fingers can move quickly and naturally to the grip of your gun. How does the initial grab feel? Can you get at least three fingers around the grip and your palm on the back of the grip quickly? 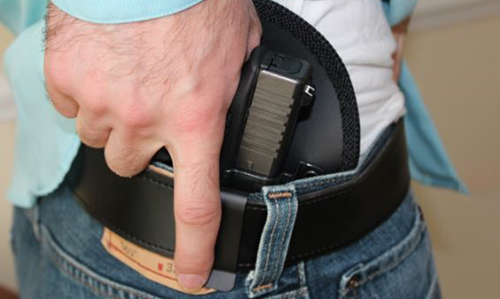
Can you keep your face, head, and shoulders toward your target while you draw? Or does your holster placement force you to bend weirdly? Are you rotating your upper body, wasting precious time?
You should be able to draw while facing your target and leaning forward just slightly, approaching a shooting stance as you draw. It’s all about holster position:
Tips for Holster Position
Most professional shooters carry at the 4 o’ clock position, or 6 o’ clock for lefties. We agree. We also recommend against keeping your holster at your side or in the small of your back. Both these positions require you to bend, and flex and twist your arm needlessly.
Quick-Draw Best Practices:
- The only part of your body that should be moving while you draw is your arms;
- Maintain a planted stance with your feet spread the same width as your shoulders;
- Your body should be squared up with your target. You shouldn’t be angled left or right;
- You should be rotating the muzzle toward the target as soon as it clears the holster;
- Practice grabbing a sight picture while you’re extending your arms outward to aim.
Just by practicing these two drills and following their best practices, you’ll be working toward cementing all the fundamentals of good marksmanship into your muscle memory. But this alone isn’t enough.
How to Conserve Ammo While Practice Shooting
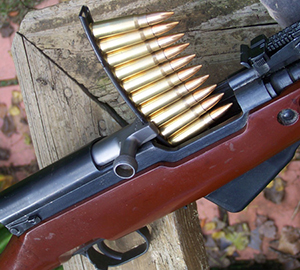 Even though we’re talking about conserving ammo, every good shooter needs to practice with live rounds. Again, muscle memory takes over when the time comes to defend yourself. Your body needs to be used to dealing with recoil, noise, and performing good marksmanship with live rounds.
There are a few simple best practices you can do to conserve ammo at the range and still get the most out of your training.
Zero Your Rifle for 109 Yards (100 Meters)
No matter what rifle you’re using, the 109-yard (100-meter) zero is the fastest, easiest, and most intuitive zero for rapid engagement of threats. It’s what the U.S. Military prefers for its rifles, and it’s what works well in the real world.
Can your rifle reach out and touch targets at 328, 437, even 765 yards? Perhaps. But you’re not facing any imminent threat or quick attack at these distances. In fact, military data across the globe says nearly all firefights happen at less than 200 yards. Most hunters take their shots at 160 yards or less. A “SHTF” situation involving your own firepower will certainly be no different.
Why the 109-Yard (100-Meter) Zero?
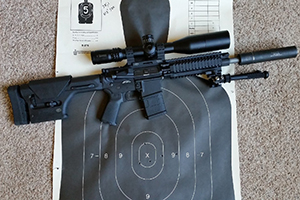 Shooters with experience like to stick to their own opinions, and we realize this can be a touchy subject. Let us explain: the AR-15, chambered in 5.56/.223 with a 16” barrel, is by far one of the most common rifles bought and used by preppers. We will soon be writing an article on how to use an 80% lower receiver to build an unregistered survival rifle.
Using this rifle as our example, we get a few benefits with this zero:
- The trajectory of the bullet will never rise higher than your line of sight;
- The bullet only rises by 2.3” from point of aim between 0 and 54 yards;
- The bullet only rises by 1.3” from point of aim between 27 and 60 yards;
- Point of aim is almost identical (less than 1”) to point of impact up to 191 yards.
Basically, the 109-yard (100-meter) zero guarantees incredible accuracy up to almost 218 yards. That means your point of aim (POA) and point of impact (POI) will be almost identical for nearly any threat or engagement. This same ballistic data will be quite similar for many intermediate-cartridge semiautomatic rifles.
This zero allows you to focus on sight picture, aiming, trigger squeeze, and the fundamentals of good marksmanship without having to worry about hold-over, elevation, or adjusting your POA to compensate for distance.
Related: The Complete Guide To Cleaning And Lubricating Your Ar-15
For Handguns, Zero at 16 Yards (15 Meters)
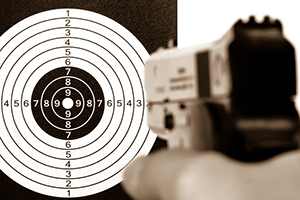
Again, touchy subject, but hear us out. There are two reasons why we recommend using a 16-yard zero for nearly all handguns:
#1. FBI crime statistics say most shootings happen at just a few feet (which isn’t true). The only study conducted that detailed the average distance of gunfights was done by Police Marksman in the 90’s. They found the average distance of a gunfight was 15 yards.
#2. For most ammo, especially 9mm Parabellum, a 16-yard zero will yield excellent accuracy with a nearly-flat trajectory out to 54 yards.
If we use 9mm Federal 124-grain HST ammo as an example, these are the differences between POI and POA for the most common zeroes:
[supsystic-tables id=7]
Remember, the only real data we have says most shootings occur at 15 yards, so simple logic says 16 yards is the best zero. Comparing all three, we can also see a 16-yard zero provides a POA and POI that are closest to 27 yards, with about half an inch of difference up to 54 yards.
The same logic about the rifle zero applies here: a 16-yard (15-meter) handgun zero will allow you to focus on the marksmanship fundamentals instead of worrying about hold-overs, elevation, and POI vs. POA.
Related: How Much Ammo Should You Stock Pile?
Final Tip: Practice Shot Placement in Groups of Three
Every live round you fire at the range should serve a purpose. This is the only way to truly conserve ammo. To get the most out of every shot – and to easily check your accuracy and fundamentals with as few rounds as possible – we recommend using three-shot groupings.
A three-shot grouping allows you to triangulate the average point of impact between all three rounds and thus, your average point of aim. Four shots aren’t necessary for this. And if a third shot is a “flyer” or runs off-target, you still have two rounds on target to average out where your point of was when you were firing correctly.
The short-n’-sweet:
- Practice your trigger squeeze, aim, and sight picture by stacking a penny on the barrel of your weapon. Practice dry-firing using this exercise. Always use a snap cap when dry-firing.
- Practice quick-draw drills to make sure your holster and handgun are set up appropriately. Dry-fire with a snap cap to practice target acquisition while drawing.
- When at the range, we recommend a 109-yard (100-meter )rifle zero, and a 16-yard (15-meter) handgun zero.
- Practice shot placement and live fires with groups of three rounds. No more, no less.
You may also like:
Do You Make These Fatal Mistakes In A Crisis? (Video)
Emergency Care For Gunshot Wounds



100 meters = 109 yards,
100 yards = 91 meters.
please correct the article
I agree. There are two typos that are incorrect information and may confuse newbies. They should be edited and corrected.
Otherwise a good article.
Thanks for the information. Right now my shooting skill is like a brand new Hoover Vacuum (it sucks greatly). I couldn’t hit an elephant in the butt with a base fiddle.Practice ! Practice ! Practice ! But I have one question. It’s one thing to shoot at a paper target, but something else to shoot at something that can shoot back. Are there “tactical” training programs for civies, or do you have to join the Marines to get it ?
There are Tactical Courses taught around the country.
Problem is you usually have to travel there, and usually 2 day affairs. And cost about $400-600 and up.
A cheaper alternate is to look up IDPA on the web
aka Combat Pistol. Find a club near you that sponsors matches. Matches are held all over the country. And usually about $10-$15 to enter. They also have a New-shooter class before ea match – just that will be worth it. Probably meet someone there who will know about other local Tactical courses. And shooting IDPA will be a very good start -it IS Tactical.
For AR Rifles – You can ask the IDPA guys about local Multi-gun and 3Gun matches. And probably some instructors shooting there. Start there, talk to people, they will be more than glad to help you.
Not all tactical courses require travel or deep pockets. Start by calling ranges and gun shops in your area many offer courses that will help you or they will at least be able to direct you to local resources. Having said that if there truly is nothing offered in your area consider contacting your local police or sheriff’s office and ask them. You may even find an officer or deputy willing to meet you at a local range and help you out. Keep your muzzle downrange, be safe, and have fun.
Thanks for the information, but I have one question. Shooting at a paper target is one thing, but shooting at a target that can shoot back in something else altogether. Are there “tactical” training programs for “civies” or do you have to join the Marines to get that kind of training?
TruthB Told,
The short answer is yes, and there are also drills you may practice on your own; but, these all need a proper range with a backstop area greater than 90°, which is the typical range where you shoot paper targets. A 180° backstop is best, so you can draw and safely shoot in any forward direction or directly to either side.
Civilian practice can best be done by finding IPSC (International Practical Shooting Confederation) or IDPA ((International Defensive Pistol Association) training and matches. Once you’re competent with either of these, look for 3-gun training and matches.
At my age, my vision doesn’t work so well for these now; but, I started shooting IPSC in the 1980’s and learned a lot.
In addition, the two courses:
NRA Basics of Personal Protection Inside The Home and NRA Basics of Personal Protection Outside The Home should also cover these fundamentals.
If you want the experience of someone shooting back at you (without the threat of death) I would suggest joining a paint ball shooting range. You will learn to duck and weave find cover and concealment, ect.. check it out, its good training.
That or use sim rounds
This is a well written clear and concise explication of methodology and the graduation of thought to muscle memory for training purposes and over all process (whoever did this might consider a short book or booklet on training yourself to shoot correctly and accurately)
It’s a good article and well written the only thing I find humorous is the idea that rifles are registered. Most states dont have that yet and a 4473 isnt a registration. However unviseal background checks will end up making it so.
I often use the 25 meter zero for my m4s and you should also note barrel lengths with optics as well.
Hey William you can please take carbine courses and train to kill humans
To the people who thumbed down my comments. Well I hate to break reality to you. The military teaches or I should say rewards soldiers for killing. They train on human targets to get rid of the human nature of not killing humans.
I suggest you do the same thing. That training will save your life and get you into a killers mindset
Raven tactical,
While most states do not have registration of any firearm, unfortunately, to the uneducated masses watching the cop shows on TV, the ”unregistered” firearm is often part of the plot.
That may or may not be the case, depending on your state laws. As concealed handgun license (CHL) holders, neither my wife nor I have to have NICS (National Instant Check System) run for our purchases, even from FFL dealers., although from an FFL we still fill out the 4473. I think Texas may have the same statutes.
Even now on private sales, I look @ ID and note the age, name and address for my own records since the 18 for along gun and 21 for a handgun is still the law.
Of course in the PDRK, all gun sales have to go through a licensed gun dealer since 2009 and all private sales are forbidden except through the auspices of a gun dealer. Rifles, shotguns and all handguns purchased since 2009 are in the computer memory of our masters in Sacramento.
I envision that is what gun grabbers would like to have, universal registration of all firearms at the federal level. I am quite confident when Nancy and friends are talking about universal background checks that is exactly what they have in mind.
yes texas has the same statutes as for privat sales well my guns are like my kids their mine for the rest of my life
If you are zeroing your rifle with iron sights and don’t have a scope that will reveal .224 of an inch holes in the black at 100 yards, set your target at 27 yards. Zeroing your rifle to hit dead center at 27 yards will get you in the black at 100 yards. In addition, you don’t have to be concerned about wind so much at 27 yards as you do at 100 yards.
Doping wind comes after you can regularly print in the black at 100 yards with no wind. Finding a day at most ranges with no wind is reminiscent of searching for the end of the rainbow.
Zeroing at 27 yards will also save time walking back and forth to paste your target and record your shots.
Buy an NRA shooting record book for rifles. Call each shot and record each shot. If you are shooting correctly, you should be able to “call” the shot, that is, know where it is going at the instant the shot breaks. This is true even if you know you pulled it low left, barely on the paper.
I don’t know currently, but when I was in Uncle Sams Misguided Children, we spent a week “snapping in” at the rifle range. This included getting into the correct position for shooting, ie., off hand, sitting, kneeling, prone. If you were not in correct position, you were often encouraged in achieving the correct position by the DI. You spent hours dry firing at stakes with a little black dot. You buddied up. One Marine operated the bolt while the other, in correct position, dry fired at the aiming stake. Then you switched and you operated the bolt while your buddy dry fired.
Having someone slap the bolt back imitated the recoil of the shot leaving the barrel and the bolt operating to eject the shell and return to battery. There was a whole week of many hours a day snapping in and dry firing at aiming stakes before we ever faced the real targets and got to insert a real cartridge in our rifles.
Trigger Squeeze Tips & Tricks
First of all, the ”Penny Drill” is an excellent first start.
Over nearly 30 years as a trainer I find that recoil anticipation or trigger finger not in the center of the pad of your trigger finger is the most likely culprit.
A firearm that is either too large or too small to fit the gripping hand is also often part of the problem.
#2. The Quick-Draw Drill
Lose the word ”Quick” and work for BSA, Balance of Speed and accuracy. Quick will com automatically with proper practice.
First, Check Your Holster Setup
It may also involve position and retrieval from concealment, so be sure to practice from concealment, which may mean a cover garment needs to be swept away or a fanny pack opened as part of the draw.
Having a weight, such as keys or a roll of coins in the shooting side pocket of a garment, may make it easier to sweep away to access the holster.
Tips for Holster Position
As a right handed shooter, I carry anywhere from 3:00 to 5:00; but, make sure you practice with your alternate hand on occasion, since an injury could leave you in that situation.
The key thing is comfortable access to the firearm without obstructions.
Quick-Draw Best Practices:
For Handguns, Zero at 16 Yards (15 Meters)
Once again, lose the ”Quick”; but, drawing slowly in precise steps is how we train the beginners, who after practicing see the Balance of Speed and Accuracy (BSA) kick in naturally.
Try these steps slowly, and with practice the speed will come as your muscle memory (actually the OODA loop in your brain) gets trained.
1. ”Grip” the firearm
2. ”Pull” the firearm straight up out of the holster, keeping your trigger finger indexed and off the trigger.
3. ”Rotates” the firearm until the muzzle is pointing horizontal. For the 4:00 & 5:00 positions you will also need to swing your arm and shoulder toward the midline always being aware of the muzzle.
4. ”Extend” the firearm. As the muzzle clears your body, bring the other arm and hand down your chest and stomach toward the midline, at which point the hands meet to take a two handed grip and extended out to your stance. For one handed shooting, be sure that the other arm and hand are out of the bullet path.
Final Tip: Practice Shot Placement in Groups of Three
This has been found to be the best type of practice; but, don’t adjust sights until you have fired several groups to make sure it’s not your grip or stance.
One final drill using an ”unloaded firearm that can be very beneficial is the ”Point Shoulder Shooting” or Natural point of aim drill.
1. Standing in a comfortable position, bring the empty firearm up to your eyes and take aim.
2. Close your eyes and drop the firearm to low ready.
3. Keep your eyes closed and raise the firearm back to the shooting position.
4. Open your eyes.
If you are not aligned with the sights and the target, raise or lower the firearm for vertical, or shift your foot positions to rotate your body for the horizontal.
Repeat steps 1-4 until you can bring the sights into position each time.
This drill gives you the edge by allowing you to aim at and hit a target, and is especially useful for split second or low light conditions,
I hope this all made sense.
Good advice. As someone smarter than I has said, “Slow is smooth, smooth is fast.” The mantra I used to always use was, “How come we have time to do it over but didn’t have time to do it right the first time?” Slow down and do it right the first time and save time.”
And to myself without saying it out loud, “And cut down on waste and increase the profit line.”
Practicing slowly but correctly will make you faster in the long run than practice that is sloppy and incorrect which only teaches you how to do the draw incorrectly which may well lead to a very bad result ie., holes in you and no holes in the bad guy.
left coast chuck,
I ran into this many times over my engineering career, where we absolutely had to meet completion dates; but, then it was OK to spend more time debugging and tweaking the product to make it work correctly.
This is quite often because people misunderstand a common mantra: “Practice makes perfect” that should in reality be “Only Perfect Practice makes perfect”
Great article, the use of snap caps is an ideal training aid to save ammo. Laserlyte makes an awesome training aid as well. It can be ued as a bore sighting tool or in drills as a sound activated laser in conjunction with snap caps.
Snap caps can also be used to practice mag changes. Practice mag changes with out taking your eyes off of the target.
The use of a small maglight flashlight is ideal for shotgun practice. It will give you the appearance of a pattern on a wall. Insert into barrel and move as to follow a target.
Always make sure the weapon is unloaded.
Thor1,
Sine I received an error with this post:
Access – Sucuri Website Firewall
SQL injection was detected and blocked.
Something I am not doing, so splitting into chuks.
Something we use gun mounted lasers to demonstrate is the timeliness of knowing the firing sequence by muscle memory from good practice.
Proper breathing for accuracy means you momentarily stop breathing during the respiratory pause, just after exhalation and prior to inhalation. This is part of the natural breathing cycle and can be mastered with a little practice.
Often people will hold their breath trying to aim the perfect shot. If you have to hold your breath for more than about 2-5 seconds, breathe normally again and start over.
You can demonstrate this to a student by having them do the following:
Using an unloaded firearm and a laser, point and hold the laser dot on a distant position on a wall, and then hold your breath a bit longer each cycle. Each of us will reach a point where the lack of oxygen and the stress on the arm, will make us less steady, and we will see the laser dot start to wiggle on the wall.
This is a good empirical demonstration of how well a person is doing their breath control and allows them to work on any corrections with 5-8 seconds being the normal maximum breath hold time until things start to change
Thor1,
Continued
True for both; but, often some real ammunition or commercial dummies can also be used to make the magazine a realistic weight, especially for an emergency change where dumping the magazine from the gun, prior to slamming in a new one is also part of the practice, once again keeping your eyes on the target. When using live ammunition, load the magazine with live ammunition first, with the snap caps or commercial dummies as the last few on top. Dummy ammunition is preferred.
More to follow
Any military weapons instructor is going to have a stroke at the idea of mixing live and dummy ammunition in the same room, never mind the same magazine. I know where you’re coming from with getting a realistic magazine weight, but I really don’t recommend mixing ammunition types like this. Deactivated rounds or metal dummies will do fine – not much of the weight is in the powder anyway. Keep live rounds well away from dry training.
Claude,
I’m only an NRA instructor; but, I agree, and mixing any live ammunition into the mix should only be done on the range, while still following all of the safety rules.
We do however, mix live and dummy rounds on the range to train what is known as the ”Ball & Dummy” drill, used for flinch control and magazine change drills.
The instructor loads the magazine for the student with live ammunition, inserting a dummy somewhere in the mix.
The student then shoots at the target, while the instructor watches fro the side.
When the firearm fails to fire upon reaching the dummy, if the student flinches like it was real recoil, it becomes obvious even to the student they have a problem.
For a malfunction drill, that misfire partially through the magazine forces them to either do the press check & clear or dump the magazine and replace it.
I only mention this to head off the complaints I’ve heard about commercial dummies (unless you reload your own with no powder or primer) being too expensive, when compared with snap caps or the really cheap solid orange plastic dummies. People will spend a fortune on a firearm; but, often complain that training or training aids are too expensive. It’s very shortsighted; but, a reality.
Continuation
Thor1,
This is another good technique, while also changing the beam spread at different distances from the wall to simulate the shot pattern spreading with distance.
That’s rule #3 but always remember rule #1 when practicing off of the range, always keeping the other rules in mind. The rules BTW are:
1. ALWAYS keep the gun pointed in a safe direction. This is the primary rule of gun safety
2. ALWAYS keep your finger off the trigger until ready to shoot.
3. ALWAYS keep the gun unloaded until ready to use.
4. ALWAYS be aware of your target and what’s beyond it.
Probably more information than wanted;
https://www.marines.mil/Portals/1/Publications/MCRP%203-01B%20Pistol%20Marksmanship.pdf
https://www.trngcmd.marines.mil/Portals/207/Docs/wtbn/MCRP%203-01A.pdf
PAINTBALL COMPETITION would be the cheapest and best to learn Close Quarter Battle (CQB) and field ops. It’s relatively cheap once you get your equipment, and there are clubs everywhere.