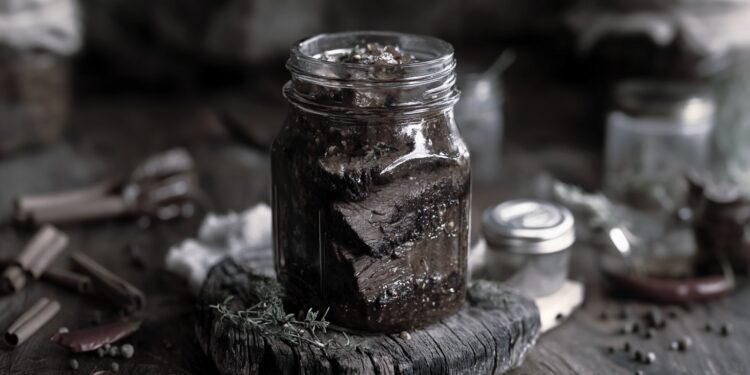
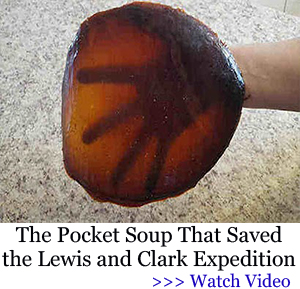
In uncertain times, nothing beats the comfort of a homemade meal that’s been cooked with care and preserved properly. Imagine opening a jar on a cold day to reveal tender, juicy brisket that practically melts in your mouth. Nobody expects that when SHTF. In this comprehensive guide, we’ll walk you through making finger-licking brisket in a jar. Yes, in a jar. You can store it for a really long time and when you want a tasty meal, it is waiting for you.
We’ll cover everything from selecting the best cut of meat and preparing a savory marinade to the nitty-gritty of canning, with a special nod to the time-tested methods practiced by Amish communities, which we can learn so much from, as you can easily see when you enroll in the Amish Ways Academy.
Whether you’re a seasoned prepper or a curious newcomer, this article will equip you with the knowledge to create a delicious, shelf-stable meal that can be enjoyed even when the grid goes down.
Why Brisket in a Jar?
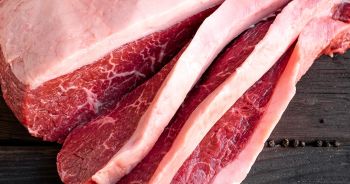
 Brisket isn’t just a cut of meat. If you love barbecue, you know how special it is. When cooked correctly, the brisket transforms into a tender, flavor-packed meal that is simply to die for. But is it good for prepping? Isn’t it a little too fancy? Too complicated? Too complex?
NO!
Why should we only eat dry meat that is rubbery or canned ground meat with only a little bit of salt when we can have something better? The truth is that most SHTF scenarios and major crises that could hit us will not last longer than it takes for canned brisket to go bad.
The idea of canning brisket might sound unconventional, but it’s an ingenious way to preserve protein-rich food for emergency situations. By combining modern canning techniques with traditional methods passed down from our ancestors, you can create a jarred brisket that is not only safe to store for 2 to 5 years but also delivers flavor and texture.
Preserving meat in jars has several advantages:
-
Shelf Stability: Properly canned brisket can be stored at room temperature for years, making it an ideal addition to your long-term stockpile.
-
Portability: Jars are lightweight, easy to stack, and take up minimal space, whether in your pantry, bug-out bag, or basement storage.
-
Flavor Preservation: When done right, the canning process locks in flavor, ensuring that each bite tastes as good as when it was freshly cooked.
Ingredients and Tools You’ll Need
Before cooking, gather all the necessary ingredients and tools. Also, remember that quality ingredients just make the meat better. Always aim for the best.
Here’s what you’ll need:
Ingredients
-
 Brisket: 3–4 pounds of whole beef brisket. Choose a cut with a good balance of meat and fat.
 -
Salt: Kosher salt or sea salt (for both seasoning and preservation).
-
Brown Sugar: 1/4 cup for extra sweetness and that tasty caramelized crust.
-
Garlic: 4–6 cloves, minced.
-
Black Pepper: Freshly ground, to taste.
-
Smoked Paprika: 1 tablespoon is all you need.
-
Liquid Smoke (optional): 1–2 teaspoons if you want an extra smoked flavor.
-
Onion Powder: 1 teaspoon. (you can also use real onion but powder is just more convenient)
-
Beef Broth or Stock: 1 to 2 cups (can help in canning to make the end result tastier).
-
Vinegar (optional): 1–2 tablespoons. The Amish do not use this but it just makes the taste better.
Tools and Equipment
-
Cutting Board and Sharp Knife: For trimming and cutting the brisket into manageable pieces.
-
Large Mixing Bowl: To combine your marinade and toss the meat.
-
Slow Cooker or Smoker: For the initial cooking phase (alternatively, you can roast the brisket in the oven).
-
Pressure Canner: Essential for safely processing the brisket. (A water bath canner is sometimes used by traditionalists, but extra caution is needed and we recommend pressure canning.)
-
Canning Jars and Lids: Use pint or quart jars that are designed for canning. Regular ones can be dangerous. Ensure they’re free of chips or cracks.
-
Jar Lifter and Canning Funnel: For safely handling hot jars and making it less messy.
-
Tongs and a Clean Towel: For removing jars and wiping rims.
-
Instant-Read Thermometer: To monitor the internal temperature of the meat. (You can also use a regular meat thermometer and if you already know how to cook your brisket, just skip it)
Preparing the Brisket
The secret to a great jarred brisket starts with choosing the right meat and preparing it as it deserves. Follow these steps to prepare your brisket for cooking and canning:
1. Selecting and Trimming
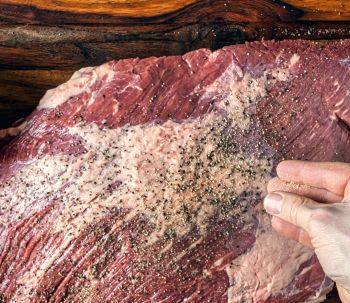
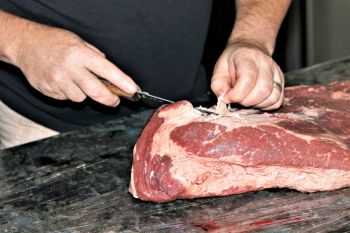 Choose a brisket with a good mix of lean meat and fat. Fat is essential for flavor and moisture but should be trimmed. If you do not, the meat will be too greasy. Use a sharp meat knife to trim away any excessive fat, leaving just enough to keep the meat tender while cooking.
2. Cutting the Meat
Cut the brisket into uniform chunks or slices (preferred). Aim for 1.5 to 2 inches thick. Try to make the pieces as even as possible for even cooking.
3. Seasoning and Marinating
 In a large mixing bowl, combine the salt, brown sugar, minced garlic, black pepper, smoked paprika, onion powder, and liquid smoke. If you also want to add vinegar, do it now. Toss the brisket pieces in the mixture until every piece is well coated. For the best flavor, cover the bowl with plastic wrap and let the meat marinate in the fridge for at least 4 hours. Preferably overnight.
4. Cooking the Brisket
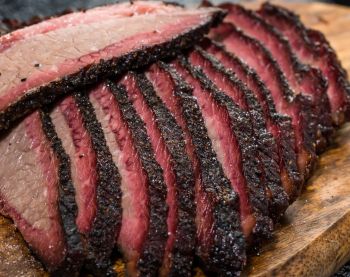 There are several methods to cook brisket before canning. This is all up to you.
-
Slow Cooker: Place the marinated brisket in a slow cooker with a bit of beef broth. Cook on low for 8–10 hours until the meat is fork-tender.
-
Smoker: For a deep, smoky flavor, smoke the brisket at 225°F–250°F for 6–8 hours until it becomes tender.
-
Oven Roasting: Preheat your oven to 275°F. Place the brisket in a covered Dutch oven with a small amount of broth. Roast for 4–6 hours until tender.
No matter which method you choose, the goal is to cook the meat slowly so that it becomes tender and flavorful. This is the real secret. Once cooked, allow the brisket to cool at room temperature.
Putting The Brisket In The Jar
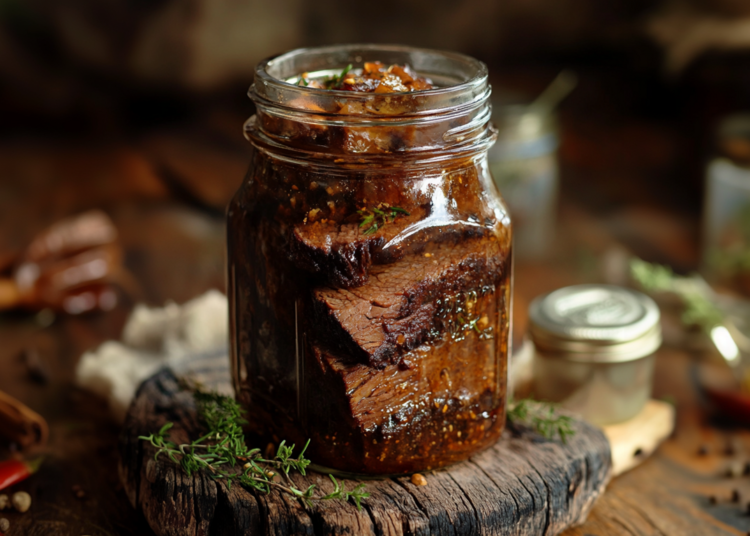 Now you have tasty brisket, we need to start the canning process.
Canning meat is not as straightforward as canning fruits or vegetables. To keep the meat safe for us, we HAVE to use the pressure canner. This is the only way to guarantee that bacteria will be killed and that the right temperatures will be reached to do that.
In most Amish communities, water bath canning is used. If you want to try the Amish way or just want to see how it is to use water bath canning instead of pressure canning, we recommend you first get familiarized with the process. In The Amish Ways Book you can find the information you need and a lot extra, like how to build an Amish Fridge where you can store what you do not put in a jar.
For maximum safety, we will present the pressure canning method.
Pressure Canning The Brisket
-
 Sterilize Your Jars: Wash your canning jars in hot, soapy water and then sterilize them by boiling for 10 minutes. Keep the jars warm until ready to fill.
 -
Prepare the Meat: If your brisket pieces are large, consider cutting them into smaller, jar-friendly chunks. Pack the cooked meat into the jars, leaving a 1-inch headspace at the top.
-
Add Liquid (Optional): You may choose to add a small amount of beef broth to each jar. This helps distribute heat during processing and can enhance flavor. However, “raw packing” the meat without the extra liquid is also good since the meat will produce its own juices as it is heated.
-
Remove Air Bubbles: Use a clean, non-metallic spatula or a bubble remover tool to release any trapped air. Wipe the jar rims with a damp, vinegar-soaked cloth to ensure a clean seal.
-
Apply Lids and Rings: Place the hot lids on the jars and screw on the canning rings until fingertip-tight.
-
Load the Pressure Canner: Place the jars in your pressure canner using a jar lifter. Ensure they are not touching to allow proper heat circulation.
-
Processing: Process pint jars at 10–15 pounds of pressure (depending on your altitude) for 75 minutes, and quart jars for 90 minutes. Always refer to the latest USDA guidelines for exact times and pressure.
-
Cooling and Sealing: Once the processing time is complete, turn off the heat and let the canner cool naturally until the pressure drops to zero. Remove the jars carefully and place them on a towel to cool.
Safety First – Check Your Jars Before Eating!
Before you eat brisket in a jar, inspect the jar. Signs of spoilage should be easy to notice. In optimum storage conditions, if properly stored, this finger-licking brisket will last up to 5 years. But, this is not the case if you fail from the start, like not respecting the proper pressure canning procedure. Even if you do things perfectly, there might be problems. Eating old spoiled meat is Extremely dangerous. Safety first! Look for things like:
-
Bulging Lids or Leaky Seals: The seal most likely failed and bacteria might kill you.
-
Unusual Odors: Bad smell suggests that the meat may be unsafe.
-
Discoloration or Mold: If you see that the meat has a weird color or you see mold, just throw it out immediately.
The Golden Rule – “When in Doubt, Throw It Out”
Every seasoned prepper knows this rule and you should respect it too. Even if you really want that brisket in the jar after who knows how long passed since a tasty meal, safety comes first! If anything seems off, throw it out.
Final Thoughts
Creating shelf-stable, finger-licking brisket in a jar isn’t just about preserving food—it’s about eating something really tasty and oftentimes it is about honoring tradition. Even if you use modern pressure canning, this process still comes from our ancestors. We still honor them. At the same time, learning how to do this very simple process of cooking the brisket and putting it in a jar will increase your confidence, which is paramount in any long-term survival scenario.
Remember! The most important thing is to take your time. Carefully prepare the meat, marinate it properly, and be safe when canning.
You may also like:
 Nuclear War Movies You Should Watch Before It’s Too Late
10 Things Cowboys Carried With Them in the Wild West to Survive (Video)
Off-Grid Tools You Need to Have on Your Property
Does Ammo Expire? This Man Fired His 60 Year Old Ammo and This Happened


you mentioned raw packing. does this mean just marinating the meat but not cooking it before canning it? we can raw hamburger all the time, its a quicker method than browning it first. canned hamburger lasts years and is good as fresh burger.
No Poot, raw packing is when you fill jars with something you already cooked, but it is unheated. Here I wanted to mention that you do not necessarily need to add the extra broth since the brisket will practically make its own broth. But you might like the taste of that little extra beef broth.
Great Article
lots of good references and Info
make s me remember as a child , my depression mom and dad used to can , prepare , store , have a lot on hand
Since we as new age thinkers with such abundance and Blessings From almighty God who is and always will be and blesses those who diligently seek him and praise him for what he does and has done for the salvation of mankind in a world of depravity and wrong thinking .
life span and life cycle of food ?
What is the expected timeframe of preservation of meats, canned items and other condiments
always wondered
love to hear from you all and hear your perspective on this .
The Great Supermarket is going to have a low cycle soon and we need to be prepared
as the Bible Says : Revelations for all who want to know and need to know
I used to be a big time hunter and black bears were one of my main game animals. I use to can bear all the time. Froze the meat, let thaw out till just that state were it was easy to cut into about one inch cubes. Tossed with salt, pepper, garlic and onion powdered and raw packed in canning jars. Pressure canned for about 75 to 90 minuets. Came out tasting like a great roast beef. Oh the good old days.
Jim, did you have to then cook it after removing from the canning jar, or was the pressure canning sufficient to cook it?