It is easy to save seeds from one year to the next if you know what you are doing. Every plant is different and some seeds require specific strategies for harvesting and saving, but these general rules work for most plants if you know the planting conditions for your seeds.
I indicate the planting instructions on the jar when I save the seeds. This refreshes my old memory and ensures that inexperienced gardeners can use the seeds if I’m not around. This is a good practice for all your saved seeds.
Heirloom Seeds
You’ll hear this repeated often, but it is not a hard rule. Heirloom seeds produce a plant that is true to the parent with the same characteristics as the parent. Hybrid seeds give you characteristics from prior generations that may not be the ones you are trying to produce.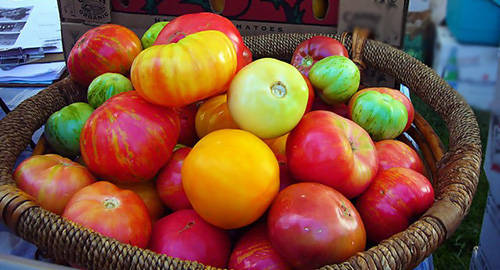 For example, hybrid seeds can produce plants that are a mix of the parents or possibly plants that have the worst characteristics of the parents or even grandparents. They may be poor producers, have poor flavor, produce small fruit, etc. I always prefer heirloom seeds; but, if hybrids are all you have, you can grow them. Just be sure to save a lot of seed so you can prune out the poor plants.
Related: Heirloom Seeds Vs. Hybrid Vs. GMO
Choose Your Seeds
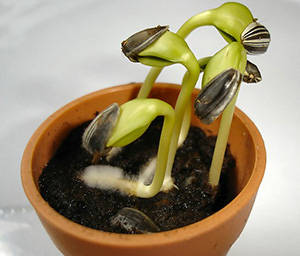
Gather the seeds from your best-producing plants, the ones you are most proud of. Hopefully, the seeds will produce an equally good plant the next year. Seeds from mediocre or poor producers will give you poor results. Always choose the best.
Harvest seeds from ripe fruits and vegetables. This one should be obvious to everyone but often is not. The fruits and vegetables you buy at the store are usually picked immature and will not produce mature seeds. For best results, let the seeds mature on the plant before harvesting. In most cases, this means leaving the vegetable or fruit on the plant longer than you usually would. Cucumbers turn yellow when mature, fruits become soft.
I have a friend who plants the seeds from everything she eats, including immature seeds. She has good results in growing plants this way, but not all the seeds germinate. She succeeds because she plants many seeds and some will germinate. In a survival situation, I would follow this strategy, if these were the only seeds I had.
Fermenting Seeds
 Cucumbers, melons, and tomatoes have a slippery coating that is easily removed by fermenting the seeds. The seeds will grow without this step, but it makes it easier to clean the seeds and store them. If you are processing seeds from one tomato, you may get away with doing it in the kitchen, but fermentation is smelly so I usually put them in a warm, out of the way spot. Here is the process:
#1. Scoop out the seeds into a glass, jar, cup, or deli container. Add enough water to cover them and put the container in a warm spot. Avoid direct sunlight, but some light is ok.
#2. Stir the seeds daily. Initially, the seeds will float. As they drop to the bottom, they are ready. Rinse away the liquid and vegetable matter and spread the clean seeds on a screen or paper to dry. It will take from two days to a week, depending on the seeds.
#3. Dry the seeds on the countertop, or other warm spots, until completely dry. This can take two or more weeks. If the seeds are put away moist, they will mold in storage.
#4. Follow the directions for storing seeds below.
Related: 18 Plants That Should Always Be Planted Together
Stratification and Soaking Seeds Before Planting
Some seeds require a period of cold weather in order to germinate. If you live in an area with ideal conditions, you can plant these seeds in a pot or in the ground in the fall or winter and they will be ready to germinate in the spring. You can also stratify them in the refrigerator or freezer before planting.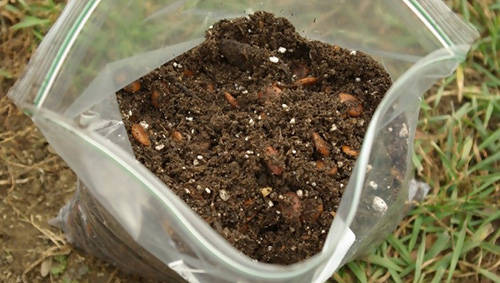 Stratification is usually needed for hard seeds like grape seeds and stone fruits. Some may need alternating periods of freezing and thawing. Other seeds need to be soaked before planting. It is a good idea to know the growing conditions for the plant when you save the seeds so that you can be successful with it the next year.
Drying Seeds
Most seeds only need to be dried thoroughly before saving them for the next year. Remove the seeds from ripe fruits and vegetables and remove any attached pulp. Some seeds, such as peas or beans, should be allowed to begin drying on the plant. Pick them dry, as they begin to burst open and lose the seeds.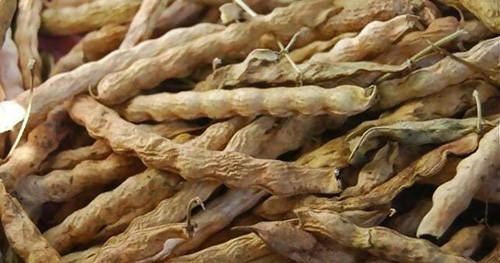 Spread the seeds out on a screen or on paper to dry. Allow plenty of airflow around the seeds and dry them until they are completely dry. Allow one to three weeks, depending on the size and type of seed.
Storing the Seeds
There has been much controversy about storing seeds, especially for long term storage. Most gardeners agree that seeds should be stored dry, with a desiccant, if possible. Moist conditions can cause mold and spoilage. However, I don’t recommend using an oxygen absorber in the jar. Seeds are living and need oxygen.
Store the seeds in a labeled, air-tight container. Some gardeners place the seeds in labeled envelopes and this works well for storing for one or two years. I prefer to place my seeds in air-tight containers with a desiccant for longer storage. The seeds will keep longer, but the germination rate will drop with each passing year.
Seeds need a cool, dry place. Many gardeners save them in the refrigerator, but I find it to be too moist for my needs. A dry spot in a cool basement or cellar is ideal. Keep them out of the freezer unless you are instructed to freeze for stratification purposes. Most seeds will not survive to freeze.
Related: DIY Seed Tapes With Toilet Paper
Saving Corn for Seeds
Like other vegetables, corn needs to be grown to maturity for the seeds to produce. Allow the ears to remain on the plant beyond the normal harvesting time.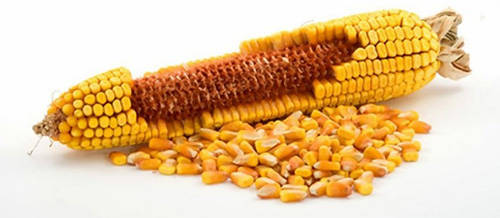 The corn will mature and begin to wrinkle as it dries. You can pick it partially dry and complete the drying indoors, if necessary, but allow it to stay on the plant as long as possible. Because corn is wind-pollinated, I choose ears that are grown away from other varieties, as much as possible.
Planting Peaches, Cherries, Nectarines, and Other Stone Fruits
The pits of stone fruits can also be planted to grow a new tree. These seeds often need a period of cold stratification in order to germinate, so check the requirements for your particular fruit before planting. Pits from stone fruits have a hard casing around the internal seed.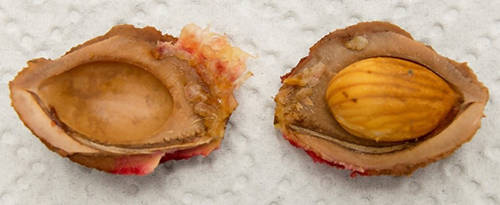 They will sprout more easily if you tap the pit with a hammer to remove the outer casing before planting the internal seed.
Harvesting Seeds from Herbs, Small Seeds
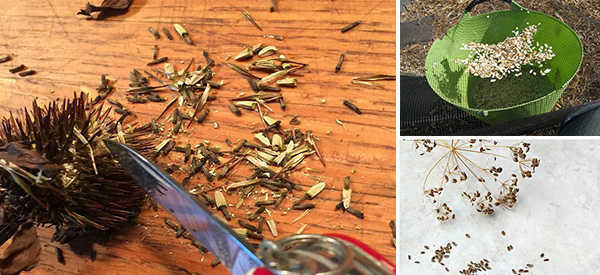
When harvesting seeds from herbs and flowers, a different strategy is required. Allow the plant to flower and leave the flower to go to seed. (Once the plant flowers the herbs are usually bitter, so do this at the end of the season.)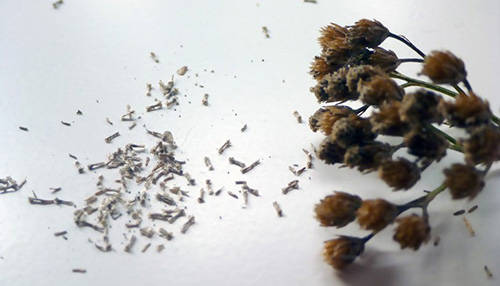 As the flowers begin to die, either attach a paper bag over the seed head to catch the seeds or cut the seed head from the flower and place it in a paper bag to dry. Small seeds are easily lost if not contained for drying. The seeds usually turn dark brown to black when dry and mature.
Once the flower heads have dried and the seeds are released, separate the seeds from the other vegetable matter and store them as mentioned above.
You may also like:
 12 Wild Medicinal Plants You Should Harvest This Fall
The Only 10 Seeds You Need to Stockpile for a Crisis (Video)
10 Beautiful Plants That Are Secretly Killing Your Garden
How to Plant a Perennial Food Garden – Fruits & Veggies That Will Keep Coming Back Year After Year





I have read that saved hybrid seeds WILL germinate but the plant will be STERILE and produce 0 produce.True?
I have never been able to get hybrid bell peppers to germinate no matter what or how or when I harvest them.
Rick: I think it depends on the plant variety. Some will fail to germinate, some will germinate for a year or two and then fail in the third year. Each successive year will yield smaller and smaller crops.
I am certainly no Luther Burbank, but I think it is a waste of your time and effort to try to save hybrid seeds. I would put all my effort in heirloom seeds.
rick, that is true.
The way I found out is we keep a bucket in the kitchen that we put food scraps in and then we dump it out by the woods.
One day I was dumping the bucket and noticed a tomato plant growing in that area.
I put one of my wire cages over it to protect it and give it support.
It grew about 3 feet and never flowered, I even watered when needed and gave it some blood meal and bone meal but it never would produce any fruit.
The leaves at the bottom have died off but there is still bright green leaves on top.
I had high hopes but the evil scientists ruined its DNA.
I have a watermelon vine that came up from a store-bought melon. It’s all male blooms, no fruit. That means if it crosses with my regular melons, no fruit next year, only male blooms. It’s called a trigger, and how the PRI in Mexico and Monsanto cause a famine among the independent Tarahumara, killing 9,000 of them with GMO maize.
This article is concise and invaluable. Would appreciate an explanation of stratification as do not know what that means in this context. Thank you!
from how the article was worded i’d assume by “stratification” they author meant that a simulated (or natural) season change and temperature drop must occur before said seeds can germinate. i am not expert,in fact i am only a fifteen year old who happens to be rather good at comprehension, so of course its by all means possible that i could be wrong, and if i am incorrect i sincerely apologize
young prepper that is correct.
I put seeds that need stratification onto a damp paper towel, roll them up and place them inside a plastic sandwich baggie.
Then that is placed inside the fridge for 3 months.
That will simulate the cold winter months.
You may need to check on the moisture of the paper towel, you don’t want it to dry out.
Be sure to write on the baggie the seed name and date you put them in the fridge.
Thanks to all of you.
Get to your local library or download this,
https://seedalliance.org/publications/seed-saving-guide-gardeners-farmers/
Wikipedia has an extensive article on stratification as it applies to seeds. In short it means replicating the conditions that particular species needs to germinate.
For example, manzanita seeds need to be scorched by fire before they will germinate. They will lay dormant for decades until there is a local fire that scorches them and the following winter they germinate.
Govtgirl, stratification is putting the seeds through a cold spell as they would experience in nature.
Place the seeds on a damp paper towel and put them in a sandwich baggie, place that in your fridge for 3 months.
Keep a check on the moisture level you want them damp but not soggy.
Plant them after the last frost in your area.
Govtgirl, please don’t think I’m being mean, but why don’t you research it? Start with looking up the word. These articles can’t cover every detail or it would be a book. These articles are designed to give us an idea and brief overview so we can do our part and learn how to do it. So get busy and learn how to do it.
I agree. Realize I have a lot of catching up to do, but wonder how many of the responders complaining about the prices quoted in this 2017 article are even considering building a BOL. This is pie-in-the-sky for most folks. Your point is well-taken, but not sure there is anyplace to learn about how to use mud for caulking in a wet place like the PNW other than trial and error.
Just to clarify, Heirloom seeds are Open Pollinated but not all OP are Heirloom. OP seeds will grow true-to-type only if that is the single variety you grow. Be aware that there are a goodly number of newer, disease resistant OP varieties that can and do out perform some of the old Heirloom types.
If you plant 6 types of OP tomatoes there is a small risk they will cross pollinate, but if you did the same for radishes, melons or squash you will definitely get some cross pollination. That isn’t a bad thing unless you want to keep your strain pure.
IMVHO plant 1 type of melon or squash only if you want to harvest the seed. Or experiment and plant several varieties you like and develop one that grows well in your situation. The best book on this subject is Breed Your Own Vegetable Varieties by Carol Deppe.
If you look at articles by Native Seed Search, they explain Native Americans always planted varieties of plants all in one large patch, then saved seed from the ones closest to the type of variety. Because I don’t plant acres, anything I save has to follow that. niio
Sorry, have to disagree with the no freezing seeds. All of my seeds are in the freezer and they work just well. Some date to 2012 and used them this year and guess what? They produced.
There is a huge seed vault in Europe (I don’t recall which country maybe Norway) but its buried in a mountain side and maintains cold to freezing temps.
I wonder how long they keep their seeds?
Also, all of the seeds are heirloom, no GMO’s allowed.
That’s right southern nationalist, it is on an island north of Norway and I think is a part of Norway. They keep seeds there deep in a mountain that countries have deposited for safe keeping Incase they need them.