By C. Nelson
In the USA, or any other advanced economy, it’s now easier to get food than it’s ever been. Most of us, especially in cities, can buy food pretty much around the clock – or we can store it at home in the freezer. But what happens if this suddenly becomes impossible?
It doesn’t take much to disrupt our food supply chain. A terrorist incident, earthquake or even a bad storm can do it – anything that closes retailers, restricts your mobility or puts the power out. If that happens our modern society suddenly has a problem with food. You can’t buy anything, the ready meals in the freezer will soon start to deteriorate as they thaw and you don’t have power to cook them. How well placed are you to survive in this situation?
Related: What Should You Do in Case of a Terrorist Attack?
To be prepared, it’s important that you have an emergency food supply that will keep you going for at least three days. As long as you have water you can actually survive three days without food very easily, but you’ll soon start to run out of energy. In a potentially life-threatening situation that’s extremely bad news, so if you want to maximize your chances a stockpile of emergency rations is essential.
Plenty of people are ready to sell you a pre-packed emergency food supply, but don’t order one just yet. A lot of them aren’t all that suitable for an actual emergency. For example, many of the most popular ones rely on dehydrated meals. These need a lot of water to prepare – and if you don’t have the ability to heat the water the result can be a pretty unappetising cold, lumpy sludge. It’ll keep you going, but it isn’t going to do much for your morale.
Instead you should concentrate on foods that need minimal preparation and can be eaten cold if necessary. That’s especially important if you live in an urban area. In the country you’ll pretty much always be able to light a fire to hear water, but a major disaster in a city is a different story. For example, San Francisco is one city that advises all residents to stockpile three days of emergency food. The most likely emergency there is an earthquake, and that’s going to leave a lot of people surrounded by broken gas mains in a city that’s mostly made of wood. In those circumstances, lighting a fire probably isn’t the smartest idea.
What about military-style rations, for example MREs? These have some good points. They have a long shelf life. They’re sealed in tough packaging, and they’re not too heavy. Everything in them can be eaten cold, with no preparation. They also pack in a lot of calories – around 1,200 per meal. On the other hand they’re not much use if you have food intolerances. MREs are designed for military use, and military catering doesn’t care if you’re gluten-free or have a nut allergy. Another downside is the cost. You can get MREs on ebay for as little as $2 each, but these tend to be scavenged from military dumpsters and are usually near the end of their shelf life. A single meal with five years’ life left costs upwards of $10 – and you’ll need three of them per day for each person. Finally they’re quite bulky. Some foreign military rations come in 24-hour packs, instead of the MRE’s single-meal format, but these are usually best avoided – the menus can be quite weird. An exception is the British 24-hour GS ration, which many American soldiers prefer to the MRE.
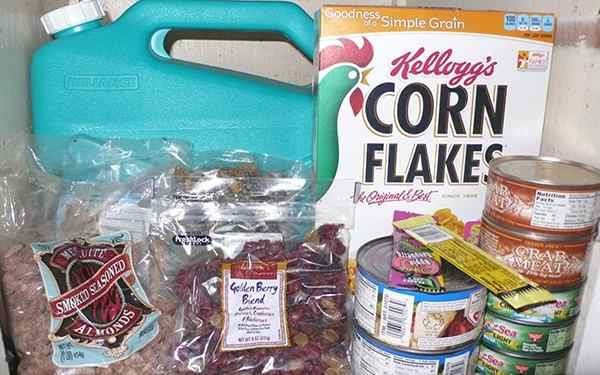
Related: 10 Awesome Food Ideas for Your Bug Out Bag
Military rations can be a good choice if you can find a supply of new ones with a few years’ shelf life remaining, but for most people the best option is to put together their own supply. This method has its own advantages that more than balance out the plus points of MREs:
- You can allow for any food intolerances or allergies you have.
- It’s possible to tailor your supply to suit your own tastes – and having food you like is very good for morale.
- It’s a lot cheaper – and you can spread the cost. Instead of buying a case of MREs or an expensive bucket of dehydrated meals you can just pick up one or two items every time you go grocery shopping.
Look for foods that have a good nutritional balance. High calorie content is valuable; it gives you the energy to cope with emergency situations, and in really extreme circumstances surplus calories let you stretch your supply further. Don’t overlook other factors though. Fiber will help avoid digestive problems, and protein helps you stay in good condition. Vitamins are less of a problem over a three-day period, but you’re better off with them than without them. Here’s a few suggestions:
Breakfast
- Granola bars
- Dried fruit bars
- Clif bars
- Pop Tarts (Ignore the best before date – those things last a decade or more)
- Cereal
Lunch
- Long life crackers (Saltines or Sailor Boy pilot bread)
- Peanut butter
- Canned tuna
- Processed cheese
- Spam
- Canned corned beef
- Vienna sausages
Dinner
- Canned stew or chilli
- Canned chicken
- Canned corn – This can be turned into a salad with some Miracle Whip
- Canned beans – Rinse and use in a salad
- International bread – Tortillas, naan and chapattis can last for months or years if they come in a sealed package
- Canned fruit (snack size)
- Canned custard – Goes great with canned fruit, and can be eaten cold
Drinks and Snacks
- Slim Jims
- Beef jerky
- Dried fruit
- Seasoned or sweet crackers
- Iced tea mix
- Kool-Aid, Crystal Light or Tang
- Candy
- Powdered milk
Cookable Extras
If you’re likely to be able to boil water, there are lots of long-life carbs that can be added to your supplies. These are filling and energy-rich. They let you stretch meat and vegetables a lot further, too. If you have three days of canned food, you can extend that to a week or more with dried goods:
- Rice
- Pasta
- Egg or ramen noodles
- Couscous
- Quinoa
Related: How to Keeps Eggs Fresh for Months with Mineral Oil
Accessories
- Manual can opener
- Paper towels or tissues
- Toilet paper
- Trash bags
Water
The absolute minimum you should allow is one gallon per person per day. It’s best to have a five-gallon container for each person as part of your three-day supply. That allows some surplus for washing, and gives you a safety margin in hot weather. Military-grade black plastic jerry cans are ideal – they’re very tough, and they don’t let light through. That can inhibit the growth of microorganisms. Fill containers as full as possible to minimize the amount of air in them – but don’t leave them anywhere they might freeze. Empty containers every month, rinse with a sterilizing solution (sterilizing tablets from a home brew shop work well) then refill.
Related: H2O Dynamo – The Awesome Device That Turns Air Into Fresh Water! (video)
Preparedness
Once you’ve built up your food supply don’t just stick it in the back of the cupboard and forget about it. Check use-by dates regularly and replace anything that’s getting close (except Pop Tarts). If you regularly buy items that are also on your emergency supply, rotate them; put the new one into storage, take out the oldest one and add it to your everyday supplies.
Store your food in a cool, dry – and ideally dark – place that doesn’t freeze. Check it regularly to make sure no cans or packets are leaking, swelling or doing anything else that looks like bad news. If anything is, get rid of it and replace it as soon as possible.
Putting your own emergency food supply together doesn’t cost much, and it’s an effective, flexible solution. There’s no risk of being stuck with expensive survival foods you don’t like much, and you can easily rotate items without making a big difference to your grocery bill. Keeping three days’ worth of convenient, high-energy food makes a lot of sense, and with our food supply chain as fragile as it is now, can you really afford not to?
You may also like:
An Insanely Effective Way to Build a 5 Year Food Stockpile (Video)
What Should You Do With Your Canned Foods After the Expiration Date?






MREs are a bad choice. They are high fat, low fiber, high calorie rations with the added bonus of stopping you up. I would not rely on either military or commercial MREs for more than one emergency meal.
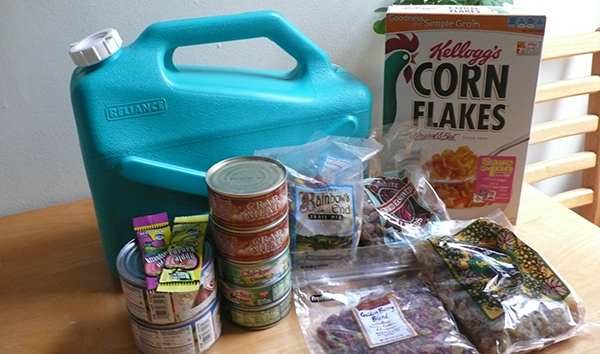
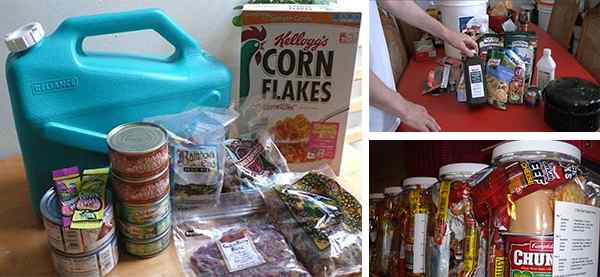
I made several of these up 3 years ago for our church to hand out, if needed. With care in purchasing they can be packed carefully into a galloon size plastic bag., excluding the water. A hand wipe and plastic utensils were included. Pop up cans eliminated need for opener. Handy in a vehicle too if rotated occasionally. Kept price around $5 at that time.
Hi Sheri. I’d sure like to know how you got all that food into a gallon jug. I’ve tried to do it for my family in ice cream buckets and it’s hard. Cans take up a lot of room and one of my daughters has 3 kids. I think I’m going to have to do a 5 gallon bucket next time. How did you do it? With respect, gma Tinker <3
In defense of C-rats and MREs, they are a specialized food. They are intended for young men in a highly physical environment where having time for relieving bodily functions might be at a premium. If you are hunkered down in a snowed in house and you consume an entire day’s worth of MREs without getting out and shoveling snow or chopping wood or some other heavy duty exercise, yes, you will find that regular means about every five days. On the other hand, if you are cross-country skiing in near zero weather whilst dodging hostile fire, MREs will provide you with energy you need to maintain body heat and energy. Dropping your drawers over a slit trench in near zero or below zero temperatures is not an attractive prospect, so a little slower bowel is a good thing.
Having diarrhea under those circumstances(zero or below temperatures in an outdoor environment) is a condition to be avoided. A significant portion of the casualties from weather during the retreat from Moscow for the German army was due to frozen rectum due to diarrhea.
If you are bugging out, lugging a heavy pack or pulling a trailer with your bike covering 20 miles a day on foot or 60 miles a day on a bike, you need the concentrated calories that MREs provide or some equivalent high calorie food.
One of the things you need to check carefully on packaged emergency foods that advertise “30 days food supply” They will tell you that there are X number of servings that work out to 3 servings a day for the number of days touted. Carefully add up the total calories included in the package. I recently got a “3 day supply” of emergency food. The total calories for the 3 days was 4590 calories. That works out to 1530 calories per day. Yeah, it will keep you alive and will be adequate if you are hunkered down in a temperate zone with no temperature extremes. But if you are bugging out as outlined above, you are going to be mighty hungry after three days and will be well on your way to being the weight watchers profile of the month. A male bicyclist riding 12 mph is reputed to use 600 calories a hour over your baseline requirement. Five hours of riding at 12 mph is going to burn 3000 calories over your baseline. If you are a 150 pound male, 1500 calories is just a little bit below your baseline requirement.
That’s why a day’s worth of C-rats ran about 3600 calories if consumed in its entirety. The C-rats needed the carbs and fats to get to that caloric value without excessive weight. The packaging of MREs is a significant improvement over the old C-rats in their cans.
This was another good article posted by Mr. Nelson with a good list of foods to consider for emergency rations. I had completely forgotten about Cheeze Whiz which is rumored to have a shelf life of 5,000 years no matter what the ambient temperature is. I haven’t looked at the label recently but I know there is lots of fat for quick energy. On my next trip to the grocery store I am going to have to search out the Cheeze Whiz.
I disagree with this entire article (as well as many similar articles elsewhere). My experience is in long distance wilderness backpacking and canoeing, which has some of the same requirements.
A 72 hour kit is intended to help you get you through the first 3 days of an emergency, with sufficient strength to go beyond your usual daily level of activity. And to do so for a wide variety of situations, including (1) being away from home with a disabled vehicle and walking home with a kit from your trunk; (2) Leaving home to flee a life-threatening event there, either by car or on foot; (3) Staying put at home but without normal utilities and with potential “must do now” projects to protect life and property or prepare your home for a longer term disaster.
The food requirements are:
1. Little or no cooking. Cooking uses up valuable time while you are trying to get to safety as quickly as possible, or to prepare your home for a longer term disaster. During an evacuation on foot from an urban area, you do not want to attract others who are less prepared with the light, sounds, and smells of cooking.
2. Little or no preparation required. You want to be able to eat while moving, or during 5 minute rest breaks.
3. Calorie dense, compared to the weight. No ordinary canned goods, but also no MRE meals. The water doesn’t add calories but does add weight, and in most cases, they don’t taste good unless heated. No baked goods either, as they take up too much space and turn into crumbs.
Here are some suggestions:
1. Lifeboat-style rations.
2. Shelled nuts, dried fruits, small candies, or a mixture of the three called “gorp”.
3. Cheese and crackers or peanut butter and crackers. Or, without the crackers.
4. Hard candies (they don’t melt or spoil).
5. Tootsie rolls (saved the Marines in Korea; don’t melt as easily as other chocolate candies).
6. Crunchy granola bars (but not the soft chocolate types that melt).
7. Canned meat spread, with crackers.
8. Jerky, meat sticks, summer sausages, and other on-the-go meats that require no cans and keep well.
9. Crackers.
Add a life straw, canteen, water purification tablets, plastic tarp, raincoat, rope, and matches, and put it in a backpack, and you have the basics to survive 3 days.
Best ever, ty!
Thanks!
My 72 hour rations, for all of us are rice and beans, potatoes and bread with water. For my dog it’s potatoes, chicken and salmon oil with water.
Hey, I am a regular reader of your blog. I find it really entertaining and informative. You are quite knowledgeable about these things. I value your opinion & would like to know your feedback. I am in the market for a reasonably priced snow blower and have been reading some snow blower reviews and I am still unsure about which option to purchase. I was reading this review https://www.toolazine.com/best-snow-blower-money-top-snowblower-brands-review-2017-gas-electric-corded-cordless-battery-powered/ and thinking to buy the Ryobi 20 in. 40-Volt Snow Blower that they recommends but I am not 100 sure. I maybe can get one of the cheaper snow blowers. What do you think? Is it really better to purchase a more expensive option? Thanks so much for your feedback and thanks for the awesome posts that you write.
There are a lot of valid points being made by everyone contributing to the information process for emergency foods and preparations of your individual kits. Knowing the calorie contents of the items in your kit is all well and good, but when the rubber hits the road, the only thing that any individual, prepper or survivor is going to be concerned about is, “I’m hungry, what do I have to eat and where is it? The one key point that someone made is to make up your emergency food kits with foods that you like, that are easy to fix and that will give you three sufficient meals from one kit with as little bulk as possible. When the SHTF, you’re not going to be concerned about the caloric content of your meal. I’ve been able to prepare emergency meal kits that generally don’t cost me more than $5 each. I purchased bulk packaged items from the Dollar Tree, individual items from the grocery store and bulk packs from Costco to build quite satisfying meal kits. Collect extra condiments, plastic ware, salt & pepper, sugar, creamers and napkins from fast food sources that you frequent. In addition to these, this is typically what I put into one of my emergency food kits. Single serve packets of Quaker Oatmeal or Cream of Rice, Single packs of Cup-o-Soup, Spam, Chicken, Tuna or Salmon singles, 6 pack crackers, 6 pack cookies, cheese and cracker packs, granola bar, packet of cocoa, drink or punch singles, coffee singles (regular or decaf), Knor side dishes, or Ramen noodles, peanut butter cup, jerky or pepperoni/cheese singles, some hard candy, (lemon drops, butterscotch, peppermint or cinnamon). If you take the time to look around your local store or discount warehouse, you will find all kinds of items that you can use to build emergency food kits that are suitable to your needs and taste. Dollar Tree has a fairly large selection of single serve items and mini bulk cookie and cracker packs to help keep the cost down. In many cases you will find sales that are 3 or 5 items for a dollar at your local grocery store. Keep in mind that these emergency food kits that you are putting together are just to get you through and either back home or to your chosen bug-out location. You will soon be able to put a select package together that will provide you with three quick convenient meals. Not always the healthiest, but when you’re hungry, your stomach doesn’t really care if it’s healthy or not. I have several kits that I put together 4 & 5 years ago and they are still good. Be sure to date them with the date you vacuum sealed them and the one item in the kit with the shortest expiration date to help determine when you should consume it before expiration. The only additional item you will need is your bottled water. Once you get the hang of looking for items that will work for you, it can become addicting, and you will be stocking these items every time you go to the store.