Making glue out of pine resin is one of the cheapest and easiest ways to bind something together when you’re out in the wild. It’s strong, easy to carry, and durable.
Ingredients:
Before making your glue, you need to collect some resin. After that, you will need to find a container to heat the glue in, a fire to heat it on, and some charcoal, which you can collect straight from the fire.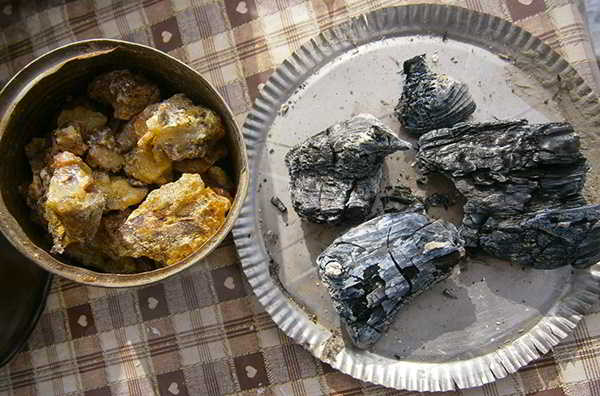
Step One: Melting the Resin
After the fire is lit and the wood is burning, take some charcoal from the fire (or get your charcoal ready that you’ve already collected), and let it cool. Put the resin into the container, and place it on the fire.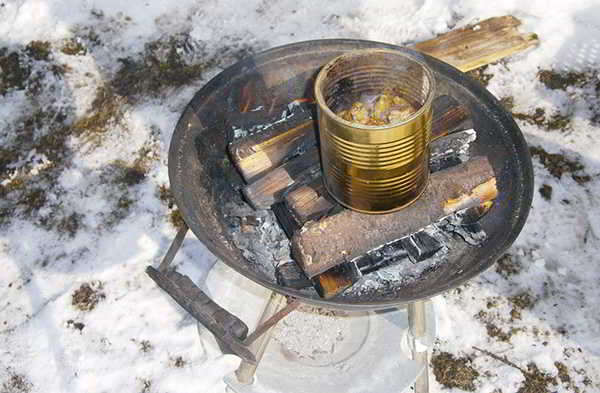
Warning: Be careful while working with the resin as it can easily catch on fire from the gasses it releases while melting. Be ready with some pliers (or any other tool) to take it off the flames, and blow the fire out so it doesn’t burn.
Step Two (Optional): Filtering Out the Resin
While collecting the resin, it’s possible that some of the wood will be chipped away with it. You don’t need this, and it just makes your glue chunkier. So to get a smooth liquid, you need to filter it out. Grab an extra container, and put some sort of filter over it in order to catch the wood, the pine needles, and anything else that might be inside the resin you’ve collected.
Filtering must be done quickly as the resin will harden fast and clog up the holes of the filter. Move the resin around in the filter to speed up the process.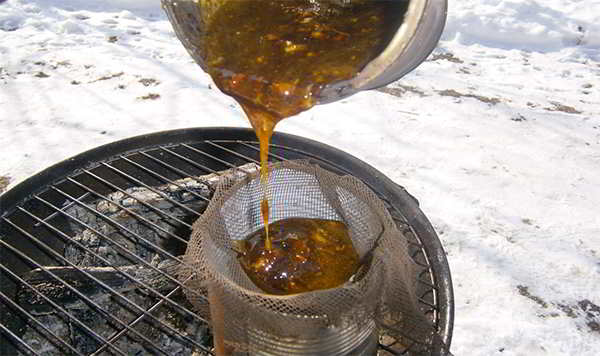
Step Three: Crush the Charcoal, and Mix It with the Resin
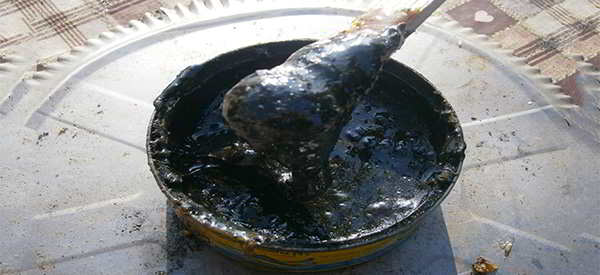
After filtering the resin out, leave the clear liquid on the fire to stay warm. You need it to be fluid for it to mix.
Grab your charcoal that you left out to cool, and crush it into a powder.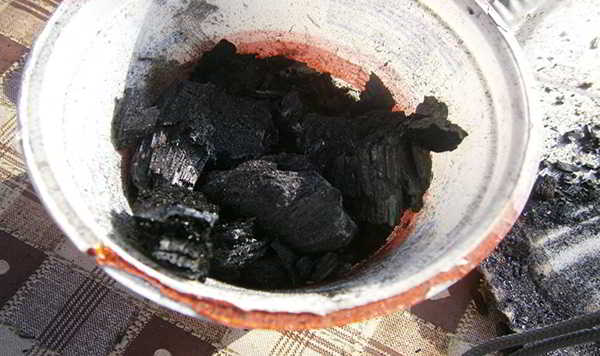
Be careful while crushing it. Move with slow movements, and crush it carefully so the charcoal dust won’t fly out.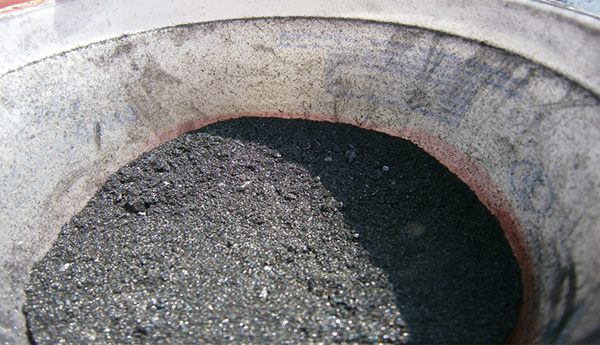
After crushing it, dump it over the resin. What I did was put two parts resin and one part charcoal, although it depends on how you like it. Experiment with it, and find the best for you.
Making it is pretty simple and easy, but you have to work quickly as the resin hardens fast and even faster with the crushed charcoal.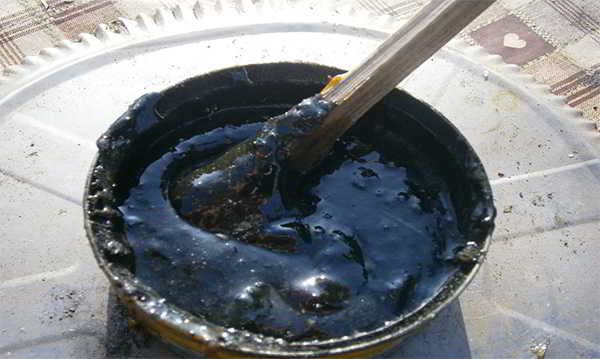
Now that you have your pine resin glue, you just need to test it out. I heated the glue up once again and dumped some onto the bottom of this large bowl, placing a wine bottle onto it for it to stick.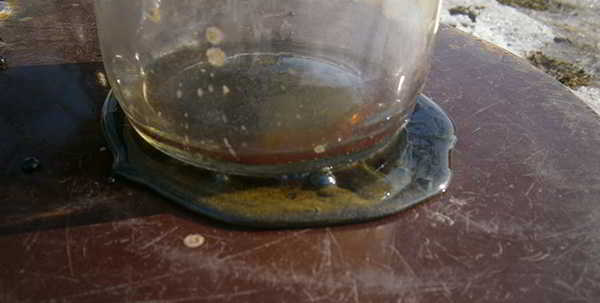
After that, I let it cool for around one minute. After lifting and turning the bowl over, the wine bottle was stuck to it completely.
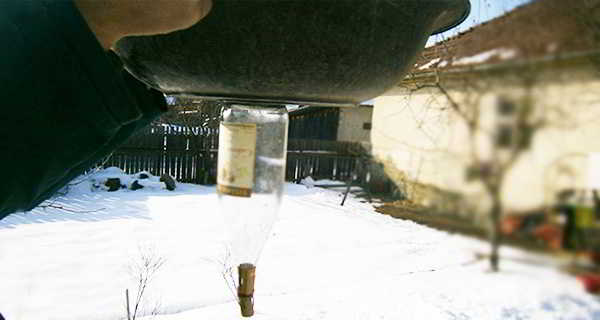
The glue works, and it’s strong, durable, it dries quickly and isn’t sticky or messy. It’s completely rock hard, which makes it easy to carry around. If you want, you can put it inside a small can or stick it to a piece of wood for easy access.
You may also like:
How To Make Gun Powder The Old Fashioned Way in Less Than 30 Minutes
H2O Dynamo – The Awesome DIY Device That Turns Air Into Fresh Water! (Video)
15 Things You Think You Know About Faraday Cages But You Don’t
How To Make a Mini Root Cellar In Your Backyard In Less Than Two Hours
How to Make Pine Syrup at Home (Step by Step Guide With Pictures)



All of this useful information about something so universal (at least in these parts!) opens up a window of comfort! Question: Once you’ve made the glue, do you have to just throw out what you haven’t used right away, or can the glue be heated over the fire again to soften?
No, no… that’s the best part… you can keep it or take it with you wherever you want… heat it and use it again… as many times as you want!
What is a good ratio for charcoal pieces to resin, or charcoal in measurement to resin amount?
A good estimate would be three parts resin, one part charcoal.
What is the purpose of the charcoal??
To add a totally unnecessary pain in the ass step to such a simple glue.
Not only does this make great glue, but consider it like JBWeld. My father and I went white water rafting when I was 10 years of age in his aluminum flat bottom boat, which we punctured a sizeable hole in, while navigating through some rocks; he repaired it with pitch glue, and we let it sit over night as we camped on the river bank. Long story short it worked great and still is water proof, strong and in place to this day, and I’m now 55 years of age.
Wow that is cool your dad sounds like he is a fix it on the fly guy not makeing it sound like your dad is a quick fix guy and hope it holds that is not what i mean what I mean it that your dad did do a quick fix but he knew that was going to get you through your trip wish i had some one like that to teach me stuff like that but i not
many N American Indians been using ‘pine pitch’ for their canoes, arrows, etc., for a few centuries.
In 1964 we bought property with 15 old apple trees (est. 50 yrs old) never produced any fruit, just wood and leaves. I severly pruned them. Many large limbs removed could not grow the cambium layer across to seal the wood. I used Pine resin, Linseed oil & Stove Pipe black(a retired druggist got for me the pine resin & Stove pipe black). Melted the resin & added linseed oil to a semi-soft mix then added Stove pipe black. Painted the injury across the new cut wood and cambium layer. The stove pipe black captured the sun keeping the resin mixture soft and the cambium grew across 10″ width and healed the trees. these apple trees became very productive, apples averaged 15 ounces per apple, except Johnathan apple 12.8 ounces average. Your glue blackened with charcoal ground to a powder might work with linseed oil could do the same healing. Your thoughts.
My grandson and I did this and made some homemade arrows for the willow bow that he made. We found some turkey feathers and used them. He was amazed we could do that without going to the hardware store. He learned a lot about doing it yourself and ended up we went out and he shot a rabbit with his homemade bow and arrow.
Now this lady over here she is having problems with her fruit tree buy the time her fruit ripens it has fallen on the ground and is brused what can you suggest
Fruit tree cancer
Cause: The fungus Nectria galligena.
Symptoms: Cracked growths on (young) branches and stems. Branches and branch parts can die in the event of a serious attack. Fruits can also be affected. This phenomenon is called ‘nose rot’.
Prevention: Choose varieties that have a certain resistance. Prevent new attack by removing affected branches and spots in a timely and radical manner. Keep the crown open by pruning now and then.
Scabies
Cause: The fungus Venturia ineaqualis.
Symptoms: The leaves and young shoots are covered with black-gray spots, after which the leaves sometimes fall off en masse and the young shoots sometimes die completely. The fruits often show cracks.
Prevention: Choose varieties that have a certain resistance.
Mildew
Cause: The fungus Podoshaera leucotricha.
Symptoms: Young shoots in particular are covered with a white powder.
Prevention: Prevent a new attack by removing the affected shoots at an early stage.
Monilia fruit rot
Cause: The fungus Monilia fructigena.
Symptoms: Rotten spots with white yellow grouped in rings
fruit bodies of the fungus.
Prevention: Fighting the caterpillars that cause worminess.
The drill holes are the entry point for this fungus.
Worm tickiness
Cause: The caterpillars of various types of fruit moths.
Symptoms: Drilling passages in the fruits. The apples fall off prematurely.
Prevention: Remove fallen and affected fruit. Stimulate the presence of natural enemies, for example by not using broad-spectrum pesticides, by planting wooded banks, by hanging birdhouses and by creating hiding places for earwigs.
Leaf eating
Cause: The larvae of winter butterflies.
Symptoms: The leaves are eaten by caterpillars in the spring.
Appearance: Apply glue bands around the trunk in early fall.
Leaf rollers
Cause: The caterpillars of moths.
Symptoms: The leaves and blossoms are eaten and rolled with spindle. The fruits are also eaten.
Prevention: Attract natural enemies (see worminess).
Button mortality or ‘capers’
Cause: Apple blossom beetle.
Symptoms: Drying flower buds that no longer open and turn brown.
Prevention: Is generally not necessary. The attack leads to a natural fruit thinning that is sometimes even desirable.
Apple blood louse
Cause: The mealybug Eriosoma lanigerum.
Symptoms: White, woolly colonies cause suction damage and bile formation on the branches.
Prevention: Natural control by parasitic wasps is usually sufficient, no action is required.
Greetz from the Netherlands and the best wishes for next jear.
How do you collect the resin?
walk in the woods
Lovely.
I use it with some smashed herbi dung to get the Nitrogen in, gets harder and stronger.
Can I use these pics to illustrate a paragraph I am writing on it?
If so, please revert the name of person to be credited.
Cheers.
Douglas de Toledo Bozza.
is this safe to use on cooking or drinkware products? I have a ram’s horn mug and the bottom got a crack in it. not sure what glue to use to repair it. the horn is black where the crack is.