For thousands of years, candles were the main source of illumination for people all over the world. Knowing how to make candles was considered to be common knowledge. People would set aside a day to render fat to make the candles they would need for the coming year.
At the turn of the 20th century, everything changed. A new machine made it possible to create over a thousand candles an hour— making it easier and more affordable than ever to simply buy candles instead.
Around this same time, electricity was becoming more common, and the artful tradition of making candles for the year ahead would soon be forgotten. Now, this once common skill is almost gone. As a result, many people today would feel lost in the dark without modern light sources.
Modern Candle-Making
Luckily, candle-making isn’t completely dead. Some people make candles as an artistic hobby using materials like soy, paraffin, or beeswax. In fact, it can be hard to find candle-making tutorials online that don’t use these substances.
While these waxes do have their advantages—they will likely become expensive and hard to find in the event of a widespread long-term blackout. For this reason, it’s wise to know how to make candles using readily available materials and tried-and-true methods.
By following the same methods that were practiced by our ancestors for thousands of years, we can be more than prepared for when the lights go out.
Related: 7 DIY Projects To Have Ready When The Lights Go Out
How to Make DIY Emergency Tallow Candles
Although tallow candles were available at various shops throughout the centuries, most families preferred to make their own. Tallow, or suet, is made of rendered beef or sheep fat but other animal fats were sometimes added if not enough tallow was available.
It’s important to note that pig fat is the exception to the rule as it doesn’t render the right texture to make a good hand-dipped candle. If you need to use lard for your candles, be sure to have plenty of other fats in the mix or opt for a container candle instead.
You can save and freeze fat collected overtime to make the candles you need. Additionally, some butchers are more than happy to sell or give away beef fat to customers who ask in advance.
Types of Tallow Candles
There are two kinds of tallow candles: hand-dipped and container candles. Hand-dipped candles are the most traditional candle-making method. However, depending on the quality of the fat used to make the tallow, they can take longer to harden.
Related: How To Make a Bacon Grease Survival Candle
This type of candle is created by twisting a cotton string into a wick and dipping it repeatedly into the tallow until a candlestick forms to the desired thickness. Container candles are made by pouring rendered tallow around a formed wick inside of a jar or other vessel.
For both candle styles, you will need:
- A crockpot, heavy-bottom pot, stockpot, or a double boiler. Plus, a second pot for filtering and collecting the finished tallow.
- A colander or funnel.
- A low-heat source.
- 1 – 3 lbs. (0.4kg – 1.3kg) beef fat cut into small chunks with most of the meat and gristle removed.
- Prepared wick or braided/twisted cotton string. (Use thicker wicks for larger candles and thinner wicks for smaller candles.)
- Glass containers such as mason jars or reclaimed tin cans (if making container candles)
- Cheesecloth or similar material
- Herbs or oils to improve scent or as a natural insect repellent. (optional)
Rendering Fat
While rendering fat might be the most time-consuming step when making DIY tallow emergency candles, it’s also a very rewarding experience.
There are two popular rendering methods: wet rendering and dry rendering. Wet rendering is when you add water to your fat while in the pot, and dry rendering uses no water.
Wet rendering is most often used when a crockpot or slow cooker isn’t an option as it helps to prevent burning and cuts down on any lingering “beefy” smell in the finished candle.
Dry rendering is ideal for rendering tallow that will be used for cooking as it is more flavorful, but since we’re making candles, the method of preparation is completely up to you.
How to Render Fat
1. Place your fat in a large pot on low heat. (If wet rendering, add water until fat is almost submerged)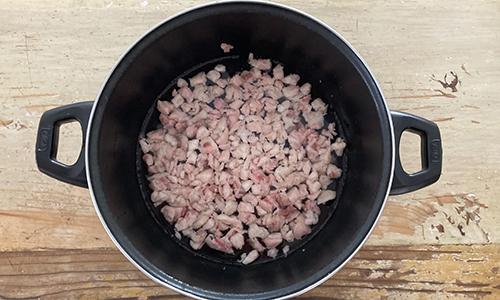
2. Allow the fat to simmer for 3-6 hours and stir with a wooden spoon every 5-10 minutes or so to prevent burning.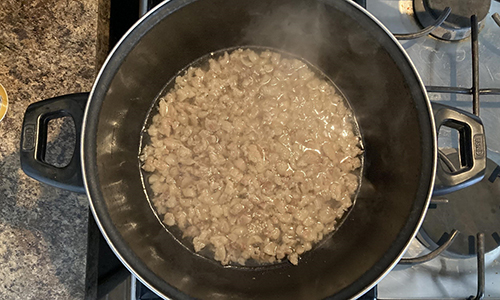
3. Your tallow is finished when the water is almost gone and a layer of glossy liquid fat pools around the remaining pieces.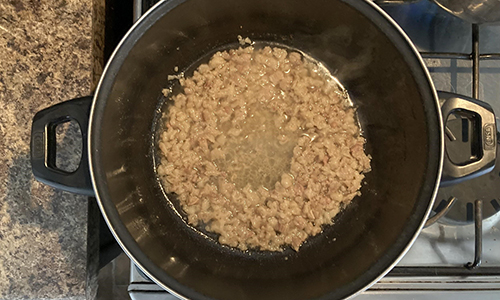
4. Turn off the heat and allow the mixture to cool for about 20 minutes.
5. Line your colander or funnel with cheesecloth and place a second pot beneath it.
6. Pour the liquid tallow and remaining fat pieces through the cheesecloth and gently push down with a wooden spoon to collect as much as possible.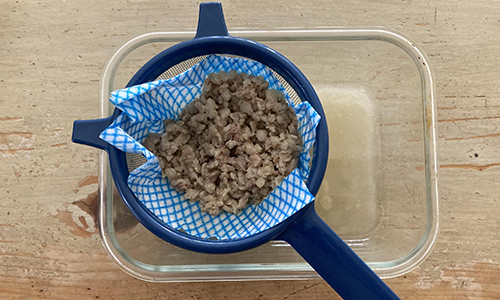
7. Reserve the fat pieces for frying cracklins, if desired. (Hint: you can reserve the excess fat from the cracklins and add it back to your liquid tallow reserve!)
8. Place the pot of strained liquid in the fridge overnight or until the tallow solidifies and rises to the top.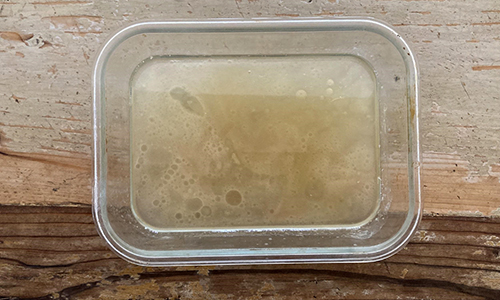
9. Remove the solidified tallow from the top and insert it into a storage container, if desired. Then, get ready to make some DIY emergency tallow candles!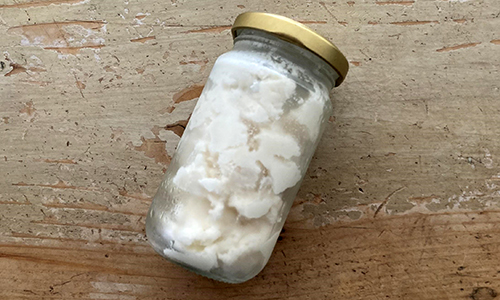
Making Your DIY Tallow Emergency Candles
Working in batches if necessary, you’ll begin by melting the pieces of tallow in a double boiler. If you don’t have a double boiler, you can rig up a DIY version instead.
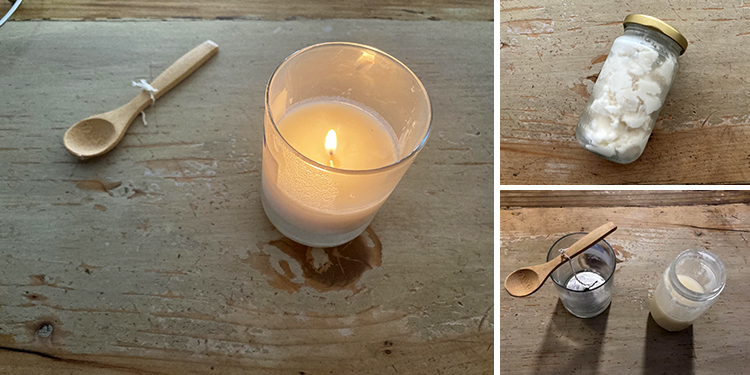
To do this, place a small pot into a larger pot that is half-filled with water. You can also use an empty tin can or mason jar placed into a half-filled pot of water. I used a mason jar since my tallow was already stored inside.
Whether you choose to make hand-dipped or container candles, the preparation is the same.
Follow these steps to prepare your finished tallow for candle making:
1. Break your tallow into chunks.
2. Place the chunks into the top part of your double boiler.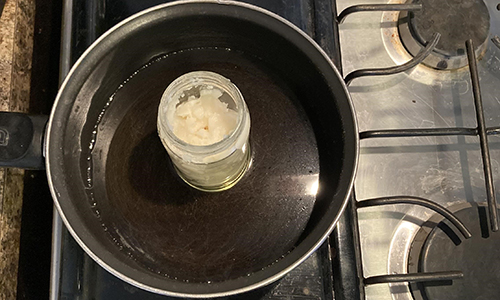
3. Heat the water below until the tallow melts.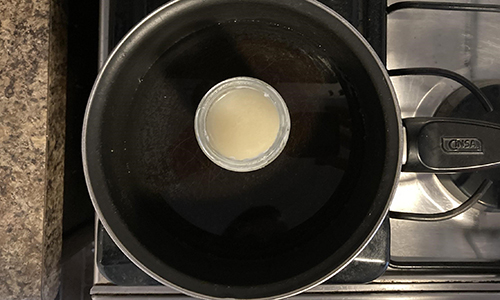
4. Once the tallow is completely melted, turn off the heat and allow it to cool for a few minutes.
5. While the tallow is cooling, prepare your wicks and containers.
6. Optional: Add herbs and oils to the melted tallow.
For Container Candles:
1. Set out your open containers.
2. Place your twisted cotton wick at the bottom center of your container. You can keep it in place by using weights, paperclips, or pencils.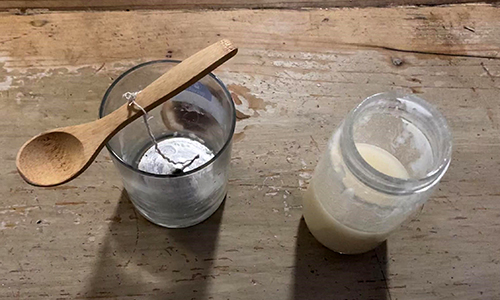
3. Once the tallow is cooled slightly, pour it into the container around the wick.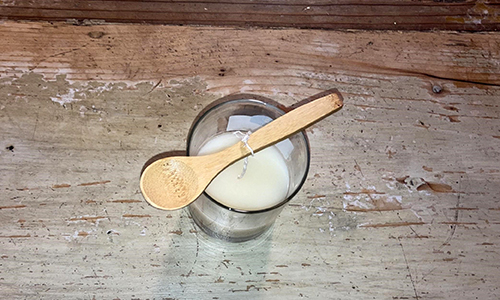
4. Allow the wax to harden and trim the wick if necessary.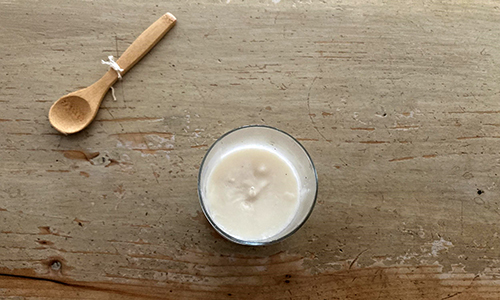
5. Your DIY tallow candle is ready to use!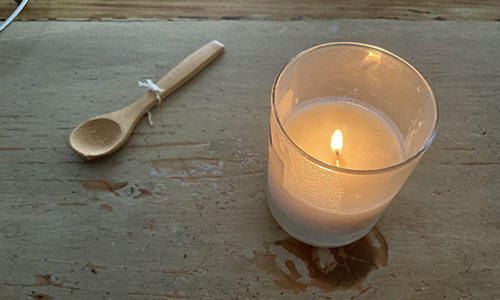
6. Repeat to make more candles.
Note: Be sure the tallow is still melted before starting a new batch.
For Hand-Dipped Taper Candles:
1. Optional: Prepare a cool water bath in a pot or other deep container then set aside. This will speed up the process so you won’t have to wait for the candles to dry between dippings.
2. Hand-dipped candles allow you to make two candles at a time. Cut your cotton wick using twice the length you want your candles to be, plus a little extra to hold onto in the middle.
Related: How To Make 30 Hours Survival Candles with Soy Wax
3. Hint: On each end of the wick, you may attach a weight of some kind to make the dipping process easier.
4. Wrap the center of the wick length over your middle and ring fingers. Allow the ends to hang down evenly on either side. You can also use a pencil, stick, or anything else you have on hand.
5. Slowly dip both lengths of the wick into the melted tallow making sure the wicks aren’t touching. If you didn’t attach a weight to the ends, the wick might float the first few times you dip them. This is normal.
6. Gently lift the wicks from the tallow and allow them to cool for a few minutes. (You may dip them in the cool water bath to speed up the drying process)
7. Once dried, dip them again. Repeat until your candles are as thick as you want them.
8. Hang them to dry over a hanger, drying rack, or clothesline.
9. Optional: You can roll the candles between your hands before hanging them if you want a more even burn.
10. Cut the wick in half to separate the two candles and trim them to the desired length before burning.
11. Repeat to make more candles.
Storing and Caring For Your DIY Tallow Emergency Candles
In earlier times, people would store their tallow candles in root cellars or hang them up in a cool spot away from direct sunlight. This helped to prevent them from melting or going rancid. Keeping your candles upright in a cool spot is your best bet for long-term storage. Properly stored tallow candles can last for 2-3 years.
Although tallow candles are notoriously slow-burning, the total burn time varies depending on the length and thickness of your tallow candles. A small container candle will burn more slowly but give off less light. Likewise, taper candles will produce more light but burn at a quicker pace. With this consideration in mind, you can expect an average burn time of several hours with either method.
Either of these high-quality, slow-burning candle styles will provide hours of bright, even light. Best of all, you’ll be keeping the tradition alive with an art that has been practiced for generations.
You may also like:
 10 Survival DIY Projects You Can Start on Your Property Right Now
The Forgotten Shelf Stable Food You Need for Healthy and Vital Fats (Video)







lengthy process but this article at least covers the topic entirely and you should have good success with it.
Most informative article. Would be interesting to take it one step further as I am sure there are different burn times and light lumens for the different types of candles as well as extra benefits of incorporating multiple and/or different size wicks. i for one, would not add any scent herbal or otherwise, nor would i add anything combustible whatsoever no matter how pretty it might look to the candle itself. Don’t think any of it in a candle format or delivered by smoke is actually good for the lungs
i like the ambiance of candles, i don’t like scented candles. this sounds up my alley but wonder if scent will suppress hunger or make me hungry. at least the aroma of food would be pleasant
I live in a very hot country Cyprus in the summer it could go to 45 f and I don’t have a very cool place to put candle can I put anything in to make it harder
you don’t own a refrigerator ? how ’bout overnight, is it still hot ? running river ?
hopefully someone with the know-how will chime in. giving you a Like still because there’s never stupid questions.
Maria: We live in Arizona, same problem here. The grease can be saved to use in old-style lamps like you see in pictures about Jesus’ day. niio/Walk in His beauty
In Cyprus you may be better off looking at olive oil as you oil source and using the ancient style of dish and wick. The idea of tallow candles is not going to be practical for every climate or region and this applies to every prepping idea and article. Some things are useful to know but not something that will be useful to use universally. Tallow melts here over summer or goes quite soft so I would only make container candles, not dipped but since I also have access to olive trees I would more likely use that for my light source if needed.
Christine, good advice. One thing we need to be leery of is moisture than can form in the tallow. Because we like chicharrons the grease will have moisture trapped in it. cleaning old grease by boiling with water, the same. It explodes. Not usually more than a small pop, but it can spatter hot grease and fire in a room. Any grease rendered by boiling, even if the fat is then fried, has to be rendered again as a safety precaution. We save all old grease in juice jugs; those are acid resistant. Because of Arizona heat, we’re more likely to make oil lamps than tapers. do not use good Mason jars! The fire will cause small cracks and they cannot be used for canning. niio
my daughter and I made a bacon grease candle one time. smelled awesome when when we burned it. We didn’t really plan it out well so we didn’t weight the wick and it went sideways and went out. We need to try that one again and try to refine it. Save your bacon grease and give it a try!
I think of my bacon grease as tasty gold lol. I use it to cook eggs and fried potatoes, cabbage, homemade refried beans and even wilted greens from the garden. I also use it for making the delicious bottom crust of cornbread in my cast iron skillet. As a kid, we were poor so my mom would add a dollop to green beans.
OMG: There was a time fat from smoked meat cost more than good butter. Good stuff. My doctors seem to be going bald because the LDL cholesterol is low-good, but i follow the old saying if it ain’t deep-fried, is it food? niio
I used to work at a candle factory, so I can tell you that if you cool your hand dipped tapers by dunking them in water, you are going to have to be very sure they are thoroughly dry before you dunk them in the wax again. As Red pointed out, any water droplets in the wax will super heat and explode – think of a drop of water going in a pan of hot fat for frying. It sizzles, spits and spatters hot stuff anywhere. Tallow is just fat, so you can get really badly burnt by it.
You can save old candle ends and melt them down to make a new candle. Crayons can be added for color or can be used for decoration.
Wicks should be weighted and dipped in melted wax several times and hung to dry straight. This will improve the burn, and if you are making jar candles just put the weighted end into a PREHEATED jar and pour carefully – you don’t want any bubbles.
Pouring hot fat or wax into a cool or cold jar will crack the glass, as will using a glass container that is too thin. Use sturdy, thick jars like used canning jars, old jelly glasses. Old tin cans with smooth (not ribbed) sides or paper cups make good removable molds for candles, too. They can be dipped in hot water if you need help getting the wax out.
The wax will shrink as it cools, especially around the wick – reserve some of your wax to “cap” your candles when they have fully cooled down. Don’t fill containers for either type of candle all the way to the top – leave about 1/2 inch for small containers and 1-2 inches in large jars or molds. This will keep melted wax from spilling over.
Most commercial wax is either petroleum based or nowadays soy. Finding it at hobby stores may be difficult or expensive, what with shortages.
Fat of any kind will burn with a wick stuck in it, even a can of used cooking oil can be used as emergency lighting.
Check out “rush lights”, too. These were cheap lights made by soaking a piece of dried rush in the fat putting it in a special holder and lighting it. They smoke a lot and drip fat, but they’re cheap and easy to make. Google it for more directions.
Quite possibly the most informative comment I’ve ever read on a How-to article ever. (It actually ties with the one on a video about making a rocket stove — use fire bricks because despite the name, cinder blocks can become explosive shrapnel.)
Thank you for the very informative comment on a very informative article!
This is putting my life experience to good use – glad you found it helpful.?
Miz Kitty. braided wicks burn better with a stronger light.
We used to make magic mountain candles for a store up in the Poconos. they can be as tall as 4 feet. Easy to make, but time consuming. Start with a taper as tall as you want the candle. It will need a few extra inches of wick. Freeze it! Put it in a plastic lined box and start to pour wax over it. Different colors, different scents. Honey can be added if you like the scent. Vanilla, cinnamon oil and so on. The taper, if for a volcano, should be red with some cooking oil added to make it melt. Each new layer has to be cooled. But, by the time it’s done, it looks like a mountain. they were popular at Christmas. Candle making is a good way for a prepper to earn some money. Arizona, oil lamps are easy to make from adobe if people like that biblical lamp look. niio
Red:
Yes, they do. You can do a three strand braid, a two strand twist or single crochet strand to the width you need. The candle making article I sent the link to goes into all of that, but you’d need to use cotton. Kitchen twine is good for that.
Someone yesterday was also asking about treating the wicks. There are a couple of different things you can use, including salt, alum and vinegar, but anyone who wants to do that should make your couple using different treatments and see which one is best for them.
Those magic mountain candles sound really cool! And a fun project if you can’t find them for sale. The description reminds me of the color drip candles they used to sell, that had different colors of wax and dripped down the candle holder in a colorful cascade. Those are best to use with old wine bottles as they are quite messy to clean off “good” candle holders.
Claude should run an article on home crafts preppers can make to sell or trade – that would be a fun discussion!
Earlier I reported on my experiments with oil lamps using a variety of different oils. Oil lamps smoke as they burn. I don’t know if tallow candles smoke as they burn. It may be a matter of how thick the wick is. I used the neck and sleeve hems of 100% cotton tee shirts as my wicks for my vegetable oil lamps. They smiled pretty heavily. I would only want to use them indoors in an emergency. I do remember that bee’s was was the preferred substance for superior candles.
An article I read on line laid the blame for a whole variety of lung disorders on the use of oil lamps in third world countries where apparently they are still frequently used, in some cases every evening. They are especially pernicious for babies and young children.
I would suspect that one could use tallow in a tuna fish can as I did and with a candle sized wick they might not smoke so much. There is a chemical one can put on wicks that makes them burn more easily. I don’t remember if my recollection that it is a potassium solution allowed to dry before dipping is a correct recollection or not. Perhaps someone with a clearer recollection can chime in with the correct chemical solution.
I use newspaper strips soaked in used vegetable oil as a fire starter for fires outdoors. It smokes some but is a sure fire (pun intended) way of starting a fire as a foot-long, one-inch wife strip of newsprint soaked in used (or new) vegetable oil will burn long enough to even set waterlogged kindling afire
I’ve used oil lamps using various types of oil and the smoking can be minimized by keeping your wick properly trimmed.
The experiments I did were very crude tuna fish cans packed with cardboard with the hem of a 100% cotton tee shirt sticking up for a wick. I wanted to replicate what might be a typical oil lamp after a civilization collapse. I wanted to see if there was any appreciable difference in how long each oil burned, how cleanly each oil burned and how easy it was to ignite the oil. All five or six oils burned roughly similarly. There was no measurement taken as to the exact amount of oil used nor any measurement as to the amount of lumens produced. I burned them all on the back patio and all the oils lasted all day with oil left over when I extinguished them at the end of the day.
I only used the cheapest oils I could find. I did use a cheap grade of olive oil — no cold pressed extra virgin oil for my lamps. I used canola oil”vegetable” oil vegetable not defined. Corn oil and one or two more oils that I can’t recollect. It was very early in my joining this list, so probably five or more years back in the archives.
….The experiments I did were very crude tuna fish cans packed with cardboard with the hem of a 100% cotton tee shirt sticking up for a wick….
We used to make something similar but the cardboard was rolled around really tight, inserted into the tuna tin and cut off flush with the top. Wax, fat or olive oil was poured into the tin to the rim and topped up as needed until the cardboard wouldn’t soak up anymore then allowed to set. The cardboard was the wick and when lit the whole top of the tuna can became the flame which we then cooked on either with a trivet or we predrilled holes around the rim for air. Big candle or a cook top. Fun times. My parents never worried I would start a fire or get burned, expecting me to have “common sense”.
LCC: Rule of thumb is, the longer the flame (excess wick) the more it smokes. niio
Perhaps it would be informative if I related one of my early learning experiences relating to candles in a tin can.
I wasn’t old enough to drive yet, so was in my early teens. My father owned 16 acres just outside Chadds Ford in PA before it became the focal point for the artsy-fartsy set of Southeastern PA.
I wanted to hunt pheasant on the property, so built myself a shelter out of bricks and scrap lumber. It was sometime in Nov or Dec, so fairly chilly at night. I had read about using a candle to warm tents and such and decided to make a candle that would last all night. I probably used a Campbell’s soup can to hold the wax that I melted down. This many years later I don’t remember what I used for a wick but suspect that it was the wick from a partially used candle and I suspect I used the wax part as part of the wax in the can. My father drove me out on Friday night and was to pick me up Sunday afternoon.
I settled down in the early evening. I on my cot and my Weimaraner on the grass in the hut. A few hours after I had settled in the melted wax in the can caught fire. The flames just extended to the top of the can, so I didn’t worry. A couple hours later the wax in the can started making noises that sounded like rapidly boiling water. Shortly after that the boiling wax started exploding out of the can. Flames shot up toward the old wooden ceiling of my hut. That was alarming to both me and my dog who joined me on the cot. I searched around hastily for something to put over the mouth of the can as flames continued to explode out. Finding nothing suitable I decided to blow out the fire. Bad decision. As I leaned over the can and expelled the biggest gust of breath that I could muster, the molten wax again exploded out of the mouth of the can. I jerked to one side but not quickly enough. The molten wax hit and stuck to the left side of my face.
I realized at that instant that I had not planned for some kind of painful episode and had zero first aid supplies. What to do. I peeled the now hardened wax off my face and took some toilet paper and soaked it in very cold tea and applied the toilet paper compress to the stinging part of my face. The almost ice cold tea felt very good on my burn and soon took the sting out of it.
The dog refused to vacate the cot and so we slept together and I was warm from the contact and didn’t need the warmth from the candle which remained out for the rest of the night.
The next day my right eye was glued shut from the serous fluid that had seeped from the burned flesh and dried on my closed eye lid. Nothing to do but soak it with more tea that I made so that I could open my eye enough to see to hunt. I hunted all day Saturday and Sunday morning sharing the cot with my dog Saturday night. Sunday afternoon sometime my father arrived and almost had a heart attack as I greeted him with a mass of green toilet paper stuck to the side of my face. Colored toilet paper was very popular at that time and I had selected a roll of green toilet paper to accompany me on my hunting trip.
When I got home we used more cold tea to get the toilet paper off my face. Monday morning my mother took me to the local doc who said the burn looked remarkably good and opined that the tannin in the tea had probably been the best ad hoc treatment I could have selected under the circumstances. I healed uneventfully and didn’t have any kind of a scar as soon as the redness from the burn faded.
Once again, another lesson from the school of hard knocks which has been my main learning source through life.
Lessons learned: Always have first aid supplies on any expedition no matter how benign it might seem. When messing around with any kind of fire have some means of extinguishing it other than body parts. Toilet paper makes an adequate bandaging material. It is clean ( If unsed) but not sterile. I didn’t get an infection, again due to the antiseptic qualities of the tea. Even today with any dental work where the gum is incised two different oral surgeons have recommended placing a teabag on the incision to inhibit bleeding. A dog sharing one’s sleeping accommodations is better than a candle burning in one’s sleeping quarters.
I had a further experience with a candle in sleeping quarters at USMC Cold Weather Training Battalion, Pickle Meadows, CA some years later. We spent our first night there sleeping in two-man tents in the open field in front of the permanent camp. During the night my tent companion kicked over the candle that we had been instructed to use to keep our tents “warm.” I quickly extinguished the flames but not before a fair sized hole was burned in the flap. Those old WWII shelter halves were most definitely flame resistant. He said, “Gee, you have a hole in your shelter half.”
I responded forcefully, “No, YOU have a hole in YOUR shelter half” and added several perjorative Marine Corps expletives to my statement.
I can’t draw any conclusion about a candle in a can. Subsequent to my adolescent adventure I have on several occasions used votive candles with no untoward adventures. I don’t know whether the thick glass of the candleholder somehow draws away enough heat that keeps the wax from catching fire or the particular size of my home made candle caused the fire. I have no answer or reason for the episode. I can only say that you really should have a snuffing device handy when using candles so that it isn’t necessary to put body parts, especially one’s face on case quick extinguishment becomes imperative.
Hope you have found my lifetime learning experience informative and can avoid experiencing my lesson from the School of Firsthand Experience. It really is a whole lot easier to learn from others than firsthand.
L.C.C.,
That reminded me of a 82nd Airborne wide op we had at Cherry point NC.
Everyone that was Airborne qualified did an annual jump at same time, MASSIVE operation.
I was going to light up the pot bellied stove in the GP Medium so we could get warmed up, one of the guys is like “You putting diesel in there?”
I was like “Nope, JP-8″….
Cleared that tent out in record time lol.
I remember those kerosene burning stoves well. We had them in the tents at Tent Camp Two, Camp San Onofre on USMCB J. H. Pendleton. We also had a similar but slightly nicer kerosene stove in our Quonset hut on Okinawa. Can’t remember what we had in our Quonset hut at Iwakuni. I think base camp maintenance serviced it. I don’t remember anyone going for fuel. Of course that was 64 years ago and some of those old recollections are faded like old photographs.
That reminds me of Army basic training at Ft. Dix, NJ in December 1969. There were coal-burning stoves in the middle of the warming huts (well below freezing that day). Those of us who knew what we were doing started out small, with paper and small sticks, going up to larger sticks, so we would get of good, hot fire going before adding some coal. A couple of the city boys, annoyed that we were taking so long, pushed us out of the way and dumped a large load of coal on the fire, smothering it. They thought it was like a gas burner, where you just had to turn it on high to get max heat. We froze the rest of the day. Later that night, they “tripped” and fell down the barracks stairs.
evil genius / mad scientist
i Like Your Madness HAHAHAHAHAHAHAHAHAHAHAHA
The thing about olive oil it doesn’t catch fire without a wick, hence my preference for it over other oils. If you spill it or knock it over, the lit wick is the only thing to catch other stuff alight if it isn’t extinguished by the jolt. This is what makes EVOO so good for a lighting fuel.
Ginny: Good to know, thank you. The dog decided to wrestle with the olive tree (still a whip) and pulled it out of the ground. When I found it, I yelled, who was bad! Did you do this? He avoided that part of the yard for a few weeks. niio
Here’s a link to another article on making tallow candles. I found it very good.
http://www.sewhistorically.com/how-to-make-tallow-candles/
Fire a useful servant but can become a Terrible Destroying Master. You can look to any of the many recent wildfires that destroyed so many lives in 2020.
Or you can read the local news of people driven out of their homes, losing much sometimes the lives of loved ones and pets. Often enough children or pets accidently started the fire, knocking over a candle or oil lamp.
A scary thought folks. AFTER SHTF, NO Fire Department, No EMS, No Police, No Red Cross style charities to assist you when you’re looking at the smoldering wreck of your home (AND all the Preps IN IT).
A tallow candle is an interesting thing. A tallow oil lamp even more interesting, BOTH can become INTERESTING as in Chinese Curse. Very little light, Smokey, hard on eyes and lungs as history would tell you.
Left Coast Chuck’s story says it pretty well, see above and think what if YOUR home is grid down SHTF and you’re doing the Tallow Candle thing. If something caused it to become an ignition source for your home, WHAT COULD YOU DO?
What’s that song about Mrs. O’Leary’s Cow knocked over the oil lamp? OH YES, “The Night Chicago DIED”.
Time and money are often interchangeable. For the time needed to do this Tallow Candle thing you could work a shift at Mc Dees and BUY a decent quality Solar Rechargeable Camping Lamp today.
PLEASE don’t buy dollar store 1 buck solar lights, OK? They fail almost as fast as your homemade tallow candle burns up.
Better light, reusable for years or if your careful decades (like my bedside solar lamp) no realistic fire hazard. Just saying.
Look up the MANY Uses for Tallow. Cooking Oil is the Hardest thing to acquire after SHTF shuts down the grid powered cooking oil plants.
Look up Luci inflatable solar lantern on line. They are like blowing up a beach ball. Deflated they fold quite flat and would be suitable as area lights for your bugout bag. They are medium priced between $20 and $26.00. They are very light and I think they would be practically indestructible except because they are plastic don’t get them close to erupting candles.
What I like about them is the manufacturer is using profits from the business ( after paying his salary and business expenses) to furnish the lights to villages in Africa that don’t have electricity. Sort of a don’t curse the darkness, light a match effort.
I do have one caveat. I tried blowing them up to use while packing when we were evacuating for the Thomas Fire that swept through our town four years ago last month.
blowing them up the first time I is a laborious effort best undertaken when one is not rushed for time in an emergency situation. Once again I had a life learning experience as after wasting more time than I wanted to waste I abandon the effort to blow them up and dig out my headlamps which was quicker and worked well in the situation in which we found ourselves.
Lesson learned: For packing up at oh dark thirty in an unanticipated emergency evacuation of one’s domicile headlamps that have both a white and a red light are much preferred over blow-up lamps that one has not previously worked through the steps necessary to achieve full erection of said solar blow-up lamps. Upon returning home after the all-clear I purchased a battery operated area lantern that merely requires the depression of a button to achieve area lighting that facilitates packing clothing and gathering other essentials necessary for bugging out in a critical situation.
Again, it is easier to learn from another’s mistakes than to have to learn from one’s own learning experience. Headlamps are really the best source of light if each member of the crew has their own headlamp. Each evacuee can go room to room with their own light source, switching to red light when meeting together so as not to blind each other with a high lumen white light.
An area light is ideal in the assembly area so that each is able to visualize all the cargo that is to be loaded in the escape vehicle and, perhaps, point out overlooked parcels to the one loading.
The Luci lights are fine for lighting at a stationary base or for traveling in a semi emergency situation. One days charge is said to provide 24 hours of light. They are not bright enough to do delicate surgery or electronics assembly but serve well as a g.p. area light. They are bright enough to read by if one is sitting close. They are not as bright as two 40 watt 4/foot fluorescent lamps
It looks very cool. Thanks for the excellent advice. I want this candle for my spa. During its production, essential oils can be added there, which will give a pleasant and relaxing smell.
It’s good that everything seemed to work out. However, when things like this happen, it becomes horrifying. Why can’t we live together and not harm each other? For example, I like to visit the Versalini spa for relaxation. After reasonable procedures, I am always peaceful. Perhaps everyone needs to register visits to spa salons at the legislative level?)
I render the fat from ground beef that I’m pre-cooking and use that for a variety of things. I usually boil 2x after that to purify it.