As a homesteader, I find joy in being self-sufficient and growing my own produce in a small garden. While I may not have truckloads of produce, I believe in sharing the easiest and less complicated methods to cultivate salad greens, tubers, fruits, and vegetables.
One of my favorite shortcuts to avoid backbreaking tasks is building a potato tower to grow regular potatoes. In this guide, I’ll provide technical instructions on how to construct and benefit from a potato tower on your homestead.
What Is a Potato Tower?
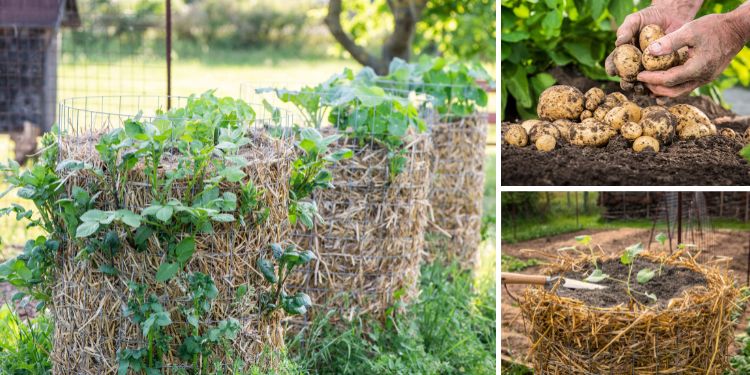
A potato tower is a creative and space-efficient gardening method used to grow potatoes. It involves constructing a vertical structure, typically using chicken mesh or similar materials, and filling it with a mixture of compost and organic manure.
Potato cuttings or seed potatoes are planted within the tower, allowing the plants to grow upward instead of spreading across the ground.

This ingenious approach maximizes growing space, facilitates easy harvesting, and provides better air circulation and drainage for healthier plants.
The potato tower is a popular choice for home gardeners and homesteaders looking to produce a bountiful harvest of nutritious potatoes in a small footprint.
Pests and Diseases
Potatoes can attract certain pests like potato beetles, aphids, and wireworms.
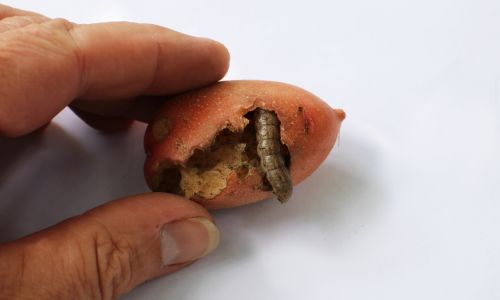
To mitigate infestations, practice companion planting with pest-repelling herbs like mint or lavender. You can find here high-quality, NON-GMO seeds packaged in US.
Regularly inspect the plants for signs of pests and apply organic pest control measures as needed.
Potatoes can also be vulnerable to fungal diseases such as late blight and black scurf. Ensure good air circulation around the plants and avoid overwatering to prevent these issues. Additionally, practice crop rotation to reduce disease buildup in the soil.
Building the Potato Tower
It was super easy to build my potato tower. The materials are cheap or maybe you already have them in your homestead and there are only a few instructions to follow.
1. Gather your materials
You’ll need wire mesh or hardware cloth, straw or hay, compost or soil, potato cuttings or seed potatoes, zip ties or wire, and stakes (optional for additional support).
2. Create the Cylinder
Cut a section of wire mesh or hardware cloth to the desired height and length. The length should be enough to form a cylinder with a diameter of about 2-3 feet.
Related: DIY Projects to Hide Your Survival Plants in Plain Sight
Shape the wire mesh into a cylinder and secure the ends together using zip ties or wire.
3. Position the Tower and Add a Base Layer
Choose a sunny spot in your garden for the tower and place the wire mesh cylinder upright on the ground.
Lay a thick layer of straw or hay at the bottom of the tower. This helps with drainage and provides a loose medium for potato roots to grow through.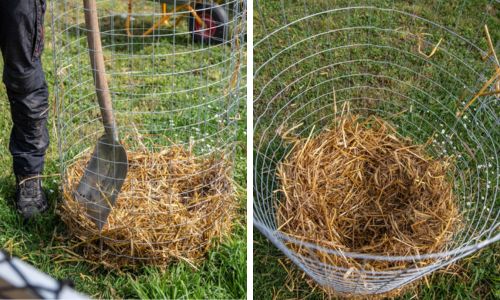
4. Add Soil and Potatoes
Add a layer of compost or soil on top of the straw, about 4-6 inches deep. Place your potato cuttings or seed potatoes on the soil layer, spacing them evenly around the edge of the tower.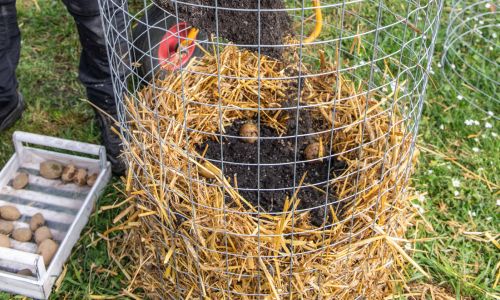
5. Repeat the Layers
Cover the potatoes with another layer of straw, then add another layer of soil. Continue layering straw and soil, adding more potato cuttings at intervals, until you reach the top of the tower. Ensure each potato layer is covered with soil.
6. Water the Potato Tower
Water the tower thoroughly after planting to help settle the soil and start the growing process. Keep the tower consistently moist but not waterlogged.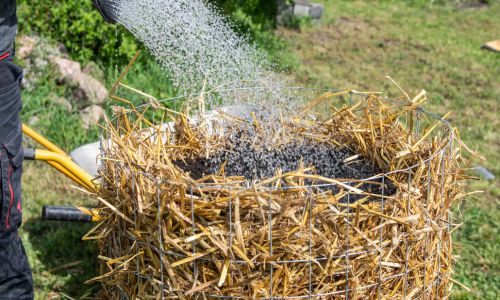
As the potato plants grow, they will emerge from the sides of the tower. Keep adding straw and soil as needed to cover the growing stems, which encourages more tubers to form.
7. Plant the Final Layer of Potato Cuttings
Once the tower is filled to the top with the alternating layers of straw and soil, plant a final layer of potato cuttings on the surface. Space them evenly to ensure good growth.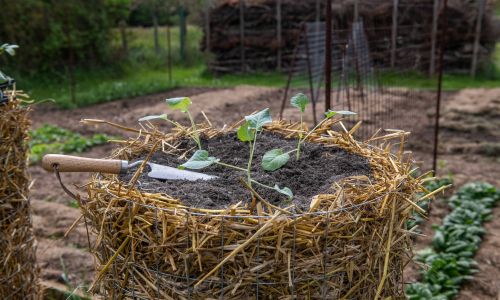
8. Harvesting
Once the plants have flowered and begun to die back, it’s time to harvest. Simply dismantle the tower by removing the wire mesh, and collect your potatoes from the layers of soil and straw.
Other Methods to Grow Potatoes
Potatoes are a versatile and nutritious staple in many diets, making them a popular choice for home gardeners and homesteaders.
While traditional methods of growing potatoes in the ground can be effective, there are several ingenious techniques that have emerged to maximize space, improve yields, and make cultivation more accessible.
⇒ This Is the No #1 Enemy of Potatoes
Among these innovative approaches, the potato tower stands out as an excellent and practical solution. Let’s explore some of the ingenious methods and why the potato tower takes the lead.
Traditional In-Ground Planting
The most common method of growing potatoes involves planting them directly in the ground.
While this approach works well for many gardeners, it requires ample space and can be labor-intensive during harvesting.
However, it remains a reliable option for those with enough land and the willingness to put in the effort.
Raised Bed Potato Gardening
Raised beds are another ingenious way to grow potatoes. By elevating the planting area, gardeners can improve soil drainage and create a controlled environment for the tubers.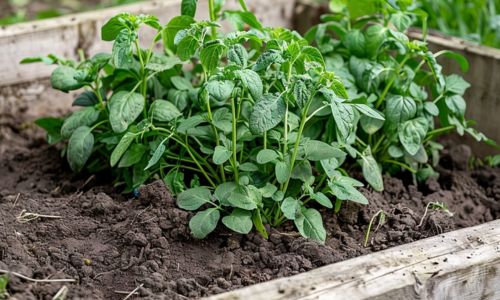
Raised beds also help prevent soil compaction, making it easier for the potatoes to develop without obstruction.
Straw Bale Potato Gardening
Straw bale gardening is a unique technique where potatoes are planted directly into decomposing straw bales.
As the straw breaks down, it provides a nutrient-rich environment for the tubers to grow. This method reduces the need for digging and promotes good aeration for the roots.
Potato Grow Bags or Containers
Potato grow bags and containers have gained popularity for their adaptability in various settings, including small gardens, balconies, and patios.
Related: How to Grow Potatoes in Shopping Bags for an Extended Harvest
These bags allow for easy mobility, better soil aeration, and effective drainage. However, the limited soil volume in containers can sometimes lead to smaller yields compared to other methods.
Hilled Rows
Hilling is a traditional practice where soil is mounded around the potato plants as they grow. This encourages the development of additional tubers along the buried stems.
While hilling can be effective, it requires regular maintenance and can become cumbersome for larger potato plots.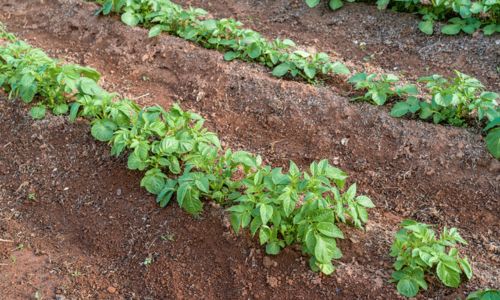
Why the Potato Tower Stands Out
Among these ingenious methods, the potato tower offers several distinct advantages that make it the best choice for many gardeners and homesteaders:
Space Efficiency: The potato tower maximizes vertical space, making it suitable for gardens with limited land or for those who want to grow potatoes on patios and balconies. It allows for significant potato production in a small footprint.
Easy Harvesting: Harvesting potatoes from a tower is remarkably simple. Instead of digging into the ground, you can lift the tower or remove sections to access the tubers easily, saving time and effort.
Improved Air Circulation: The tower design promotes better air circulation around the plants, reducing the risk of fungal diseases and creating a healthier growing environment.
Effective Drainage: The structure of the potato tower ensures proper drainage, preventing waterlogged soil and minimizing the risk of root rot.
Cost-Effective: Building a potato tower can be done using affordable and readily available materials like chicken mesh, making it a budget-friendly gardening solution.
As a homesteader, I’ve found the potato tower to be a valuable addition to my garden. A potato tower is an excellent solution for homesteaders seeking a space-efficient and productive gardening method. While they may face some pests and diseases, vigilant monitoring and natural pest control measures can help ensure a successful and rewarding harvest.
This article first appeared here.
You may also like:
 7 Things That You Should Never Do After an EMP
How to Build a Hidden Food Growing Fence in Your Backyard (Video)
Never Throw Away Your Wood Ash! Do This Instead



i wonder if this method of tower potatos would work with sweet potatos.
I see no reason why it wouldn’t. Traditionally, my family used hilling to grow Irish and sweet potatoes, but it has been shown to work with barrels and these tomato cages.
The original article by Carol is about growing sweet potatoes https://selfsufficientprojects.com/diy-potato-tower/
I like making beds out of stuff like this, cheap, pretty easy, and very efficient. We have around a half dozen gust front storms here every spring and summer, 60-80mph straight line winds, so I also have to support everything with t-posts. Be sure to use straw not hay.
When I read “straw or hay” my entire viewpoint of the article’s reliability changed.
I was thinking that, but in a survival situation I reckon we have to use what we have?
Sorry for sounding green, but why straw and not hay?
Critters shy away from straw but nest in hay. Straw is less likely to get moldy.
My father used this same method in a little different way. He used very large black trash bags (the kind you’d use for large amounts of cuttings or leaves). I’m guessing they were 50 gallon bags or so.
The trick with the plastic bag is they are thick enough to stay in place when he would roll them down for the first layer. He started with the straw or hay layer, laid the potatoes, then added soil. Like the tower here, he then would use soil and straw for each additional layer. When one layer started to stem, he would cover that layer with straw and soil. Every week or so (that’s a guess), he would repeat until the bag was about 3 feet high. He probably had 8 or more layers. Also……he cut large (3″?) holes in the side of the bag for aeration and draining. He had amazing yields of potatoes every year. This was in southern California.
Anecdote: When I was a child, living in Pennsylvania, my Italian grandfather loved to grow fig trees, among other things. We had fairly harsh winters with lots of snow. At the start of fall, he would dig a shallow grave the size of the height of the tree. THen he’d put a heavy duty stake in the ground, vertically. He then used strong rope around the middle of the trunk and attached it to the stake. Each day he would pull on the rope a bit to start angling the tree towards the ground. Amazingly, in a few months, he would have that large fig tree on the ground. He then would put a bit of soil over the tree and finish with a large amount of fall leaves. Reverse the process in spring or course. He never lost a fig tree to the cold weather and snow! Amazing!
Aphids. The absolute worst and uncontrollable. NEEM oil is BS
Very nice to see good valuable information instead of the
usual articles.
Three cheers to the author.
This article would be perfect in March/April or May when spring plantying begins