I wanted to share this bean and rice survival soup recipe, because it’s an inexpensive and easy one to prep, store, and make when you’re ready to use it. Once it’s in the jar and stored, you will only need water and heat to have a hearty bowl of soup loaded with carbohydrates and proteins.
A great perk of this recipe is that it’s highly adaptable. You don’t like rice? Simply omit it. Or, you want it spicy and full of robust flavor? Add your choice of seasonings to the jar, which I will get into greater detail further down in the article.
Another way to adapt this recipe is the batch size. The first instructions I am about to share is for a large batch, which makes it appealing to preppers for survival because it makes about 270 meals for under $300. Based on a 2000-calorie per day recommendation, and assuming it’s the only available edible item in sight, it’s approximately 90 days worth of meals for one person.
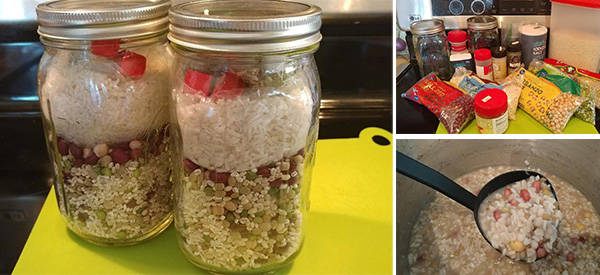
I’m also going to share a much smaller batch that can be made for around $10-15, give or take a couple dollars. The cost will depend on what you add or omit, as well as the cost of groceries in your area. I will be demonstrating the smaller batch in photos.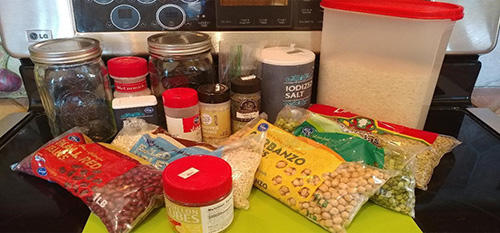 First, the basic recipe for the large batch:
- 4 20-pound bags of white rice
- 22 1-pound bags of red kidney beans
- 22 1-pound bags of barley
- 22 1-pound bags of lentils
- 6 1-pound bags of green split peas
- 6 1-pound bags of chickpeas (Garbanzo beans)
- 30 pounds of dry bouillon (chicken, beef, or vegetable)
- Seasonings of choice (example: garlic, salt, pepper, cumin, oregano, or other dried spices and herbs)
And, the smaller batch recipe:
- 2/3 cup kidney beans
- 2 cup barley
- 1 cup lentils
- 1/4 cup green split peas
- 1/4 cup chickpeas
- 1 1/2 cup rice
- Bouillon (chicken, beef, or vegetable)
- *Seasonings of your choice
This all fits in 2 individual quart jars.
*The seasonings I chose (per quart jar) was 2 bouillon cubes, 1 teaspoon of salt, about 1 tablespoon of dried onions, about 1 tablespoon of dried celery flakes, 1 teaspoon tarragon, 1 teaspoon of black pepper, and 2 teaspoons of garlic powder. For the record, this is a relatively bland batch of seasonings. If you like spice and bold flavor, add more according to your own liking.
Now, that you have an idea what goes in it…what is the best way to store it?
Related: How to Make Portable Soup
Prepping For Storage
The prep is the same for both size batches, and is as follows:
#1. Mix all the beans in a large container.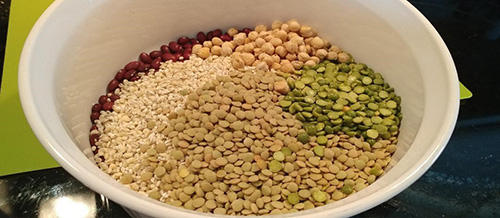 #2. Fill a mason jar just under half way.
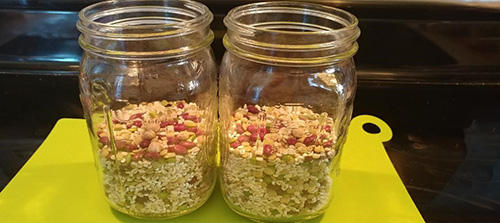 #3. Put 1-1.5 cups of rice in a baggie, then add the bag to the jar, leaving enough room to add a baggie of seasoning. The reason to separate the rice and seasoning is because the beans need to cook much longer than the rice, and this will allow you to add the rice later avoiding mushy rice.
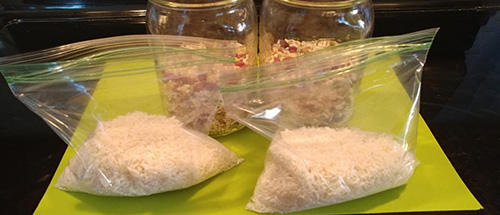 #4. Place the seasonings and bouillon you choose into a little baggie. Separating the spices also allows you to remove expired seasonings and replace them.
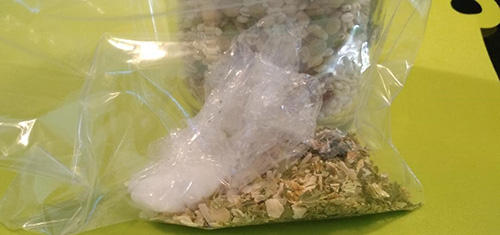
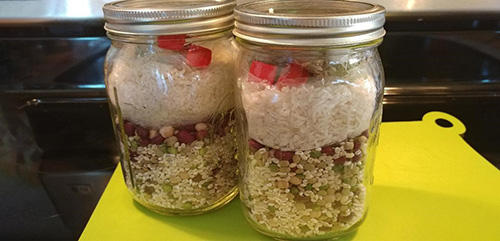 To make an individual pot of soup from this recipe, you will need the ingredients in the jar, and at least 3 quarts of water. Then follow these easy directions:
#1. Pour the water into your pot and place on a heat source.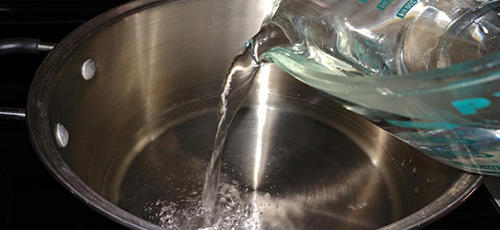 #2. Add the beans to the water.
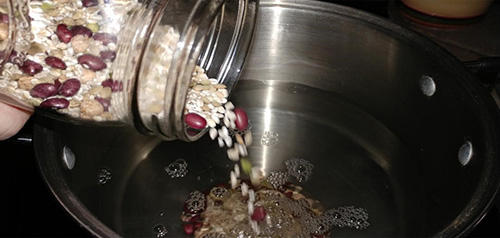 #3. Empty your seasoning packet, a little at a time if you prefer to taste as you go.
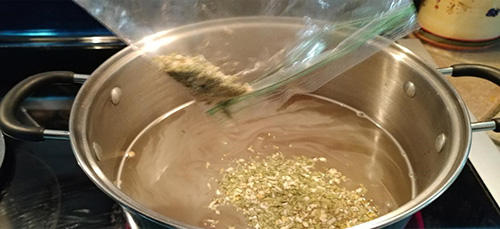 #4. Cover and simmer on a low heat, until the beans are soft, about 1 to 1.5 hours.
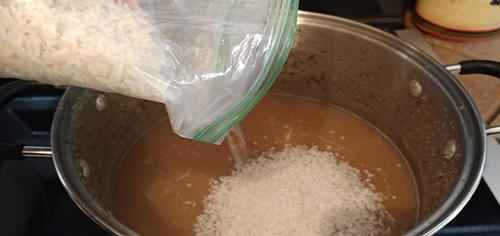
 #5. Then add the rice, and simmer for another 20 minutes, or until done.
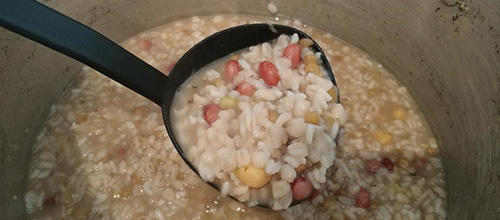
 The finished soup is fairly thick. If you prefer a more brothy soup, add an additional quart of water in the beginning. But, I would then also add more seasonings as well.
Shelf Life of the Ingredients
Keep in mind the shelf life for all ingredients that you add, such as:
- Dried beans – 10 years to indefinitely (depending who you believe)
- White rice – 4-5 years, unless vacuum sealed (then about 10 years)
- Spices – most ground, dried, or whole spices are good for 2-5 years
Related: 20 Foods that Will Outlast You
So, as long as you separating the dried spices from the beans and rice, the above recipes should last a minimum of 2 years, depending on the spice.
However, there is no need to toss the entire batch. After 2-5 years, just change out the seasonings and start over for the expiration date.
If you do not want to store the batches in quart jars, you can also place the batches in quart or gallon size baggies. However, critters can get through bags much easier than glass jars. So, make sure to store the bags of ingredients in an airtight storage bin.
Optional Additions to the Soup
If circumstances allow, you can always add fresh ingredients, such as meat or veggies. Personally, I like a good ham added to bean soup.
But, if you’re in survival mode, that might not be an option. So, having more seasonings in the jar will allow for more flavor to develop, and you might not even miss the meat.
And, even though it will be an abundance of bean and rice soup, altering the seasonings between the batches will give you a bit of variety, which is especially nice if you are truly in a state of survival and don’t have anything else to eat.
However, having batches of this on hand is also great for the temporary survival situations, such as a bad storm knocking your power out for a week or two. One jar, a pot, water, and a source of heat is all you need to eat inexpensively and healthy for a while.
You may also like:
 How To Make Delicious Lard With 2 Years Shelf-Life (+ 5 Tasty Recipes)
Cheap and Easy to Build Root Cellar in Your Own Back Yard (Video)
Pioneer Recipes That Survived The California Trail



Thank you for sharing this information!! Very much appreciated. I will share this site with my friends. Awesome content.
I like the idea. I’ve done this but used the more expensive dehydrated beans. They are cooked and dried in the production plant. DH beans take 10 minutes to rehydrate…same as the rice. Hence a 10 minute meal with the savings in fuel as benefit.
Okay, Farmer, without doing an extensive internet search myself, can you describe dehydrated beans in a little more detail? Brand name would be a good starting point.
For those who would like an unbreakable, lighter weight storage vessel, I like 2-quart mayonnaise jars. They have a wide mouth that I can better get my hand in. They are insect and waterproof and reasonably airtight. If you want to make them moreso, remove the lid liner that comes with the jar and melt an eighth of an inch of paraffin wax into the lid. Let it cool until it is solidified but not hard and screw it down on the jar.
By the way, I am quite fond of mayonnaise in case you hadn’t guessed. I prefer it to butter on sour dough bread.
Chuck…i get mine in bulk from harmonyhousefoods.com. there may be others particularly try Amazon. Like i said…more $$$ but much more convenient.
Thanks, Farmer.
Farmer. the first thing I thought of when I read the dried onions, celery in the seasoning packet was…Harmony House dried vegetable soup mix.
You’re right on that. They also sell a bulk dehydrated vegetable mix. May be the same thing you’re talking about. 1 cup white rice, 1 cup dehydrated beans, 1 cup dehydrated veggies…seasoning of choice…you’ve got a tasty meal.
I think the green beans the recipe calls for, look like split peas in the illustrations. I have looked at several version of this recipe on the internet and they all say green beans, but in fact, the packages are split peas.
Excellent suggestion!
Good link to purchase DH beans. Thanks. Very interesting idea to use DH beans… would really limit the cooking time, and cooking resources might be very limited. I do have a gas stove and can cook with power out, but it won’t last forever. Also have a grill with a side burner, but have never used it so not sure if it would even boil water. And if it is summer the heat of cooking in house would be much more extreme looking at 2 hours of cooking verses maybe 20 minutes using DH beans. Really great Idea.
I grow organic food for me and my dogs and have grown Chinese Noodle Beans for the last six or so years. Just a couple of years ago I found out how good the beans are when you let them dry for dry beans. They are smaller black beans but taste kinda like chicken, no just kidding, they taste a little like black eyed peas.
I have a bunch saved and am going to go ahead and cook them all up, drain and let air dry and put them in my dehydrator. The time up front sounds like a good time investment to save on the back end when you really might it.
Chinese Noodle Beans grow extremely well in the heat, are very long like up to 24″, so a handful is a lot of beans. I put them up and green beans, save some for replanting, and the rest now go to store for dry beans. I got my seeds from rareseeds.com
I like using the Mason Jars but I would probably separate the beans, rice and spices. with varying shelf life it would be a nuisance to have to open your well sealed jar to remove spices, and then again to remove rice. There are the very small glass jars for spices and you can use pint size for beans and rice and have the same pot full and not have to open your beans to replace your spices or rice. I would likely also have some cooked and DH onions, and carrot, and asparagus to add to it, just to name a few. All separated you use what you need to use without having to open your jar.
On that note, my dogs are part of my farm and are also SAR dogs so insuring the food I put up can feed them too is important for me. Minus the onions of course the soup mix of beans rice and veggies would also feed your dog, albeit, not the perfect meal being meatless, but they would survive.
Love these articles that cause us to think things out and work it out for what works best for each person and family. I can’t wait to do my first DH cooked dry beans that I grew.
I grow those beans as well. They go by “asparagus” or “Asian” beans here. In northern MS where it gets hot I have to pick twice, sometimes 3 times a day to keep ahead of them. The seeds keep well for the next year’s planting. They do love the heat!
Dog Trainer, I purchased some “Asian Long Bean” seeds on Etsy a couple of years ago, and they do very well in our hot and dry Southern California – Inland summers as long as I monitor the water. My wife loves them so I will continue to grow them every year from now on. Last year I was browsing seeds on a store display and saw “Asparagus beans” and the picture looks exactly like the long green colored Asian Long Beans, so I bought a pack and will grow some this year to compare. I just searched online for “Chinese Noodle Beans”, and they look like the Asian Long Beans except the Chinese ones are red, but then I scrolled farther, and some were green. Do you have a link that shows the correct Chinese Noodle Beans you are referring to?
You can also choose to cook the beans, rice, and seasonings, then dehydrate the whole shebang if you have a dehydrator and store until needed.
This might also be a good thing to consider if you’re still not sure what kind of spices you want or how much. Make a batch, season it to where you like it, and dehydrate the leftovers.
When you want to rehydrate to eat, add very hot or boiling water for faster rehydration or cooler water and wait a while for things to rehydrate.
When I rehydrate things, I find it takes 3 or 4 parts water to 1 part dehydrated item. I start with 3 parts and check before adding more.
If you can vac seal it or store it with O2 absorbers, it’ll last longer.
O2 absorbers plus vacuum sealing jars helps immensely with regards to shelf life. I intend to utilize this “recipe” to add to my food storage. I have also purchased freeze-dried ingredients to create “meals-in-a-jar” creations that will only require water. I wish I could upload pictures of these. Because of everything being free-dried, the cook time is the same for all ingredients – generally 20-30 minutes. I have done Taco Soup and Stroganoff Skillet. Both are exceptional meals.
Awesome information. Very valuable. Much appreciated. John
One can also cook and then dehydrate their own beans for a lot less than buying them.
An excellent well prepared and presented article covering the entire gambit from ingredient storage to preparation. Thanks!
Thank you
If you have an “Vacuum Packer” you can make multi-pocket strip bags to hold your spices indefinitely. Simply cut a 2″ strip from bag material,
1. Seal 1 edge
2. turn sideways mark number of “Pockets” and seal at each mark
3 fill with seasonings needed
4 vacuum seal the open edge
5. add to quart jar
There a a lot of uses for that Vacuum Packer and you can make bags for most any item with a little thought.
I vacuum packed the Pemmican I made earlier this year, just before we lost power to 4 counties for 16 days.
Sure was a good prep check and actually got easier as time went on and a routine was formed, good experience. 39°F degree weather added to it greatly.
Enjoy…… Doc
Umpqua Doc, as in the Umpqua River in Oregon? The Umpqua outlet is at Reedsport, and my dad took us fishing a couple times up the Umpqua, but farther inland. We fished both forks of the MIllicoma Rivers a lot for cutthroat, steelhead, and salmon, and also several of the lakes in the area like Eel, Clear, Ten Mile, and even Tahkenitch.
Sounds good. Add a little SPAM or other canned meat from the stock pile for protein and fat. Just need to make sure you have a good supply of water, would hate to eat dry soup.
Instead of buying all the beans individually to make things to store like that, I use the ’15 bean soup’ package.
I have been storing food since 2010. I have buckets , jars of dried beans I sealed and added 02 absorbers. I’ve tried to cook some of these beans so I could replace w/new product. The beans I thought would feed us are so hard u can cook from here to eternity and they will never soften. I’ve tried adding Baking soda ,soaking over nite nothing except maybe a grain grinder would let me utilize these beans . Just a warning to not store beans for any length of time. Maybe fresh freeze dried would be better but freeze dryers are expensive.
You Need To Use A “PRESSURE COOKER” ; That Should Solve Your Problem !! FYI: PHILLIP
PS: DO NOT Add Salt While Cooking , As This Will Inhibit Cooking Process ; ALSO: Use Only “Distilled or Purified” Water ; FYI: PHILLIP
PS: Use Stainless Steel Pressure Cooker ; DO NOT Use Aluminum ; As Mentioned Previously : DO NOT Use Salt When Cooking ; Salt “Dehydrates” , It Acts As A Preservative By Removing Moisture , Therefore , It INHIBITS Moisture INFUSION Into The Beans Or WHATEVER You Are Cooking ; In Addition To THAT ; EXcessive Salt In Your Diet Causes ALL KINDS OF PHYSIOLOGICAL PROBLEMS , Like ; HYPERTENSION , HARDING OF THE ARTERIES , PLUS: MANY MORE PROBLEMS ; FYI: PHILLIP
farm girl, I’m a novice at gardening and food storage, but will old beans still germinate? Even if the germination rate was only 10%, if you had a few thousand beans you might still get a lot to germinate for growing fresh ones, have you tried this? My stored beans are only a couple years old and will still germinate fairly well.
I have been focusing a lot on learning how to grow edible plants in my climate and also creating my own “seed bank” to keep replanting each year and can also grab them and go if we ever needed to. I am always looking for real world guidance, thanks for any advice and tips you post.
Pressure cook them!
Good article!Thanks!!! Also – for variety, in the seasoning packets – one could alternate curry, cumin, chili powder, dried pepper flakes, dried Italian seasoning mix, and Creole/Cajun/Old Bay seasoning preparations. Most of these are available at Dollar Tree Stores – so are not very expensive. We store them in their original packaging – then placed in vacuum sealed containers – and use them for our hurricane/emergency pantry. These can add much needed variety and a little zip to an otherwise bland survival staple stored in quantity. In a pinch – if well stored (kept cool and dry) – the spices themselves could be nice bartering commodities too!
Agree that beans and rice will meet daily survival requirements. I buy my bean soup mix in bulk, 20lbs, at $21/carton from WEBSTAURANT Store. https://www.webstaurantstore.com/search/bean-soup.html Take a look.
Have you been looking in my mailbox? Webrestaurantstore.com is a fantastic site for bulk foods and other cooking essentials. Just finished vac bagging 100lbs of various dried beans from them at 1/3 the price of Walmart. Although it’s $99/month for unlimited free shipping, splitting that with neighbors is well worth it to stock up. One word of caution. Their beans come in a cardboard box with no plastic liner. You must repackage them on arrival or risk losing the whole box to bugs.
Sorry, I fat fingered the keyboard… the correct website is: webstaurantstore.com … as noted elsewhere in these posts.
I have been dealing with them for years. Just always for containers. I NEVER knew that they sold food/beans.
As part of outfitting our new summer kitchen I purchased their Regency 24″ x 48″ 16-Gauge Stainless Steel Commercial Work Table with Under shelf last year for less than $100.00 with free shipping.
I also did not know they have food but will take a look. The table BTW is wonderful and allows us to work with meats and other foods right on the tabletop with easy cleanup.
Very good idea. I like this and will definitely be adding this to my supplies.
Is there a nutritious alternate for the barley? I must eat gluten-free; barley is the only ingredient that is a problem in this great recipe. Thanks!
How about buckwheat (not actually a wheat), millet, sorghum, quinoa, corn grits (get non GMO), or tapioca (made from cassava root)?
You don’t really need to add grains to the soup, but if you want to fortify it with grain…. gluten free … try quinoa, millet, oats, sorghum, buckwheat, or amaranth.
Use quinoa instead of barley..(It’s spelled correctly. I finally found it.) In addition to being a grain, it is a protein substitute. The Incas (I think) used it as the national diet because it contained all the vitamins necessary and protein.
Many brands of quinoa and amaranth need to be thoroughly rinsed before use because the seeds are naturally coated with saponin. Some do not, so check the package directions.
To cut down prep time on this soup, I would also suggest using canned pre-cooked beans if possible.
You might try spelt. I am also gluten free, but spelt did work for me. I actually bought the berries and did my own grinding.
If you have a dehydrator, make your own dehydrated beans. Purchase a #10 size can of prepared beans at Walmart or restaurant supply place (like Gordon Food Service). Any type of bean works as they are already cooked. Spread the beans (juice and all) on solid fruit trays and dehydrate until they are crisp.
If using regular dried beans as in the original recipe, I suggest using the smaller red and white beans/legumes instead kidney/garbanzos as they will take less time to rehydrate and cook. (ex. adzuki, mung, split peas, lentils are all about the same size)
You can save even more $$ by buying the dry beans, cooking yourself and then dehydrating. If you have a pressure cooker (old style or electric such as Instapot, Power Pressure XL, etc.) the process is much faster. With canned beans you are paying someone else to do the pressure cooking for you. You can also *pre-cook* the rice or pasta and dehydrate is as well to speed up the cooking time when you are ready to make the soup. There should be no need to separate the rice and beans in that case since I think they will rehydrate and cook at the same rate.
Great sites for dehydrator tips and recipes:
Trail Recipes Guide to Dehydrating: https://www.trail.recipes/guide/dehydrating123/
Chef Glen’s Backpacking Recipe site:
https://www.backpackingchef.com/
Sorry to nit-pick …. Where it says “#1. Mix all the beans in a large container.” … shows lentils and split green peas in with the other dried beans. Both lentils and split peas take 30 minutes or so to cook. The others …. a lot longer. Maybe it won’t hurt the lentils to cook for 1.5 hours or longer, but why do it? One more separation in the jar might be in order.
Best article on this site in a long time. Thanks and keep up with the good comments.
For a longer storage time, you might consider adding an oxygen and moisture absorbent pack to each separate unit.
The oxygen absorbent prevents bugs and the moisture absorbent prevents spoilage.
I put my beans, rice, flour, cornmeal in 1/2 gallon containers with one absorbent packet of each and one gallon containers with two of each. I place them in the bottom to make it easier to remove the contents.
The number of O2 absorbers depends upon the size of the absorber and the size of the container!
It’s really neat how these simple but excellent articles can make you rethink things. I was a Vegetarian for a couple years in college, I knew about the idea of complimentary proteins but it just meant eating grains and legumes, which you were going to do anyway. Then the idea was locked into my brain during an Anthropology course by a debate between the professor, who was a world class anthropologist, and the pre-med students in the room. Doctors, of course, were and still are mostly of the opinion a vegetarian diet couldn’t furnish the complete protein that meat supplies in the diet. The Prof’s view was that human’s had survived on grains and legumes with limited meat throughout history. The pre Docs said, impossible, and the argument escalated, the Prof won because he knew the names of the 21 amino acids essential to a healthy diet and what foods were able to supply which ones, and named them off one by one. He was one of the smartest guys on the planet, so I never questioned what I learned that day, until I read this little askaprepper article. Now, poking around the internet I find Vegans have disproved the theory of complimentary proteins. However, they seem to list only 8 amino acids as necessary, instead of 21. So both the question and answer have changed, and the way the world is today I don’t know if I can ever find the truth of the matter. I do know, however, that corn and beans and rice and beans love each other and that I just planted Mandan corn and a big patch of Haricot beans, which makes everything okay.
You might want to add squash to your garden ( if you like it). The “three sisters” formed the basis for the diet of many native American nations and have been staples in the kitchens of North and South Americans for generations.
The traditional way of planting the three was to put them together in “mound” planting.
The corn stalks would provide a support for the bean vines to climb, and the bean leaves would shade the squash vines, which covered the ground and helped retain moisture and protected the roots of the corn from getting uprooted in a high wind.
Ah, but what variety of maize? Most corn today has a stalk too soft to handle beans. 3 Sisters is something whites named, not Native Americans. 30 sisters, maybe. every weed hath its use, if only as mulch. Centuries ago, someone commented the Native Americans came out in anger because whites had ridden horses thru their fields, thinking them meadows. That, Miss Kitty, is a great basis for a hidden garden. A field filled with wild, useful plants. That’s still traditional farming, then allowing in livestock or wildlife for the winter. niio
Most people today accept that, thinking those 3 plants were more important than local plants. No es nada, as folks say. Here, mesquite is the tree of life, and was more important than maize, beans, and squash. In the East, other things. West coast, the white oak.
We always used a pinch of wood ashes, or ashes from bean plants to flavor food. Just a pinch! And, the wood has to be from a good tree, not a toxic one like yew or any in the laurel family.
Hidden gardens are great. One big thing about them is so much is used today as ornamental. Canna lily, which spread farther than maize or beans did, amaranth, Indian Rice grass or, if you live in a wet area, red rice in a garden pond. American lotus are good, as well, in that sort of area, and the carp are good when smoked. We have 3 kinds of cactus, all common in xeric flower gardens. Sweet potatoes. wild beans, wild chilis, red purslane, and soon, wolfberries, a relative of goji, but considered an ornamental. Nasturtiums are great salad greens, which is why people raised them. Red runner beans are a flower, but a food, and make a nice potato-like root. There’s more, a lot more, but those are the basics. Rosemary (used to stop food poisoning), thyme, and Mexican tarragon are all ‘flowers’ so far as some of the neighbors are concerned. Cilantro is, as well, but the leaves and seeds are good herbs. In veggie patches, when one thing matures and comes out, something else goes in ASAP. Fig trees have a nasty defense, the sap, so someone climbing it isn’t going to stay. The yucca have needles on the tips and the roots are used for soap and food, the fibers for coarse clothing, and burlap. The aloe is all eatable, as well, but not the skins, which are great for healing skin. Wild tobacco, wivian, is nice, but there are more ‘ornamental’ types, like jasmine for wetter areas. I had a mishap. The dog came down with a stomach virus, and somehow I picked it up. Yes, I was careful, but it happens. Nothing worked till I ate some tobacco, then, after a night of bad, it was gone.
Don’t use sweet corn, bush beans or summer squash for this. Use field corn, pole beans and winter squash.
MIKE: I certainly agree. Butter is bad for you. Eat margarine which is better. Oops! Wong advice. Eat butter. Margarine has nasty chemicals in it worse than butter.
Don’t eat eggs. They have really high cholesterol and will plug the plumbing in your heart solid. Oops! Eggs are a complete food. You should eat a hard boiled egg if you want a mid-afternoon snack. An egg a day is great.
Don’t drink milk. It is loaded with fat and will plug your arteries. Oops! Milk is a well rounded food which provides most of your daily needs of vitamins and minerals and is rich in vitamin D which you need for strong bones.
The list goes on. It gets worse with pharmaceuticals. Take estrogen therapy for post-menopausal bone loss. Oops! don’t take estrogen therapy. Take phosphorous therapy. Oops! It’s okay, but makes your jaw rot away and your teeth fall out but other than that, it make the other bones strong. And so on ad nauseam.
I’d pull my hair out but it is just a little too sparse for that kind of mistreatment.
bad boy 🙂 Hey, I went vegetarian for a while and wound up in the hospital 4 times, thanks to it. Allergies went haywire, led to bad arthritis, bad many things, and I gained a ton of weight. Not to mention a serious gas problem… 🙂 niio
Hi Red vegetarian is ok for me but i have to look all the time at my ailments – i’m old – and use my spirit to deal with them. So i am never ill – i just have ailments like pain or leg trouble which i work on so it goes away.
in fact my ailments talk to me about things that caused them … 🙂 and so are a useful part of my life.
i understand Jesus to have said you should research what happened to you back to birth (Nickodemus).
i dont find one needs any non-veg.
*
i am much impressed by your garden/growing/plant knowledge and would like to learn from you.
Will you write an article ?
best wishes
david godfrey lawn
If vegetarian works for you, then by all means, run with it. For me, it made everything far worse. Same in all the family. Be warned, soy has toxins in it that cannot be removed. Right now the USDA is telling farmers do not feed it to breeding stock because it causes too many health issues (I wasn’t using soy). Asian friends told me men should not eat much soy because they know what it does. Wheat is another thing we’re warned of. Modern wheat was bred for high gluten content. Even groups who normally never had a problem are experiencing everything from acne to diabetes.
For arthritis and so on, I use Korean acupressure. But, first, always, spiritual. Touch the area and say “In the Name of Jesus, I cast you back on the one who set this on me and bind it there, broken.” Act like you’re grabbing it out of you and throw it out a window. It’s wild, sounds crazy, but works; even if only because the mind sees it as working. But, I had a severe string of ‘bad luck’ and was told to cast it back on the one who caused it. OK, and? It took a while, 10 days or so, but the bad luck stopped and a little while after that, my stepdaughter told me her mother, who is a Nazi and hates Christians, had to have pen heart surgery. I do not curse people!
My stepdaughter has a very bad problem with calcification in soft organs. There are other things, as well, but when living in NYC, she went halal and kosher, that means all organic everything and it stopped. Same when I visited her, often staying for a week while working down there. She was organic and I was raised that way by old-time farmers, people who hated chemicals. Allergies, arthritis and so on all gone. I could have some dairy and fresh, homemade bread! Return home and it would start again.
I have some things written about hidden gardens and so on done for another site, but they didn’t publish and now are gone. A good site, very strong, and missed. Who do I send it to? I’m a lousy shot and never cared for guns (Dad’s Garand though, wow! 🙂 I used to bow hunt but arthritis stopped that. I have a Tarahumara manzanita wood bow, a yew (parting gift from a brother-in-law who’s ancestor brought it from England), and a straight 25# fiberglass from when I was a preteen (it’s fifty years old and still works great).
Remember the wisdom of God (George Burns, in Oh, God): “How old were Adam and Eve,” he was asked, “when You created them?” ‘God’ looked up in thought with that long black cigar in hand and said, “17. It’s the perfect age to be. You’re still living at home. You’re working like a dog but it’s you money to spend like you want. Your parents are feeding you, paying the bills, and probably paying on the car and insurance. All you medical care is taken care of. 17 is the perfect age to be.” I’m only 17 (and holding 🙂 for quite a few decades. Learn that attitude. Years ago, maybe a little cocky, I asked God to show me how mature I was in His eyes. After all, I was growing fast, learning, and even teaching. I dreamed of a little kid, about 6, walking along a beach holding hands with two big men and being urged along by someone behind me. I said, that’s it? Yep. All we are and ever will be is little, much loved children to God. Stay young, always. Old and wise, yes. But in the heart forever young. niio
My taste buds are already waiting 🙂 Instead of rice, we’re growing Indian rice grass, a native and a rice, but it likes the dryness of Arizona. Beans tend to dry out over a year or two, and all legumes are subject to insect infestation. I’d rather keep it in 5 gallon buckets with a sealed lid, and add dry ice to kill the bugs. Something traditional Native Americans still do, the sopa seca. Leftovers are dehydrated and can be soaked and heated. I need to get my wrinkled old butt in gear and get the solar dehydrator built. With that, it’s a snap to dehydrate veggies, meat, and cooked food. No electric, just ask God to turn on the solar heating unit 🙂 Add to that, if I get it right, it can be used as a slow cooker, niio
Hi Red! Sorry about the erroneous info in my post on the 3 sisters, etc. ? When I goof, I goof, and like many others I was taught that story in school (many years ago, to be sure!).
Your point about the “hidden gardens” is an excellent one, especially in the light of potentially having to hide your preps from nosy neighbors, marauders, the HOA watchdogs, etc. Using native/naturalized “wild” plants is a great way to diversify your crops and your diet. Thanks again.
Your last post is great. Native American hidden gardens are easy today. Much of the stuff is now under ornamental or as weeds. Nasturtiums, canna lilies, dalias a relative of yacon, (roots were eaten, donno about the ‘flowery’ types today), sun-chokes and so on. Here, a lawn is optional, so Indian Rice Grass (a native desert variety of wild rice) will look good, If I can keep the doves off it…Of course, poaching is illegal, cough! 🙂 Safflower looks good, as well, a nice flower but the seeds are high in oil. Chia is coming on well. Garbanzo beans, which are ‘fern-like’ with flowers are at about the end of their season. One scarlet runner bean survived winter, but where they’re from, they do get some snow and frost, they’re a perennial. We also got a lot of compliments on ‘those pretty flowers growing on the ocotillos (Yori Cahui cowpeas). and the pretty flowers blooming on the fence all winter (Tohono green peas). Chinese celery, mariposa lily. Ajo lily. The list is endless. Look up JL Hudson seedsman and others for Native American plants. Survive in style! niio
Good gads, I sure want to be as positive as everyone else here since this is almost exactly the kind of soup we ourselves eat each week in my household (1 cup our own beans and grains mix cooked in 1 quart liquid = 4 servings)… indeed, a soup like this can be *part* of a healthy meal… but in the end, it just doesn’t stack up to be particularly nutritious meal by itself at all. Yes, it hits the general ballpark on several popular macronutrient core targets as far as protein, carbohydrates, and calories are concerned, but to use any simplified list of major macronutrients as some kind of a formula for long term survival can be a potentially deadly mistake. This is what worries me the most about so many of my fellow preppers, the obsession that beans + rice = a complete protein, at the expense of looking much harder at what constitutes a nutrient-dense complete meal — and planning (prepping!) to have the necessary items on hand.
While I don’t want to cause an uproar, the fact is that this soup is almost completely devoid of calcium, potassium, Vitamins A, B12, and C, and many other trace micronutrients that everyone needs to stay alive and healthy over a period of time. Too many days of relying on grains and legumes *will* have an impact on your health and mental clarity, particularly in times of extreme stress.
This is sounding overly negative however… so let me try to show how to combine other common prepper foods into a more meal that will make this soup really shine. First step: soak the combination of beans and grains (leaving the rice out) overnight to help get rid of the naturally occurring phytic acid, which prevents your body from fully absorbing the precious magnesium contained in the beans mixture (as well as other trace minerals). It’s a simple step, but be sure not to consume the phytic-acid laced soaking water in your soup recipe. (Wash the floor, your hands, or your hair with that grey water if you’re trying to conserve water, but that’s the subject of an entire article).
Second step: ditch the dreaded broth cubes, which only add chemicals and toxins rather than any nutrition at all, and replace it with real broth that you made yourself for adding protein, collagen, Vitamin B12, and other trace nutrients that will make your gut very happy. Instead of adding trace poisons you’ll be adding trace nutrients that really add up via the real wholesome broth. This Ask a Prepper website includes the article “How to Make Portable Soup” that shows how you can make and store your homemade broth for the long term, or if you’re short on time with a lot of excuses for not doing so from scratch then consider buying “More Than Gourmet” brand broth concentrates (it’s the only brand I’ve found with a 2+ year shelf life and no chemicals or preservatives, just plain food ingredients).
Third step: just as author KJ advocates although as an option, it really is essential to add just a little bit of meat to fill out the Vitamin B12 minimally required profile while also adding a bit of fat. There’s really no way around it, one’s body under extreme stress absolutely requires these core nutrients on a daily basis if optimal “fighting condition” health is a goal. Summer beef sausage that is often seen on unrefrigerated shelves in the supermarket can last a year with proper storage, ditto for dry-cured Italian salami or Spanish-style chorizo, as well as some top-quality canned meats. Freeze-dried meats also fit the bill and are the easiest of all to manage, although additional healthy fats should be added when they are used in a meal.
Fourth step: so far all of the above have added close to zero calcium, which is needed not just for bones and teeth but also for the heart and proper muscle functioning. Just one ounce of hard parmesan cheese shaved off the block— which can be preserved without refrigeration with proper handling — can float on top of this Survival Soup for an instant blast of salty unami to deliver precious calcium as well as Vitamin K2. (Caution: do not use
Fifth step: fix the utter lack of potassium plus Vitamins A and C in all of the above solutions by drinking a can of V8 with your Survival Soup. This is not a perfect solution but it’s absolutely impossible to fit 10 cups of fresh vegetables per person per day into the pantry, therefore we’ve resorted to drinking two cans of V8 daily over here. If you hate V8 then take a couple of sips daily for a month while your taste buds adjust (and yes, in almost all cases they will eventually adjust). If you REALLY hate V8 then try adding a few drops of Worcestershire sauce, another few drops of Tobasco sauce, some freshly ground pepper (these are all ingredients from your pantry) and subsequently pretend that your doctored V8 is actually a wonderful Bloody Mary — this certainly worked for my husband Gordon, who previously wasn’t a fan of V8 at first. Of course if you still want to throw up over the thought of drinking a V8 then you might try downing a plain double-vodka shooter all at once first and then drinking the entire doctored can of V8 immediately afterwards, while we haven’t tried this method ourselves it should thoroughly fry your brain so that drinking anything immediately afterwards won’t be noticed. Yeah, there’s the problem of eventually frying your liver at the same time, but over a period of days one might phase out the vodka shooter entirely after just learning to drink the can of V8 without major complaints. Yes, it’s that important, to find a way of getting adequate amounts of potassium plus Vitamins A and C.
Sixth step: add a small tiny dish of raw almonds or other nuts to follow your meal, just 10 or so individual raw almonds will do, to end balance your Survival Soup meal with some Vitamin E. Most guys figure that Vitamin E is all about intensely private subjects that won’t be covered here (actually Vitamin A is at least equally important in that department), but the fact is your heart also counts on precious Vitamin E to function properly. Tree nuts are the traditional way of adding this important nutrient into the diet.
Seventh and final step: it takes just a few days to successfully sprout an extra tablespoon of the same lentils used in this Survival Soup into little microgreens that are filled with enzymes, Vitamin C, and other life-sustaining nutrients unavailable elsewhere on this limited meal menu. Enzymes and all the other beneficial nutrients offered by sprouts or micro-greens are almost never mentioned anywhere in prepper nutrition strategies, but they are a cheap and easy way to fill in many forgotten gaps. They add a little crunch, help enormously with digestion, and are easy to integrate into any meal. I’ve successfully harvested sprouts from lentils stored years before using a nylon knee-high stocking, each 1/4 cup of even old dried lentils yields enough to last a person a daily cup of fresh sprouts for an entire week!
So these are my own very personal thoughts on the Survival Soup recipe offered here: it’s a variation of what we eat weekly here at my house, and it’s an excellent *part* of a healthy meal (which is why we keep eating it regularly). That said, it’s still not a nutritious complete meal all by itself for long term survival. Preppers, rise to the challenge, realize that even small quantities of meats, cheeses, fish, fats, nuts, and other staples are critical for making the core bulk beans-n-rice programs work out for the maintenance of your bodies over the long term!
There was an article on Ask a Prepper a while ago on how to make dried soup stock that you might want to look at if you missed it when it was posted. Basically you simmer the stock until it’s reduced to a thick gel and then dehydrate it into a hard, gluey substance for long term use. If you make your own bone broth, this might be a good addition to any soup you make, and it would also address the calcium deficiency in the bean soup in this post.
My first thought was “greens”. Most can also be dehydrated. Even cabbage. Microgreens and sprouts are both great nutrient boosters. Also parsley… Thanks for all th ideas.
Great info and fun suggestions. I still love the raw basics of the beans/grain/rice mix. I don’t imagine anyone feels like that would be totally adequate long term so having canned or dried meat, along with canned or dried veggies rounds out the nutrients better. Adding in some oil or ghee for fats, and personal spices increases how pleasant and well rounded it will be.
Many can add things from their garden a lot of the year to the basic mix as well. But I always dehydrate a decent amount of veggies. My winter squashes store for on average ten months. I have about 25% that will store for a year+. I always have winter squashes or pumpkin available to me all year long, and I typically have new ones coming in and many from the previous year to still use. Took me years of developing those plants from saved seeds.
We each surely have our personal tastes to what is important to save and add to it considering what we have the ability to do and the money to spend. I am a light prepper compared to some, but I have dogs so storing for them is more of a challenge.
The great thing here is we are all talking about it and sharing ideas. Great community, thanks to KJ to spark the fun.
Did you ever grow chilacayote squash? It was developed in Mexico by Native Americans to be extra sweet and long storage. It’s so good, stored, it was carried on Black Ships from Mexico around the world for fresh food. In Asia, they call it 7 Year Melon. The longer it stores, like most squash, the sweeter it gets. Main use is pie and candy. niio
+ lots to Chris F. for “complete” – ing the nutritional mix. For the original recipe, garbonzos/cannelinis will need 2-3 hours to cook past the crunch, or a significant soak prior to cooking. Not a “one and done” recipe, but pretty darn close. thanks for a great article.
the ‘crunch’ in garbanzos is half the fun. Beans in general, we soak them 2-3 days, till they start to sprout. This adds to the protein levels and vitamins, it also helps digestibility. One warning, any grain can carry aflatoxins. Soaking the grain can help them to grow. One capful of bleach per gallon of water for the first soak. 12 hours later, drain and rinse, then soak overnight. Watcher should be changed several times over the 2-3 day soak, allowing it to drain out and the seeds to breathe. When cooking, it should take less than 45 minutes to make them tender. We don’t do this with garbanzos (a long soak) because I heard they develop tannin when sprouting. Ditto cowpeas. We also like bean flour, usually made of pintos and garbanzos. a little starch in the flour and it makes good noodles. Starch, when possible, comes from canna lily roots, which were used for that for thousands of years. niio
Preppers make it sound so complicated having so many different kinds of foods etc. I’m not doubting this but I really doubt all the pioneers ate a balanced diet, especially during the winter months. Many of them didn’t go to town to trade or buy supplies very often. How did they survive? Most of them had a cow to milk but today’s Homeopathics try to tell us Dairy is bad for us. Please give feed back.
They for sure had a simpler diet due to logistics in many areas of our country. But also those in more rural areas had much less life expectancy due to poor health including teeth. We in the US just don’t have that as much now (with some exceptions) like they do in third world countries, which might could be compared to old west rural areas.
I think early on I did not prep because it sounded complicated, but as I worked it out I simplified it to work for me by putting up what I grow for the most part, and bringing in a certain amount of quality organic canned meats. So I saved on putting up my veggies, and paid more for quality canned meats, so it balanced out. It grew from there as I got my routine and balance. But we all have to find that out, but the bean and rice mix is a good place to start only, not the only thing you do though. But each person has to find their starting place. Mine was when I got my first little Ronco dehydrator… now I have an Excalibur. But I started somewhere that allowed me to see where I wanted to go. All they had in rural areas for certain part of our history was the sun. Of course that is all powerful if you have the know how to use it.
Anyway… mostly here in this type of site and comments are ideas and ways for people to find their own way. It can be as simple or as complicated as you like depending on your time and budget. But prepping is fun when you go about it with a positive outlook and start slow where you can. If you try to start too fast you make big stressful mistakes that can be costly and can cause you to quit. Find you in all this and do you.
> Dog Trainer. That is such a powerful message. Thank you for the wisdom. Wish I had those thought a while ago.
Spike, In the old days, people dried off (made her stop giving milk) when the cow could no longer find pasture to graze. Most milked her for 6 months, then stopped. Eggs, same, most chickens till modern feeding methods came along would lay about 150 eggs a year. Anything you couldn’t store raw was dried or pickled, ham, bacon, corned beef, fruit and vegetables. There is still no better balanced diet than fresh meat and fermented vegetables. Beer was a food, made of sprouts. Fermented anything enhances all vitamins and raises the protein level. There were whole families during the Depression that had nothing but sauerkraut to live on in winter and stayed healthy. Not in the best shape, but they survived. No vitamin deficiencies that I know of, but they lacked iron.
Pioneers ate like Native Americans, hunting and gathering wild foods. Native Americans liked their beer and those who couldn’t raise grain traded for it or used a substitute. Fruits were either cooked until thick and dried for preserves, or crushed and fermented into wine. Wine and beer could be set out in winter to freeze the water and the old folks made merry on it, a brandy. niio
Early pioneers didn’t have much in the way of variety, for sure, unless they packed in dried or preserved goods to supplement their basic stores. Sometimes they would be able to trade for goods with locals, but they would be on their own until their crops began to come in. After the Transcontinental railroad was completed, goods would be much more readily available, even in remote areas, and boy, were the settlers happy!
I forgot who else said it in this thread, but as far as preps, pick stuff you like. If you want to try making say, baked beans from scratch, try it some long weekend. It’s fun trying new recipes, and you’ll have a chance to tweak it as needed. But don’t limit yourself to stuff you don’t want just because it was presented in an article, get stuff you will actually eat and enjoy. Canned food is a great alternative to dried because it is already cooked, bugs can’t get into it, and it lasts a long time. The only drawback is that for some items it’s more expensive, and cans take up a fair amount of room. And they’re heavy.
The easiest way to build your reserves is to take $5-$10 each time you go to the store and buy preps with it. Try to get at least two balanced meals worth of stuff – a can of beef stew, a can of ravioli and two veg will give you two dinners. (Maybe three if you pad the stew with rice, but you need to be able to keep it cold or you could get food poisoning. )
If you do this over a period of time, you can have a good reserve built up . Work the sales, too. And after a few months, start rotating out your stock.
Don’t over think things…. prepping is different for everyone, and everyone has different priorities and scenarios that concern them.
Good luck! ?
Bean and Rice Survival Soup
Dear KJBarber
thank you. So I can properly prepare food for a long-term fallout. I am much impressed and shall do it. And the very high quality comments from readers who obviously know a lot are so valuable – I’d like to get up to somewhere near their level 🙂
I’d like to be a bit useful, too, and add in my bit:
1. i’d like to get the knowledge and use of plants – like for example Red knows them – but all of you too – put in european terms because i am in europe. Maybe i can help that such good and effective and cheap preparedness be possible. I am just starting to recognise the seriousness of all this and how neccessary it is. I do have the impression that those who apparently “run” this place would much like to increase the chaos, and the number of deaths, so preparedness should help.
2. There have been some comments about being vegetarian. Most of my life i wasnt. Then it seemed neccessary – my body and conciousness seemed to require it – and for the last few decades I am vegetarian. My guideline has been something like my understanding of words of Jesus, like as he spoke with Nicodemus, I understand him to say one should remember back to birth. I am constantly seeking, asking myself what i am, what happened to me.
I know that i was something of a sex slave and managed to get away but my concious has access to only a part of all that.
Sex slaves have a life expectancy of 7 years and i am 79 so I was able to escape. So if people break your back as a young person for sex, then if you push that away, in order to survive, and then, after you have survived, keep pushing it away and dont go for access to it, then you have lots of ailments. I see that. I find if I still cannot go back as I understand Jesus to say, then at least i can work on all my ailments and try to access them and de-tension them.
3. So my one cent here might be to trust ones own conciousness and not be afraid of being afraid – God has this place put on foundation stones you can’t ignore. if you do access parts of your unconcious you see the difference between heaven and hell and that both are very present, and can deal with that.
With love and best wishes
Thanks from a 77 yr. old guy for this great recipe and all the comments related to energy efficiency and for effective nutrition…// the really scary comment was the one about the M.D.s wgo are still stuck in the complementary proteins trap and are so anti veg. diet !!! He or She surely does move in mysterious ways !
Please consider making a commentary-free version of your recipes avaiiable with your delicious recipes so that we can print a copy which is less than 36 pages long…thank you and please keep it coming!!!
Richard: Just copy the main article and paste it into a word processing program. Edit as you like, changing the font and the point size and print it out from your word processing program.
I use Libre Office and the word processing program with that office suite has a “Remove Formatting” command which I like as it eliminates a lot of the formatting and allows me to reformat in a more concise form.
small batch says 1.5 of rice…But if you put that in one jar the other won’t have any rice…Is this correct?
What I like about this is the fact that it can be put into my pressure cooker. I have lived alone in an old 77 Dodge Sportsman with a Motorhome box affixed to the chaises. Large batches can be canned while parked @ Public parks when temperatures reach triple digits; requiring less propane. The Holiday period lends to a second canning period as a means of heating the inside & exploiting the available meat price sales. Living without refrigeration takes little adjustment. I love my own Chili & lintels. Green olive brine makes wonderful pickled hard-boiled eggs. Ripe olive brine adds flavor to my lintel soup.
If you use dehydrated beans, the cooking time is very much shortened…. about the same as the rice. A bit more pricey, but saves a lot of time.
QUESTIONS from a baby prepper ~
Which cooking earl is best for long term storage , and
Why is it bad to use rancid earl . It seems earl goes rancid pretty fast . Thank you ??????
A few thoughts on vacuum packing. I went this route last year and had great success. I needed to vac pack 1/2 gallon mason jars for dehydrated mushrooms and dh veggies and did not have a chamber vacuum sealer. I bought a “vacuum chamber” used for degassing epoxy … 3 gallon size, heavy stainless steel with a 3/4″ thick acrylic lid (about $75). I had a single stage vacuum pump already. 4 jars fit nicely into the chamber. Lid on, pulled a vacuum with the pump and in 30 seconds, had the jars sealed. Of course, this will work for smaller jars and will help to preserve any foodstuffs, such as the rice and bean soup mix.
Black beans & blackeye peas in place of split peas & lentils.
Quinoa instead of barley.
Quinoa is the only thing I can not grow or have not grown so far, here in zone 8a.
I get dry beans & rice wholesale, because I worked at the processing plant until I retired.
I retired early on company stocks.
I can get blackeye peas for $0.40 a pound.
I’m seeing a lot of “you must do this instead of that” about what to plant, store, learn, and prepare for. What if everyone tries to expand their awareness and attempt to learn a little bit more of everything they can, then figure out what works for them, and take it from there. Why restrict yourselves to beans OR potatoes, rice OR pasta, canned OR freeze-dried, why not consider them all?
Here’s some of what I’m doing for preps, and we live in a single-family one-story house on a 75’x90′ lot in a suburban area in Eastern San Diego County (not the city) and we have all “public” utilities (including the bills), but I want to prepare, in advance, in case any or all fail, and/or for any other disaster we might be faced with that we can reasonably within our means prepare for:
Water: we have about a two week supply of purchased bottled water in liter and one-gallon sizes that we use and rotate, backed up with six 55-gallon water drums that should last 2-3 months on very tight rationing, as well as several small filters suitable for use in camping / wilderness settings, and a lot of 2 to 5 gallon water containers, some solid, some collapsible, if we ever need to forage and bring back water – we have done this while overseas – so these should work fine for foraging water from local sources if needed. If that happens, we will clearly mark which containers are for Un-sanitized water, and which will keep the filtered and sanitized water. It does you no good to put sanitized water into a contaminated container. Two main problems will be how many other people will be out foraging (dangerous), and how long the limited number of lakes and water reservoirs in the area will have water in them.
Food: we have always kept a well-stocked pantry, but in the past few years I have been stocking up on long-term storage foods as well – freeze-dried is preferred. I am also learning what will grow, survive, and produce in our conditions, and also trying to develop my own “seed bank” to keep the gardening going, that can also be taken with us if we ever leave. I bought a dehydrator, food saver, some boxes of canning jars and extra lids, cheese cloth, stainless steel strainers, Gulf wax (paraffin), a by-hand grain grinder, and more, all to learn how to preserve and store any edible foods I might produce, buy, or gather. We have been freezing the extra vege’s I grow, but I want to learn how to properly dry and package food for long term storage without electricity. We also have fishing gear of all sorts including stainless steel wire leader that can also be used to make small game snares, as well as rifles and shotguns with hunting ammo. We are very recently trying to learn which of the local plants we can forage if needed and have already discovered many varieties of “weeds” around our house that are edible.
Shelter: we have our own home, and our first plan is “bugging in”. We have a double-cab truck with canopy and tow hitch, and lots of “camping” gear, including tools, wool blankets, a lightweight tent, heavy canvas tarp with brass gromets, fire making and cooking equipment if we ever need while bugging in, or if we decided to “bug out” as a last resort.
Gear: our tools and gear include solar chargers; wind-up and solar charged lights and radios; mechanic tools, household maintenance and repair tools, gardening and outdoorsy oriented tools such as bow saws, axes, shovels, pruning shears, spools of paracord, rolls of duct tape, portable toilets, lots of bags and containers from Ziplock bags to heavy construction trash bags, 5-gallon buckets with lids, plastic tubs with lids. ammo cans, back packs, and so much more useful items around the house that the hard part will be trying to take everything we would want to, and then we would have to prioritize and limit to what we estimate will be the most needed for both traveling and for wherever we end up going.
Medical & Hygiene: we have a couple of small first-aid kits, one larger “disaster first-aid kit”, several items obtained separately like tourniquets, blood clotting agents, scalpels, syringes, suture kit, forceps, stainless steel scissors, both nytril and latex gloves, real medical face masks, isopropyl alcohol, hydrogen peroxide, over the counter meds, gauzes, wraps, and bandages, at least a years’ worth of extra dental care and personal hygiene products, pet care items including a metal lice/tick comb, and again, much, much more. It’s daunting when you sort through and really see how much you have accumulated over the years.
Security: the first priority of security is maintaining Situation Awareness supported by NOT being overly chatty – called COMSEC – giving out details about your prepping with anyone not directly involved. Posting on this blog in the manner I do does not compromise my COMSEC. We have three dogs, a selection of firearms and a decent amount of ammo, short range hand-held “walkie-talkie” type radios, handheld optics such as binoculars, as well as scopes on some of our weapons, several melee type options such as knives, staves, mace/pepper spray, stun guns, whistles, alarms, motion sensor lights, even tools such as hammers, breaker bars, axes, machetes, etc.
Topped off with the most versatile and useful prepper item ever created: our brains: to learn skills; maintain awareness of our surroundings at all times; make WISE decisions based upon facts, not emotions, hyperbole, or propaganda; having an imagination to adapt and improvise; and please develop an attitude to be willing to do whatever you need to do to provide for and protect those you care about. Then learn, practice, learn some more, practice some more, and it cannot be stressed enough – learn some more, and practice even more. It’s really kind of weird but the older I get and the more I learn, the more I realize how little I really know, and is why I intend to keep learning for as long as I am able. My family deserves that from me.
30# of bullion?
This recipe states 2 cups of pearl barley. This is indirect as a serving size is 1/4 cup the recipe should state 1/2 cup for 2 servings. WRONG and totally s*****d us.
I have had a garden all my life & think you should also have a perennial garden, as well as flower that you can eat. Weeds should be on the bottom of your list & as many fruit, berry, nut trees as you have space for. We have a 30 acre family farm with for homes & many different skills. One blacksmith with tools, electrician, carpenter & wood worker & a water source if power goes out. Figs, grapes, pears, plums, raspberries, blue berries, strawberries, persimmons, garlic, onions, greens & annual seed supply. Working to gather more perennial crops.
Dehydrated meals in quart jars are wonderful if you have a woodstove. If you don’t it will use hours of fuel you might not have or be able to replace. After some thought I decided the “quick beans” you can purchase are a bit expensive for meals when you can cook and dehydrate them yourself. That’s very simple to do. Cook as directed, then put in dehydrator for about 12 hours until they are dry and hard again. Then it’s just a matter of 10-15 minutes in water to rehydrate and then enough fuel to warm it up.
If you have time and little money you can buy #10 cans and run the contents through your dehydrator too. Much less expensive than buying them already done. chop extra celery, onions, tomatos etc when you’re cooking and run things through your dehydrator, jar them up and add oxygen absorbers (most stores that carry bulk items-bulk bins- carry oxygen absorbers and mylar bags.) If you make an assortment of dehydrated things it makes quick meals inexpensively. Everything but the rice or pasta is already cooked and will rehydrate as the “pasta” cooks.
One thing I’d add is that if you want to dry meat (such as burger) it should be finely chopped and boiled. When there is a layer of fat on top of your water pour it off and rinse it. Refill the water and boil it again, and yet again. At least three pots of water. Keep going until you don’t have any fat on top of the water. It needs to be fat free to dehydrate and not spoil. Fat spoils dehydrated food so be mindful that there isn’t any fat in whatever you’re dehydrating.
It isn’t rocket science-anyone with a $30 dehydrator can prepare food ahead for your family inexpensively.
God speed everyone. That means hurry!