What does winter mean for your food supplies?
Probably not much.
You won’t see much locally-sourced fresh produce, but modern global supply networks can cope with that. If it’s too cold to grow fruit and vegetables locally they can simply be imported from warmer climates – that’s why you can buy oranges all year round.
For the pioneers, facing harsh winters on the frontiers of the American West, things were very different. Primitive transport systems built on horse-drawn wagons limited the movement of food – even when the railways came along, without refrigeration there were still serious limits on what could be transported.
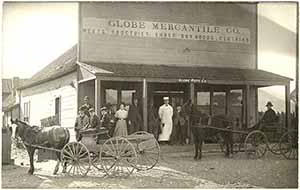 Town stores sold a few staples, like flour, salt, sugar and rice, but people mostly lived on what they and their neighbors produced themselves. In winter the options closed right down, because for months nothing could be grown. To survive until they could start planting again in spring, the pioneers had to spend much of summer and fall building up food supplies for the approaching cold months.
Most food won’t keep for months without being preserved somehow. There are exceptions – if you keep them protected from damp and vermin, dry goods will last a long time. Almost everything else needed preservation, though. The pioneers used various methods for this, and were able to store quite a wide variety of foods for long periods.
The bulk of a winter food stockpile was usually carbohydrates, especially flour. Vegetables and fruit were also a major part of it. Meat usually had a lower priority, because game could still be hunted in winter, but as much as possible would be preserved anyway; hunting isn’t always reliable, and can be risky in extreme weather. Let’s look in more detail at exactly what the pioneers stored, and how they did it.
Dry Goods
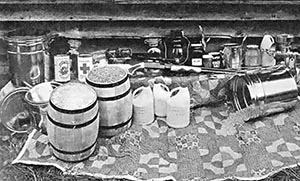 Flour was usually bought or bartered from the nearest trading post, and it was stored in large quantities – families would aim to go into winter with at least 100 pounds of flour for each adult, and an appropriately reduced amount for each child. Flour was usually delivered in sacks, so it needed to be protected from dampness and pests. Sacks would be stacked on a low platform raised off the floor; the storeroom would be checked regularly for mouse holes or signs of any infestations, and usually generously sprinkled with traps. Sometimes flour would be kept in barrels. These were also stored off the floor, but they gave much better protection against vermin than a sack.
Dried beans were another staple. They’re a good source of protein, last for years if properly stored, and are quite resistant to pests. A few pounds of beans per person were a common part of winter stockpiles. Like flour, they were usually kept in sacks and raised off the floor. The same goes for rice; it wasn’t as common as beans, but many pioneers would add a few sacks to their dry goods store.
Related: 50 Days of ‘Survival’ Calories with Rice and Beans
 A small sack of salt was essential. As well as being the basic seasoning it’s also useful for preserving more perishable foods. Finally, sugar. In the 19th century this came as a solid sugarloaf, usually shaped like a cone with a rounded end. Sugar nips, pincers with heavy sharp blades, were used to cut off pieces as needed. Sugar was an expensive luxury, and used sparingly.
Root vegetables
Potatoes, beets, carrots, turnips and most other root vegetables will last a long time if kept cool. The most common household way of storing them was in a root cellar. These could be fully underground, either under the house or dug into a nearby hillside. Alternatively they could be partly underground and with the roof and walls covered with a thick layer of earth. Some were even completely above ground, usually where the ground was too rocky or wet for easy digging.
Its thick earth insulation keeps a root cellar at a fairly constant cool temperature. It protects food from both freezing in winter and the heat in summer. Root vegetable crops would be stored in wooden bins or barrels, and would last for months. Shelves in the cellar could also be used to store canned goods and other supplies that did best in a cool, dark place.
For large vegetable crops a clamp was another option. To make a clamp, dig a rectangular trench about a foot deep. Line the bottom with a layer of brush and twigs, then a layer of straw.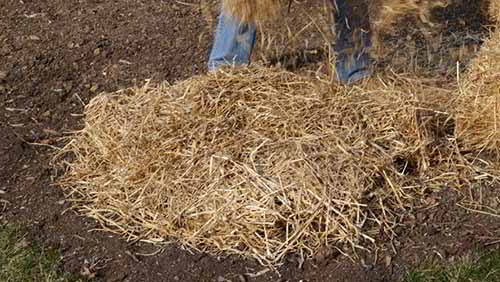
Stack the roots on the straw, forming them into a narrow pile up to about six feet high.
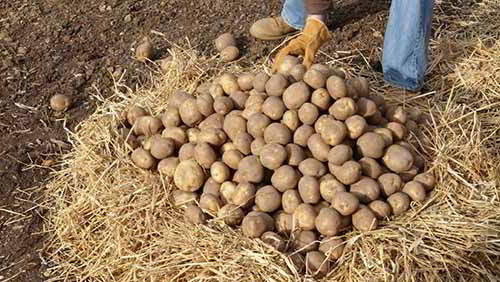 Then cover the pile with straw and cover it with the soil removed from the trench.
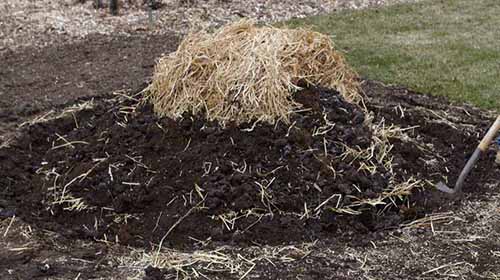
Dig another small trench all round the clamp to help with drainage, and throw the soil from that on too. You should aim to have about a six-inch layer of soil completely covering the clamp.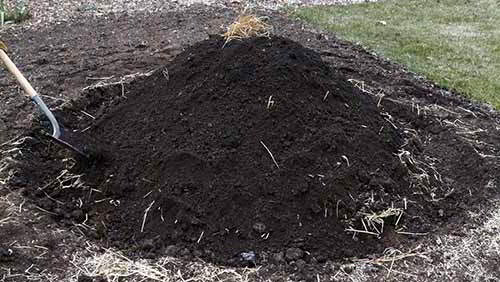
To remove vegetables open one end of the clamp and take out enough to replenish your root cellar, then reseal with straw and earth.
Clamps work best in very cold weather, when the temperature stays below freezing for long periods. In wet winter conditions it’s best to skip the initial trench and build the clamp directly on the ground.
Fruit and Vegetables
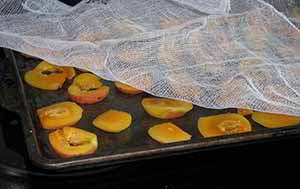 Some vegetables and fruits would be air-dried by slicing them thinly, laying them on a rack then leaving them for several days to dry. Racks would be covered in cheesecloth to keep bugs and birds away from their contents, and the slices would be turned occasionally to make sure they dried evenly. Once almost all the moisture had evaporated the slices would be stored in jars and kept in the pantry or root cellar.
Canning was a major activity every fall. As fruit, corn and green vegetables were harvested, pioneer kitchens filled with jars and steam. Canners didn’t exist, so jars would be heated in a large pot on the stove or fireplace. When winter arrived pantries would contain scores, perhaps hundreds of jars of preserved food.
Meat
Whenever possible pioneers would hunt or fish in winter, but sometimes they came back empty-handed. If a blizzard was blowing they couldn’t go out at all. To make sure they always had meat available, as much as possible would be preserved.
In fall, surplus livestock would be slaughtered. Older animals, most pigs, surplus bulls – anything that wasn’t worth the fodder and effort of keeping it alive through the winter. Offal, which is hard to preserve, would be eaten immediately; most of the meat was processed and added to the winter stores.
Thin-sliced beef would be air dried and turned into jerky, which could be eaten as a rugged, portable trail food or soaked to soften it for cooking. Beef and pork could also be salted. The best way to do this was to rub the meat with warm salt then pack it in barrels, adding more salt to fill the gaps as layers of meat were added. Alternatively, meat could be packed in the barrels then filled up with heavily salted brine. Properly salted meat would last for months, but it had to be soaked before cooking to wash away excess salt.
For pork, smoking was a popular solution. Not everyone had a smokehouse, so they’d take their pork to someone who did, trading a share of the meat for use of the facility. Almost every family slaughtered at least one pig in fall, so carefully smoked hams and bacon were a common sight in frontier pantries. Even if the weather made hunting impossible there would be meat available to add taste and protein to the menu.
Related: This Super Root Preserves Meat Indefinitely!
Cheese
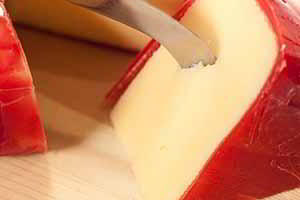 Dairy products are highly perishable and difficult to store without refrigeration, but the pioneers managed to store some. Butter could be canned, but the easiest to stockpile is cheese. Almost any variety of hard cheese can be preserved with paraffin wax. The most common way was to melt the wax then brush the cheese with it. Two coats were applied to make sure there were no holes where air could get in. Once sealed in wax, the cheese could be stored for long periods in a cool place. Not only was it preserved, it would mature and improve its flavor.
Eggs
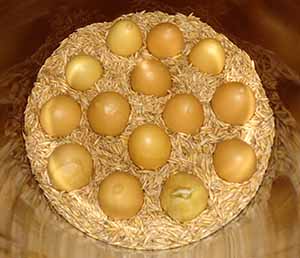
Hens lay more when they get more sunlight, so in winter eggs were few and far between. Paraffin wax came in useful here, too. Surplus late summer and fall eggs, collected as soon as they were laid, could be brushed or dipped with molten wax; like cheese, they got two coats. That gave them an airtight seal that stopped bacteria growing inside and spoiling them. A waxed egg would last in a cool place for six months, or perhaps even longer. Before using, the pioneers would strip the wax from the egg and put it in a bowl of cold water. If it sank to the bottom it was still good; if it floated it had spoiled. The more time between laying and waxing, the more likely the egg is to spoil.
Related: How to Keeps Eggs Fresh for Months with Mineral Oil
The pioneers didn’t have the benefit of modern supermarkets, but they were experts at preserving a wide variety of foods. A family on the frontier would have hundreds of pounds of food in store at the beginning of winter, and they used it carefully – waste was a serious matter. Nature took enough of a toll; ten percent or more could be lost to pests or spoilage.
Households would preserve and store as much as they needed for the winter – then keep on canning smoking and salting, packing away everything they could. Any surplus was a safeguard against unexpected losses – animals breaking into a clamp, or a serious pest infestation in the root cellar. Families would also donate surplus to neighbors who’d lost their reserves – after all, next winter they could be the ones who needed the help.
We’re spoiled by refrigeration and modern shopping, but if the SHTF all that will be gone in days. At that point, those who can fall back on the skills of our pioneer ancestors will be the ones who can watch the first snow fall and look forward to seeing spring. Because if you don’t know how to put up a few hundred pounds of preserved food it’s going to be a long, hard winter.
You may also like:
 Dipping Candles the Old-Fashioned Way
Beware! 15% of The Population Is Infected With This Parasite (Video)
100-Year-Old Way to Filter Rainwater in a Barrel
What Advice Would A 80 Year Old Person Give About The Way Life Should Be Lived?
How To Build A Dirt Cheap Sod House (Soddy)



Since paraffin was wasn’t discovered until 1830, a pioneer would be considered to be someone like my great grandfather who fought in the Mexican American War and homesteaded in Nebraska in a sod house, and not like my great-great grandfather who lived in colonial times. The latter probably had to use beeswax, tallow or candle berry to seal his cackle fruit.
That would be “a short hard winter.” 😉
wondering how they canned corn and green vegs. with no pressure canners. were they just processed longer? anyone know?
they water bathed them for a few hours and they did more at a time outside over an open fire
some of my old canning books actually have processing times for these vegetables, but it’s usually around 3 hours and very unreliable! Corn was often dried and ground for meal. Beans and other veggies are great pickled. I make an end of the garden pickle with all kinds of left over vegetables, like carrots, celery, regular pickles, peppers, onions and more. I just use my grandmothers favorite bread and butter pickles recipe. I’ve had these last over 10 years in the jar!
Water bath. Up until last year we canned everything by the water bat method. My wife is afraid of pressure canners. We will have ben married 58 years on Oct 22, so we must have done it correctly.
You have NOT been doing it correctly and have been very fortunate. Botulism grows in ALL low acid foods that grow underground, or near the soil, and creates spores that produce a deadly toxin in wet, warm, low oxygen environments. Botulism spores are NOT destroyed in water bath canning because 212°F is not high enough to kill the spores. It must be killed in temperatures over 250°F. All water bath canned low acid foods provide the PERFECT environment for spore growth: wet, warm, low oxygen, never heated high enough to kill the spores. You have been very fortunate so far, OR you actually never water bath canned any low acid foods. Please stop this practice immediately. ? Please stop water bath canning low acid foods. You have been EXTREMELY fortunate.
my mother never owned a pressure cooker. She would put her vegetables in a glass jars put them in a large pan and boil them until the water in the jar was near boiling the allow them to cool the jars would seal themselves.
(I realize this is over 3 years old but people are still reading this so it needs correcting. I am a retired biochemist and as I stated above:)
You have NOT been doing it correctly and have been very fortunate. Botulism grows in ALL low acid foods that grow underground, or near the soil, and creates spores that produce a deadly toxin in wet, warm, low oxygen environments. Botulism spores are NOT destroyed in water bath canning because 212°F is not high enough to kill the spores. It must be killed in temperatures over 250°F. All water bath canned low acid foods provide the PERFECT environment for spore growth: wet, warm, low oxygen, never heated high enough to kill the spores. You have been very fortunate so far, OR you actually never water bath canned any low acid foods. Please stop this practice immediately. ? Please stop water bath canning low acid foods. You have been EXTREMELY fortunate
Pickled in large crocks with salt. This would last all winter.
They sliced veggies and fruit and dried it
If I were to make a guess… De-hydrating, then dry canning.
Corn was dried. Green beans were ‘strung’ with a needle and thread, hung up to dry. Some called them britches. Beans were dried. Root crops were kept in layers of straw or sand if they had some in a cool dark place like under the floor boards or in a root cellar. Pumpkins, squash will keep all winter. Cabbage is a good keeper too.
Cold packed. They would wash the jars and place them in a large pot of boiling water and the lids. They pulled out the jars, poured in extremely hot food and took the lids out with tongs and screwed them onto the jars. It is very hot so need to use some sort of dish cloth as you twist it. Then you had to listen for the pops. Each jar lid has to make a pop or it is not sealing right. You will see the lid. If for some reason you did not hear all the pops then check the lids and whichever one did not pop remove the food, re-clean the jar, lid and tongs and reheat the food and try again. If for some reason you missed it altogether and when it comes time to open it if there is not a tight seal and you do not hear a slight pop when you open it do not chance it,throw it away! Could have botulism. I have never had one that has gone bad. But always better safe than sorry.
Your method is for modern metal lids. They didn’t have those until 1903. What they are talking about in the article is most likely the flip top lids that would have used some kind of wax as a seal. This will work for high sugar, salt or vinegar procucts, but can lead to botulism in meat and other things. That’s why most was smoked, salted or preserved in some other way.
Indiginous women air dried the cobs.Then they were stored in a pit under their homes or between houses. I don’t know how deep but I know that they used a ladder to go down and get it eventually.
I am a retired biochemist who has studied food storage methods from.ancient times through current times. The well-taught pioneer NEVER canned low acid food items, and they knew “low acid” simply by the tartness of the food. Tart foods could be canned. Sweet or bland foods could not. Pioneers we’re very smart, and although they didn’t know it was botulism that caused these canned items to kill you, or that it was the “acid” content that prevented botulism, they knew better, by their ancestors mistakes, not to can non tart foods. All low acid crops were either fully dried (dehydrated), pickled, or fermented. Pickling adds the “tartness” (acid) back to the foods and, as we now know, destroys botulism. Beans, peas, turnips, apples, etc were all thoroughly dehydrated then reconstituted in soups.
Like today, there are always some individuals that cut corners and did things they shouldn’t, and so you do find that some women canned these items, but the fully educated survivalist pioneer woman who was knowledgeable in how to work and run a proper homestead NEVER canned these foods. Qutes such as, “my grandmother did such and such” is not a resource as to what was the actual and properly taught method of the times. A good pioneer woman always dehydrated, picked, or fermented low acid foods.
Sorry about the typos:
From.ancient=from ancient
We’re=were
ancestors=ancestor’s
Qutes=quotes
Did things=do things
Non tart=non-tart
Picked=pickled
I agree 100%!! What resources do/did you study or recommend for people wanting to learn “the old ways?” For example I know green beans were dried but then what do you do with them?
2 ways. One boil your jars and melt your hard fat. Pyt what your canning into a large copper or tin pot. Boile them until cooked well and some fruits till thick. Most people didn’t sweeten them but if available sugar, honey, molasses or maple syrup could be added. Also a little salt. Pour into the hot jars and let cool, being careful to be extra clean handling the food. Then you could pour the hot fat over the top. Let cool and pour again a thin layer of fat over top till no holes were seen carefully put the fat covered jars on shelves and put a muslin circle on top of jar with the fat on it and tie with string to keep bugs out. Other was to fix your food till done, fill sterile jars to 1 inch from top. Put lid on and put into a flat bottom kettle and pour boiling water to cover by 1 to 2 inches of water over top of jars. Put a large towel in the kettle to keep jars from rattling around and possibly cracking. Bring to boil and simmer for 3 hours. This is mainly veggies and meat done this way. Use a teaspoon of salt in quart jars. Have a tea kettle of boiling water. ready to keep canning water at proper level. When time was up turned fire off and let water cool for about 10 min.then remove jars from water and put on towel to let cool all the way down. Tighten lids before storing.
Just a note that some of the waxed eggs in the oats picture are pointy end up. Because of the air sac at the bigger end of the egg, if stored pointy end up, the air sac will separate by gravity and move up to the pointy end, causing the egg to go bad much sooner. Experiment with a few eggs in the fridge, and notice how fresh the big end up eggs stay when you break them into a fry pan: nice and firm whites, they don’t break and run all over. The pointy end up eggs run all over and the yolks often break.
I’ve read that green beans called Leather Britches were strung and hung in the attic to dry.
I dehydrate green beans for casseroles, soups, and stews. They are okay, just don’t reconstitute back to as to the original. Hence, the “leather” part.
Drying beans is easier than canning them. Less prep with the jars and water bath.
My grandmother and mother used to dry green beans on strings hanging in an attic until dried.
When cooking dried beans (called shuck beans) they would wash the beans and then cook with ham or some bacon for flavor. They would slow cook for hours until rehydrated and soft. Salt and pepper to taste. I remember that they were delicious.
One of my grandmothers still cooked on a wood stove. The food always tasted better I thought!!
I have dried beans like this and could never get them tender when cooking. Canning is best if you can do it !
My mother canned everything she wanted to can using a Water Bath Canner. She would first cook the vegetables in a big kettle or pan. Then she put them in clean jars, sealed the lids only finger-tight, then placed the jars in a Water Bath Canner for the final process. We had fresh canned vegetables all year long.
Pioneers knew the signs of spoilage and checked the jars regularly plus they alwsys fully heated the canned foods after opening and before tasting to kill any bacterea. By storing canned foods in cool dark spots they had a much better chance for success.
great article this site and all the articles on it are great
my mom used to can or freeze food every fall. she would can pears,peaches, different veggies.bnack in the 1940s-80s.
my mom used to can or freeze food every fall. she would can pears,peaches, different veggies.back in the 1940s-80s.