by Bob
Do-It-Yourself camouflage with spray paint is easy to do, inexpensive, requires no fancy gear, and doesn’t require a ton of skill or experience to do reasonably well. For a few dollars and a few minutes up to an hour or so, you can camouflage weapons, holsters, knives and other gear sufficient to break up the items’ inherent outlines and thereby allow yourself to better blend into your surroundings.
I myself have never been too excited about camouflage as a fashion statement. It’s just not my style, and I’m pretty sure if I’m at the grocery store in a camo t-shirt, people can still pretty well see me. Nevertheless, I am pretty clear on the importance and even necessity of camouflage in the right situations.
The need for camouflage in my mind applies mainly to 3 scenarios:
- Recreational hunting. I’m trying to fill my tag, and I don’t want the game to see me.
- Survival hunting. The sustenance of my family requires that I kill something to eat.
- I wish to stay hidden from those that may be hunting me in the event of WROL. It is plain that two of these scenarios are critical, make-or-break, do-or-die endeavors.
Then, I wonder…
“What good does all this camo clothing do me, and face paint and whatever else, if I’m holding a gun that looks from every angle to be exactly what it actually is?”
So then, what can I do to break up the outlines of my weapon and to make it blend into my environment and into the background?
Such questions led me down the path of watching several hours of DIY videos. It didn’t take long to understand that there are a variety of approaches and techniques and thought processes and outcomes. I’ll tell you straight out so I don’t waste your time-what’s in this article isn’t going to be very much value to you if you’re looking to do a camo job on your hunting rifle to make it look like you spent hundreds of dollars on a custom job.
There’s a very good reason that I don’t bother with the “nearly custom” effort, and it also stands as a really good reason to rattle-can your gear in the first place…and its not because I’m a cheapo. I am a cheapo, but that’s not the reason.
If I’ve got a brand new, shiny and perfect weapon, or knife or new pair of cowboy boots, then there’s a little part of me that’s going to avoid to one degree or another the accumulation of dings and scratches and other blemishes that come with using a tool that was designed to do work in adverse conditions. That is to say, once I’ve rattle-canned my rifle, I’m going to be a lot more prone to making it do the work it is made to do rather than babying it.
Same way, if I spent countless hours and a bunch of money applying an expensive camo job to my rifle, I’m likely to be just as reticent to ding up the camo job. Ever see a skilled bmx’er or skateboarder take their new gear and “ghost ride” it enough to ding it up a little? Once that new bike or skateboard is a little scratched up, the user is then free to use the item with the abandon that a competitor ought to use it. An inexpensive, DIY rattle can camo job on your weapon really serves the same purpose as the ghost riding does for the bmx bike.
Before we talk about some methods lets take some time and talk about how the mind and the eyes work. The human brain is designed to pick up patterns. It helps us survive and it helps us learn what we’re doing right and what we’re doing that’s not right. For example: your eyes pick out a pair of small, glowing orbs on the side of the road. Just as the orbs move out onto the road you hit the brakes, fearing you’re going to hit something. You end up staring into the wide eyes of a deer that you stopped just short of hitting with your car. Your throat is dry and you’re sure your eyes are as wide as his. The next time you see two small yellow orbs down the road, without even thinking you immediately slow down and move to the middle of the road, and the deer stares at you curiously as you cruise by at 25 mph. The simpler, age-worn analogy is you touch a hot stove, and you learn not to touch the stove…because it is hot. The point then of the rattle can camo job isn’t so much an artist’s rendering of the background applied to the subject item, but rather the goal is to break up the item’s outlines. It is the outline-the form and shape and color-that make it immediately identifiable to our eyes and our brains.
So if I’m trying to obscure myself in my surroundings it is vital that I break up the natural pattern of shapes my body and my gear makes. The use of painted or printed patterns of colors and shades that are similar to my surroundings breaks up the outline to a degree of the shapes I and my gear are making. The wide variety of camo patterns available make it easy to see how this works if the camo’d item is at a reasonable distance. Up close it has very little effect…unless one is practiced in the art of ghillie suits, and that is a whole ‘nuther level of camouflage. But at a distance the camouflage effect can be very pronounced.
Can You Spot The Sniper In The Picture Bellow?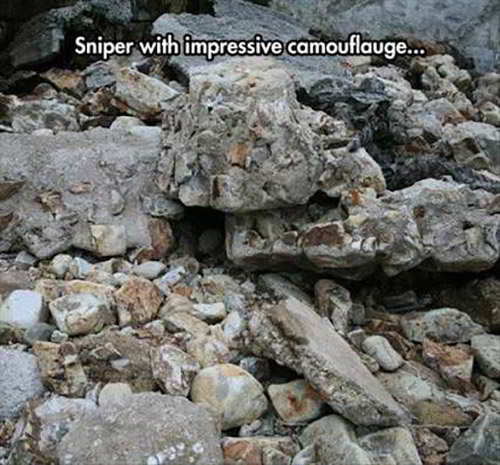
With that thought in mind the DIY camo project starts with finding (flat only!) paint colors that match your natural environment. Generally speaking, deserts are light to dark browns and grays. Forested areas are obviously light to dark greens, tan, dark brown and black (shadows). A snowy environment is going to be white and shades of gray. Spend a few minutes on the paint aisle at a well stocked hardware store and you’ll see this is a straightforward and simple matter. Don’t forget blue painter’s tape while you’re buying paint, and you might pick up a 1″ foam paint brush or two while you’re there.
So you’ve got your weapon and you’ve got your pallet of spray paints all put together. Next, collect things like pine boughs, es, grasses etc. from your natural environment (or the environment to where you’ll be bugging out). These can be augmented with items like frayed cord or rope, chicken wire folded over six or eight times (it has to be folded over itself to create a noticeable pattern as you paint-and chicken wire is one of my faves), randomly cut sponges and paint brushes, and other items.
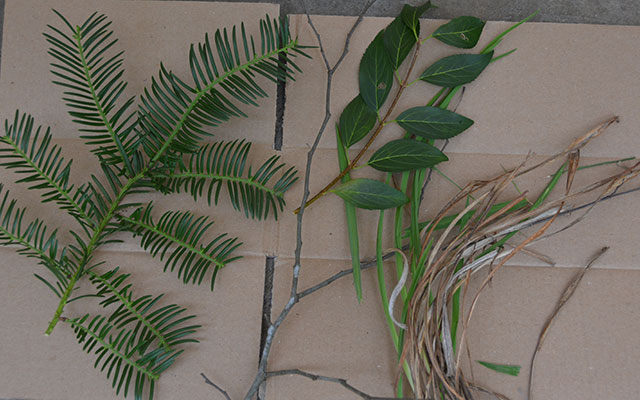
As you select items to create your pattern, try to avoid the temptation of small items that may be too detailed (like a single layer of chicken wire) as at a distance, too-small details with wash out and you’ll lose the effect of breaking up the pattern of the item you’re striving to camouflage. It might look pretty sharp close up, but its not going to be as effective as it could be.
Next is your PPE-personal protective equipment. Make sure you’ve got eye protection, dust masks and food service type gloves. Always paint in a well ventilated area as per the paint can’s instructions. Never spray aerosols near an open flame, food or beverages. If you’re painting a weapon triple check that it is unloaded before doing anything to it.
Start with your degreaser of choice. I usually use isopropyl alcohol or mineral spirits. Fully wipe the weapon or other item down to remove dust, debris and any oil that could prevent the paint from adhering to the item. Wipe the degreaser away with a dry, clean cloth or rag. Double check to make sure you got it all.
Next, put a foam earplug in the in the barrel, tape off the loading port, the ejection port, the front and rear sight and any other of the weapon’s features that might be caused to malfunction if they get paint on them. Also, if you’re painting a weapon with a red dot sight, or a scope on it you’ll want to either tape up the features of the item that would be adversely affected by the application of paint, or remove the item and plan to paint it separately. Painting a scope for instance separately means that you’ll have to re-zero the weapon, and it also means that you may end up with a scope that doesn’t quite blend in with the weapon that it is mounted on. For those reasons I usually leave the “glass” in place and take good care to tape up the lenses and knobs appropriately. I generally paint detachable magazine fed weapons with an empty mag in the mag well. Otherwise it’d be wise to tape over an empty mag well. With shotguns, you’re likely to have to tape over the end of the barrel, as obviously an earplug is way too small to have any effect. Also, I usually leave the sling in place (if applicable) and I paint it as I paint the weapon.
Related: DIY Gun Solvent
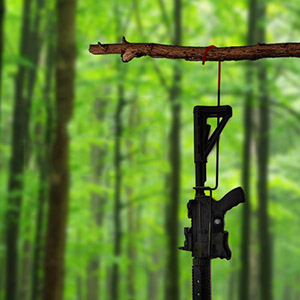 Once I’m ready to apply paint I suspend the weapon, usually from a bungee cord attached to the garage ceiling. I like to hang the weapon about torso height to make it easy to hit it from all angles, and the bungee allows the item to swing freely, which makes all angles access even easier. Don’t forget to open doors/windows to maximize airflow to prevent the buildup of toxic paint fumes. Put on the dust mask, the eye protection and the latex gloves if you haven’t already.
The first step of paint application is to thoroughly cover the weapon in the base color. I like the results I get from starting with the lightest color first, usually tan or light green. Often it’ll take a couple of coats to get sufficient coverage. As spray paint dries fairly quickly, a second coat doesn’t take too long. Be sure to apply the paint with smooth, even strokes. Avoid the temptation to go back and forth as you’re spraying as this will cause drips. Follow the spray can’s instructions as to how far away to hold the can when you’re spraying, and then adjust as necessary. Once the weapon is well covered and sufficiently dry, its time to apply the pattern(s) you’ll be using.
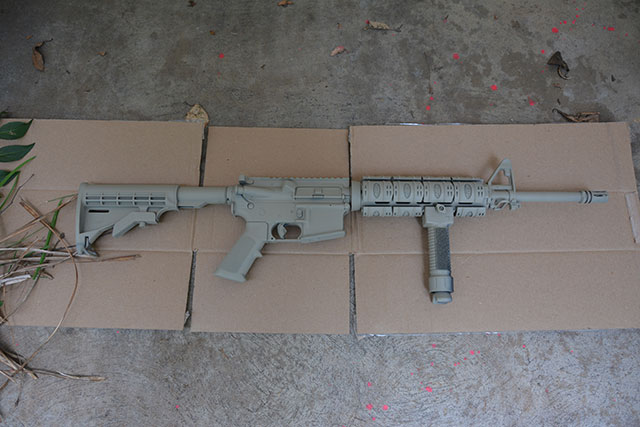
 Be sure you have gloves on for this part. Identify the next-darkest color in your paint palette. Take a pattern item (pine bough, clump of field grasses, or, my favorite-the folded over chicken wire) in one hand and the paint can in the other. Hold the pattern item against the weapon and spray a short burst at the pattern item. Move about the weapon, changing the spacing and the angle-of-orientation randomly. Avoid the temptation to “overdo” this first pattern application, as you’ll be filling in the gaps with subsequent colors. As you change to the next darkest color, feel free to change your pattern item if you wish. Fill in the spaces that you didn’t cover with the first pattern-color, and don’t be afraid to partially overlap the first layer of pattern in places to enhance the effect. It may be helpful with some pattern items to apply a coat or two of any color to the pattern item and let it dry before you start using it. The extra layers of paint will make its features thicker and will help the pattern to be more visually effective.
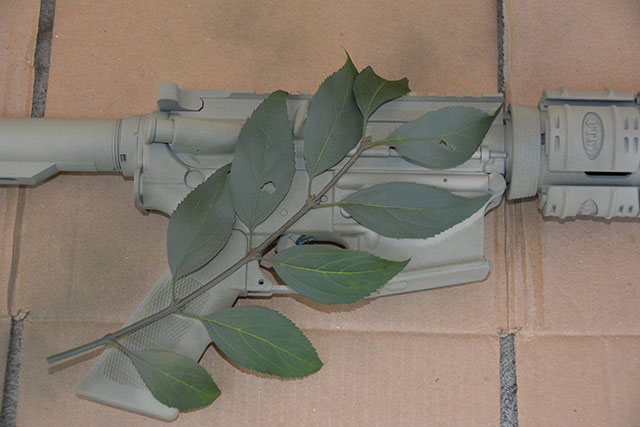
 I usually use a total of five colors-tan for the base and then light green, dark green, dark brown and then black when I’m doing a foliage camouflage. I do the black very last and somewhat sparingly to avoid drowning out the rest of the pattern-colors. Don’t forget the trigger guard, the barrel from all angles and the back end of the buttstock. If you do get a drip spot, or too much color in one place, feel free to “touch up” the spot with a lighter color to bring it back into balance. If you allow the paint to fully dry before applying the next color, it will maximize the definition in the pattern details. If you quickly move from color to color without allowing the paint to dry the colors will meld and give a more “impressionistic” feel to the pattern. Both approaches work quite well for camo and I encourage you to try both techniques. Be sure to let the item fully dry for a day or more before putting it back in its case or holster, as the paint will “go away” pretty easily until its fully dried. Once its dried, then not so much. If you don’t like your first results, just start over with your base coat and do it over. As you move from summer to fall, and then fall to winter, you may choose to reapply camo paint in suitable colors accordingly.
 Once finished, remove all the tape/earplugs and any other measures you took to avoid applying paint to sensitive areas. If you choose, spray a color of your choice on a paint brush and dab at the places where the tape was to avoid “shiny, black spots”. Again, be careful to not diminish the functionality of the weapon. Then double check again to be sure you have all the tape and whatnot removed. A blocked barrel could be disastrous. A taped over ejection port could be anything from an embarrassing nuisance at the range to a failure to feed in a life or death situation.
Do-It-Yourself camouflage via rattle-can paint is pretty easy to do and pretty hard to screw up. Its not very time consuming, and it is fairly inexpensive. It provides a protective layer of paint to your weapons and other gear, and helps you move past the “it looks so nice, I’m afraid to scratch it phase” of ownership. The camo paint job will prevent providing an readily identifiable outline to your weapon and help you better blend into your environment. And once you get the hang of it, it’s actually pretty fun.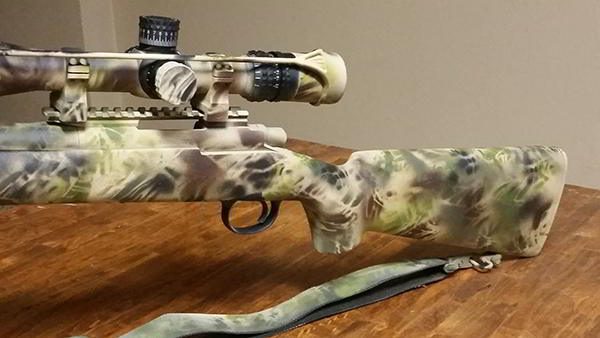 What you will need to rattle-can camo your gear:
- Two to four shades (or more) of flat paint that are similar in color and shade to the area you operate in.
- Foam earplugs for the barrel
- Blue painters tape for sights and other components that may not function properly if painted upon
- Eye protection, dust masks, latex gloves and some clean rags or cloths
- Leaves, pine boughs, grasses, frayed rope, or chicken wire (did I mention that’s my favorite) or whatever else you think might make good patterns
- Degreaser/cleaner like alcohol, mineral spirits, paint thinner to give the paint a proper surface to adhere to
- 1″ foam paint brush(es)
- A well ventilated area to paint in
- About 30 to 60 minutes of free time
If you have other suggestions feel free to share them in the comments section…help make us all good at what we do!
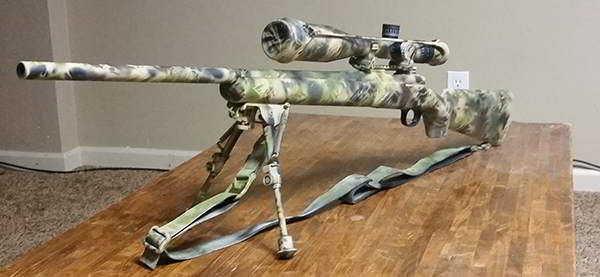
I camo painted my weapon a few months ago and sadly I didn’t take pictures at the time. The pictures in this article are my weapons but in order to visualize the process better I borrowed some the pictures from Pat Henry.
You may also like:
 How to Deal With The Most Common Handgun Malfunctions?
H2O Dynamo – The Awesome DIY Device That Turns Air Into Fresh Water! (video)
How to Make Firebricks (fire logs) and Wood Stove Logs for Free!



With the skill of the people that will pile out from a city for a crisis the countryside wont be recognizable anyway. game will be run to death so finding food wont depend on camouflage but old fashion skill. In the densely populated areas they wont leave the leaves on the trees. they will be as locus and devourer everything and then die to fertilize the earth so it will recover.
Grampa
I agree grampa, but camo would be nice for taking out intruders!
Yes, indeed, intruders. Anyone that comes near me…..well, fertilizer is what they become. I will NOT assist the locust scavengers.
I want to point out something about green paint. The majority of people will see green and that’s fine but I know someone who is color blind except he can see blue. Some green paints, prints, etc are made mixing blue and yellow. People like him can see the blue so someone trying to camouflage, the blue will stick out like a sore thumb.