Winter is upon us, and with it, frigid cold weather and higher heating bills.
Even though winter is usually a time to look forwad to thanks to the Christmas season and the fun we can have in the snow, it also always brings with it a list of concerns that those living on off-grid homesteads have to contend with.
Those living on the grid may seek alternative means of heating thier homes to help lower their monthly heating bills, while those living off-the-grid face the no-less difficult challenge of keeping their homes warm when their normal heating methods may not be enough.
Here are seven ingenious DIY ways to heat up your home this winter:
Caulk the Windows and the Doors
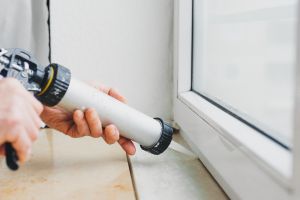 There are two places in your home that are the most vulnerable for letting cold air seep into your home (or allowing warm air to escape), and these are your doors and windows.
Before winter, add or check the caulk over the windows and doors to ensure the seal is tight.
Weatherstrip the Doors and Windows
As an alternative to caulking, you can weatherstrip the doors and windows instead. If you already have weatherstripping, look for tips and tears that could be letting any cold air in.
Use Soft Rugs
While making sure to your doors and windows are properly sealed is smart for keeping, a commonly overlooked place in any home for is the flooring.
Related: The First Thing You Should Do in a Winter Blackout
Regardless of whether you have hardwood floors, tile, or carpet, consider investing in soft rugs that you can lay out over the floors. Not only are soft rugs more comfortable for your feet, they will also help your feet to be warmer as well
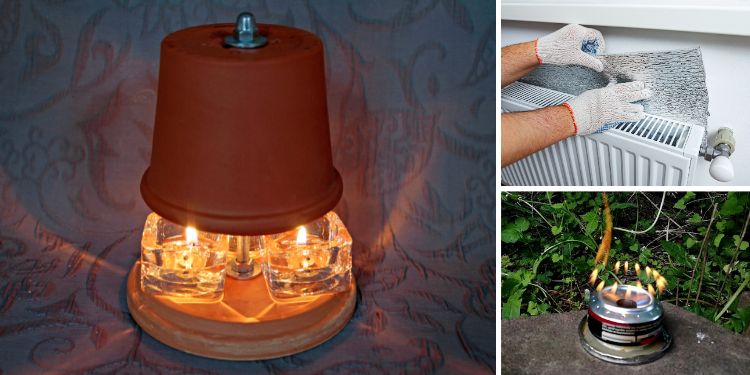
Build a DIY Stoneware Heater
A DIY stoneware heater is very easy to make and can help provide warmth to a room in your home.
Gather the following items: ceramic pot, fan, tray, candles, wax or glue, four bricks, matches or lighter.
Now follow these steps:
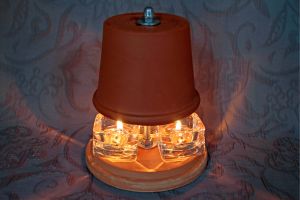 Place your candles on a tray and stick them upwards (this is why using wax or glue is helpful if you’re using birthday cake style-candles, otherwise candles in jars or cups work just fine)
- Position two of the bricks on their long sides next to the tray on the right and the left
- Position the other two bricks behind the tray on their short sides sticking upwards, to form a wall behind the tray
- Position your fan on top of the back two bricks that form the wall
- Light your candles on the tray
- Place the ceramic bowl over the tray, and make sure it’s leveled on the bricks on the right and left so it won’t crush the candles on the tray (the bowl should be in front of and underneath the fan)
- Switch on the fan
And that’s it! The ceramic bowl will start to emanate heat generated from the candles inside, and the fan will help redirect the heat into the rest of the room.
Make A Penny Can Stove
A penny can stove provides a small but reliable source of heat. You can also assemble penny can stoves using items you may already have in the form.
Start by gathering the following items: empty soda cans, rubbing alcohol, pushpins, hammer,sharpie, knife or scissors, nail, wrap insulation kit, coin (quarters work best), lighter.
Related: How to Make Your Own Rocket Stoves (Tin Can & Long Burner Rocket Stoves)
Once you have those items, follow these steps:
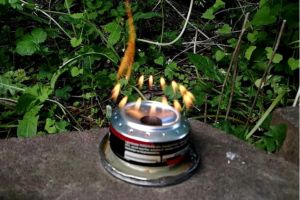 Turn one of the soda cans upside down
- Drive a nail through the middle of the bottom of the can
- Now punch four holes around that center hole using the push pins
- Punch sixteen more holes around the bottom of the can, again using the push pins
- Take your marker and draw a line around the circumference of the can right in the middle
- Use your knife or scissors to cut evently along the line; this will create two halves of the can
- The (A) bottom part of the can (with the punched holes) will go on top of the (B) other piece of the can
- Take the pipe rap insulation and place it into the B piece of the can
- Now assemble the can by placing the A part of the can over the B piece
- Pour the rubbing alcohol through the center hole that was created with the nail
- Ignite the fuel using a lighter
- Place a coin over the middle hole, so the flames jet outside of the circumference hoels created by the punched holes
And that’s it! You can hold your hands directly over the flames (but not too close!) to help get warm. You can also try cooking certain kinds of foods, such as hot dogs, over the flames as well.
Consider making multiple penny can stoves and then set them aside in your pantry or cupboard so you can pull them out to use at a later date. The idea is you want to have a few penny can stoves ready to go.
Reflect The Heat From Your Radiators
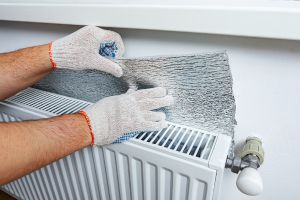 This is an easy DIY method for redirecting heat into your home.
Take sheets of aluminum foil and tape them to the wall behind your radiator.
This will reflect the heat generated by the radiator back into the room.
It really is that simple.
Indoor Fire Pit
If there was a method for safely adding an indoor fire pit to your home, would you do it? As it turns out, there is such a way.
Gather these items to start:
- Ceramic Container (make sure it’s fire resistant)
- Candle Holder (make sure it’s built out of glass)
- Rocks (go with fire safe rocks suc has marble, granite, or lava rocks
- Bioethanol
- Lighter
Once you have those items, follow these steps:
- Place your candle holder into the middle of the ceramic container
- Now your rocks into the ceramic container surrounding the canlde holder and layer them appropriately; you don’t want the rocks to be packed together too tightly (the idea is that there should be airflow in between the rocks
- Pour bioethanol into the glass holder (this will serve as your fuel)
- Light up the bioethanol
And that’s it! The bioethanol will burn and the rocks will gather the heat created by the flames, before emiting it out into your room for warmth. The larger the container and candle holder, the larger the flame will be (but for safety purposes indoors, go with a smaller container).
The above methods may seem simple, but that’s a good thing. They each require very limited resources and don’t require you to be a skilled handyman to complete them.
As winter approaches, off-grid living becomes even more challenging, especially when it comes to heating your home. While DIY methods like using penny can stoves, stoneware heaters, and reflecting heat from radiators are great short-term fixes, they can only do so much. For those looking for a more reliable and long-term solution, The Modular Backyard Power Plant could be the game-changer you need.
This simple, scalable DIY project allows you to build your own solar-powered generator right in your backyard. You can generate heat and power for your home—without relying on propane or fire hazards. Not only will this help with winter warmth, but it also ensures you’re ready for any emergency, making it a must-have for off-grid living.
Plus, the guide walks you through every step with videos and material lists, so you don’t need to be an expert to get started. Grab your guide today before the limited edition runs out!
You may also like:
 The Most Realistic Prepper TV Series You Need to Watch
5 Types of Wood You Should NEVER Burn! (Video)
I Tried to Eat My Emergency Foods and This Is What Happened



With any device that requires open flames, beware of moving the fire to things that you do not want to burn!
Beware of carbon monoxide. BE SURE TO HAVE GOOD VENTILATION! Otherwise you could drift off to sleep and never wake up.
Yes, candles will heat a room nicely when the cat knocks them over and sets the room on fire. I’d rename the article…”How to collect on homeowner insurance without really trying.” This article is a disaster. Right up there with heating with a portable LPG heater and 20 lb cylinder inside the house.
A person new to this might have been persuaded to do something differently by reading this and the comments section. Any and all ideas should be considered and filed away as useful or what not to do. It’s all in how you want to use the article. I notice you didn’t offer any suggestions, only criticism. You won’t last long in a community if you can’t offer a solution. I have used the can/ hobo stove to boil rice and rabbit. It works great and yes. Be careful with any fire anywhere you are especially inside a closed space.
Claude, this site always amazes me. There is something to learn, or a memory to be refreshed in every episode. This article by Nicholas Oetken is just another fine example. Thank You for all of the great ideas, recipes, and projects, consistantly found among these pages.
Sincerely.
G.W. Long
Common Sense , keep seals tight , vents open , and abillity to open and close for ventelation
Wp is best , but depends on your location
apply all you learn to your own setting or enviornment
there is no one size fits all and what works in the cold or hot , does not work in the swamp or humid areas
if you have ever lived or been to other places you see , all have a different setting for enclosures and housing
My son lives in a very hot , Humid area , keep s hse constant with ac and heat running for mold control
I on the other hand have 4 climate setting area , 4 seasons , Hot , Cold , Spring , Fall
so I want good ventilation and Good Enclosure , but when wood s on the fire , you need a slight vent to let the exaust out , when in the summer you want a good vent to let the air in . so be wise and be smart about how you think
Wisdom , not social following
The safest emergency heat is the Big Buddy catalytic propane heater. I’ve used mine many a time running it in an enclosed space with CO detectors, never a peep, they produce no toxic gasses. Just need to use a high quality hose and connector to the 20 lb propane tank and check for leaks by spraying the connections with soapy water. Or do it the old grandpa way with a bic lighter…
I agree. Mr Buddy will produce 4000/9000 BTUs. Safest indoor option is to use the disposable 14oz cannisters. They’ll last about 6 hours on low. Cans run about $4 to $5…a lot cheaper than 100 eighty BTU candles and you get real heat. A 15,000 BTU wall hung or freestanding LPG catalytic heater is another viable option. Fed from an outside 20 to 100 pound tank will provide plenty of heat. Fire code prohibits tanks inside occupied dwellings and there are specific requirements for gas piping. None of which are insurmountable. No need to buy new tanks either. 20 lb tanks can be bought cheaply at garage sales, flea markets … exchange them for a full tank and store as many as you can safely. Camp stoves and turkey friers also run on propane. Cooking and heating water is taken care of. Now, before anyone jumps my back and says…”but I live in an apartment or rental or storage unit” … set up a portable Mr Buddy with disposable bottles. Yes, it’s an investment but so are candles.
You say ceramic container – is that a ceramic flower pot or vase?
We use the Mr Buddy to heat our 13′ x 14′ greenhouse.
Thanks, Claude
Keep up the good work. Happy holidays everyone.
Hey Claude,
I’ve a finished plan in prepping for a winter event of a lights out situation. 2” blue Dow board insulation (R13) pre cut to fit all doors and windows, FROM THE INSIDE. Drop in place and tape the edges with clear package tape.
“According to the U.S. Department of Energy, the average heat loss through windows in a home is around 25-30% of residential heating and cooling energy use, meaning a significant portion of heat is lost through windows.”
So what ever is used for supplementary heat the net efficiency is increase by average of 27.5% due to lowered btu heat loss demand. In WI I’ve seen night time – 36 degrees straight up with –92 degrees wind chill. This straight up negative temps lasted for 6 days and has happened many times over the last 40 years.
Being 90% more expire from freezing rather than from excessive heat dictates an effective plan be put in place.
Please pass on if found of value. Please leave my name out.
Cheers,
Dave
I live in Arizona … in the low desert, so heating my home is never an issue. How ever with that said, insulation for the heat, helps keep out the chill in winter as well. I am a cheap skate … so in lieu of new double pane windows throughout my house, I purchased that styrofoam insulation with basically reflective aluminum foil on one side at my local Home Depot. In every window of my house, (except the front main window at the front facing the street) I put in a thick slab of that foam shiny side out … reflecting the sun, and insulating to keep the heat / and chill out. I even do that on the sliding glass door on the back of the house. Weather stripping is a good idea, as is caulking windows …. and frankly for summer, I prefer bare concrete or ceramic tile floors …. though I suppose it would be a bit too chilly for you folks with cold temperatures.
I did that trick but only on a few windows on the top floor. And only the top of the windows.
Need some sunlight in…
Pipe that hot water into a hot water radiator. You can at least heat one room.
Pipes to outside must have some sort of antifreeze in them too.
And pipe insulation.
no matter how many times i’ve read the stoneware heater I don’t get it , step by step pictures would have really helped.
Hopefully you do a follow up with instructions and illustrations , but whether you do or not I still appreciate the article.