Many people hear Chicken Pot Pie and assume anywhere in the US, you’ll be receiving the same dish. But here in Amish Country, Traditional Chicken Pot Pie and Amish Chicken Pot Pie are in fact, quite different.
In this article, you will learn what those differences are and how to make and can a pot pie filling to use in either recipe.
The Amish community puts the Stead in homesteading. We can learn a lot from this group of incredibly united and self-sufficient people.
Taking great pride in their expansive farms, gardens, fields, and orchards – the Amish use their harvest in real-time turning the leftovers from one meal into elements for the next, while also storing away a large stock of canned goods for the months to come.
Here in Lancaster County PA, if you were having Amish Chicken Pot Pie aka “Slippery Pot Pie” it would be served in a bowl, piping hot with thick doughy noodle squares, and chunks of chicken with veggies in a stew or soup-like dish. It’s marvelously hearty.
In most other places, if you were having Chicken Pot Pie, that would look much more like an actual pie with a flaky buttery crust and a creamy chicken and veggie mixture.
Canning the filling of Amish Chicken Pot Pie will not only ensure a longer shelf life but also provide a valuable resource for you and your family during times of need, such as when disaster strikes or in SHTF scenarios.
Related: These Are The People You Want To Keep Around When SHTF
This preservation method guarantees that you’ll have access to a delicious dish loaded with vegetables and proteins, even when fresh ingredients may not be readily available.
Making Chicken Pot Pie Filling
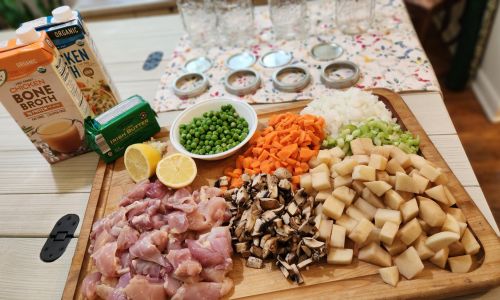
- 3 c. chicken
- 1-2 garlic cloves, minced
- 0.5 c. peas
- 0.5 c. celery, chopped
- 1 c. mushrooms, chopped
- 1 c. carrots, diced
- 1 c. onion, diced
- 1.5 c. potatoes, diced
- 6 cups stock
- 3 tbsp. butter
- 1 tsp. salt & pepper
- ½ tsp. celery seed
- ½ of a lemon, squeezed
- sprinkle of herbs: thyme, parsley, or 1 bay leaf
Directions
1. In a large pot or pan, melt butter over medium heat. Sauté garlic and onions until fragrant, about 2 minutes. Add mushrooms and celery, cooking until softened, about 3 minutes.
2. Add carrots and potatoes, sautéing until golden and soft, about 6 minutes.
3. Stir in the stock and add salt, pepper, celery seed, and any additional herbs like your bay leaf and/or thyme.
4. Bring to a boil, then reduce heat to medium and cook uncovered for about 10 minutes, or until the vegetables are tender, stirring often.
5. Stir in the chicken, peas, and lemon juice. Once the chicken is cooked through, remove the bay leaf and take the pan off the heat.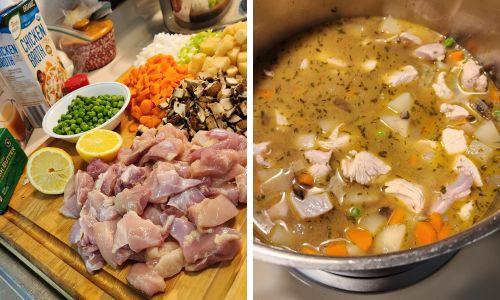
Pressure Canning The Chicken Pot Pie Filling
We are pressure canning today because we are using a low-acid food in the recipe, meat.
The supplies required for canning are: jars, lids, rings, a wide-mouth funnel, a jar grabber, a pressure canner, and a towel.
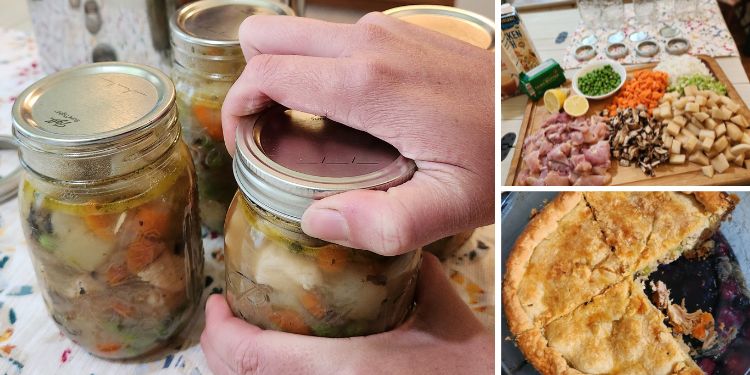
1. Begin the process with freshly cleaned jars, lids, and rings – you will fill your warmed jars with ladles of the Chicken Pot Pie Filling.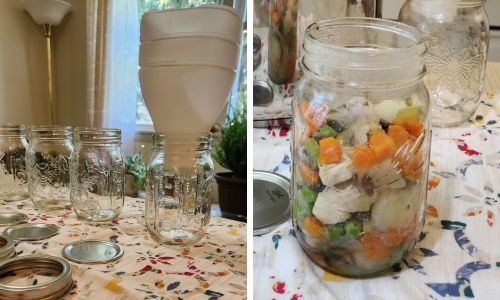
2. Strain the broth off first, then using your funnel, ladle in the hot meat/ veggie mixture, following it with the right amount of broth for you. Leave 1 inch of headspace.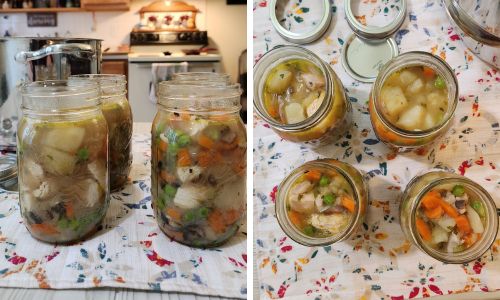
3. Using the air bubble tool, remove any pockets and double-check the headspace, adjusting as needed.
4. Wipe the rims of the jars with a moistened cloth of warm water or vinegar. Then apply the lids and bands, adjusting to finger tight.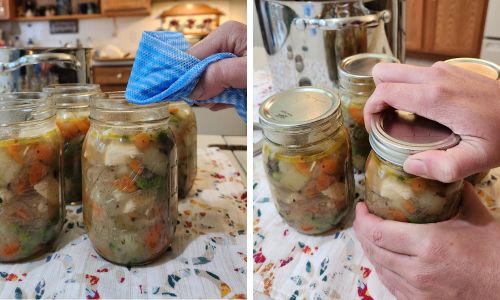
5. Once all your jars are filled and closed, load your canner and be sure your lid is locked.
6. Process jars in a pressure canner at 10 PSI, or according to your elevation; 75 minutes for pints and 90 minutes for quarts.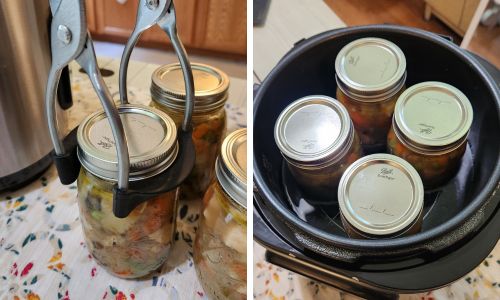
7. When the time is up, turn off the heat and let the pressure return to zero. After 5 minutes, remove the lid and cool the jars in the canner for 10 minutes.
8. Carefully using your jar grabber, remove them from the canner and allow the jars to cool on the counter for 12 hours. Then check the seals, label the lids, and store in a cool, dry space with sturdy shelving.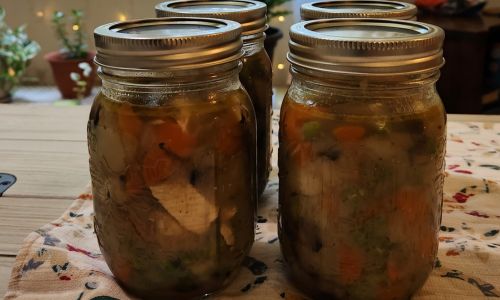
The ideal temperature for storage is between 50°-70° F. Always check the jars for any signs of spoilage before consuming, such as bulging lids, strange odors, or visible mold growth. If any of these signs are present, it’s recommended to discard the food.
How To Use Your Canned Chicken Pot Pie
For Amish Pot Pie you will need a large stew pot, a few cups of chicken or vegetable stock, your canned chicken pot pie filling, and a flour paste to thicken your broth.
For the noodle dough, you will need: 2 c. all purpose flour, 2 eggs – beaten, ½ c. water, 1 tsp. salt.
For the flour paste you will need 1 ½ – 2 tbsp. flour, and enough water to make a smooth paste.
The amount of stock you use will vary. Have a few cups on hand. You want the broth to be floating several inches above the meat and vegetables. This way when you drop each noodle, it will have room to hit the boiling broth and not clump up with your other noodles.
Directions
1. Beat eggs in a small bowl. Add water and salt. Mix until combined.
2. Add flour to the egg mixture and combine until a ball of dough forms. If it seems too sticky, add a bit more flour. Cover and set aside while you prepare the rest of the ingredients.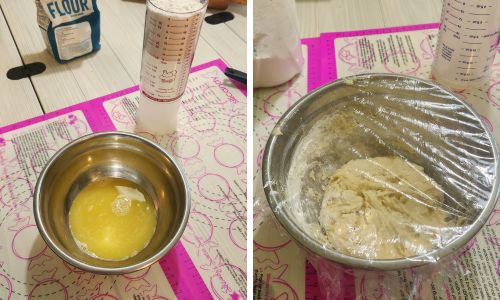
3. Pour canned pot pie mixture into a large stock pot. Add broth to the pot, and bring to a boil.
Related: How To Can Bone Broth At Home With 2 Years Shelf Life
4. As you’re waiting for this to come to a boil, flour your surface and roll out your dough to 1/8″ thick. Using a pizza cutter, cut your dough into about 1 1/2″ squares.
5. Once the broth comes to a boil, drop your squares into the broth, making sure each piece hits the boiling liquid. Take your time with this, if you pile too many in at once they will stick together. Stir.
6. Boil the noodles for 15 – 20 minutes, stirring occasionally. In the meantime, make a paste with flour and water to slightly thicken the broth.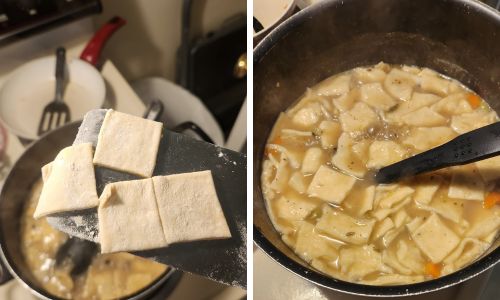
7. When your chicken pot pie is finished cooking, slowly add your flour paste, stirring to get it incorporated. Boil for 1 more minute.
8. Remove from heat and allow it to cool before serving. As it does, the mixture will thicken.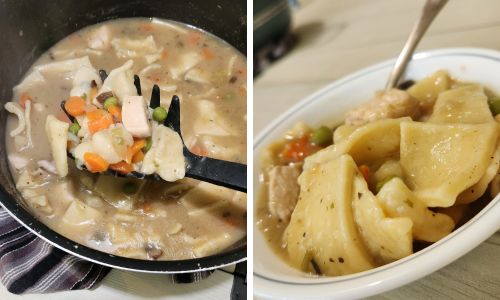
How To Make A Traditional Pot Pie
For a traditional pot pie, you will need an oven-safe pie plate, rolling pin, extra flour for dusting your surface, foil, and cling wrap. For the contents, you will need a few jars of Pot Pie Filling, a strainer, a large stock pot, and a bit of cream.
Crust:
For the crust you will need 2 sticks unsalted butter, 2 c. all-purpose flour, 1 tsp. salt, ½ c. full-fat sour cream.
1. Take the chill off the butter by cutting it into cubes and letting it sit out for a few minutes. Mix flour and salt in a large bowl.
2. Sprinkle butter cubes atop the flour and use your hands to work the mixture into a course meal. Add the sour cream and blend well with a fork.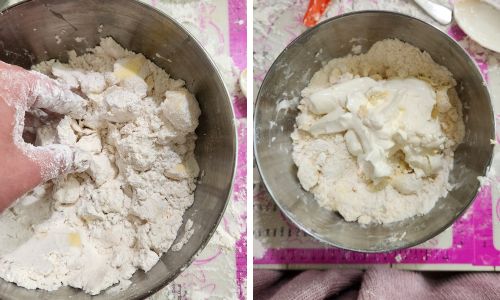
3. Form the dough into a ball, cut it in half, and flatten it into 2 disks. Smooth out the cracks in the dough, sprinkle with some flour, and wrap into plastic wrap. Chill for 1 hour, or up to a day.
4. Remove the dough when ready, allow it to sit for 5-10 minutes before rolling.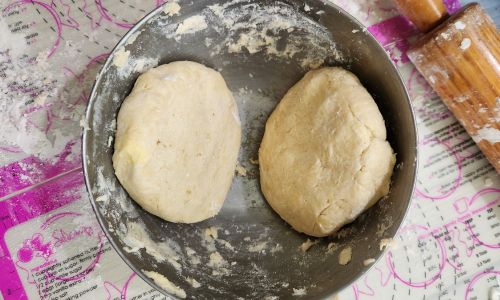
5. Dust your dough, surface, rolling pin, and hands as you begin to roll the dough to a 12” diameter and an even thickness. Lift gently and place in a pie pan.
Related: No-Knead Sourdough Bread
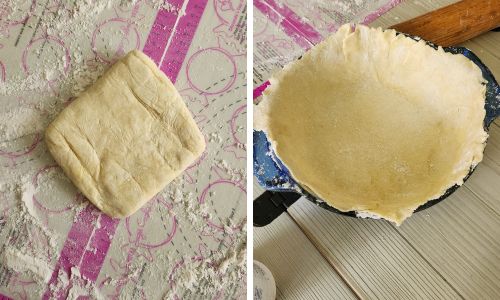
Pie Filling:
For the pie filling you will need 1 pint of half-n-half, 2 tbsp. butter, ¼-½ c. broth and the canned filling from before.
1. Heat your oven to 400 degrees F.
2. Begin by straining the liquid from the jars, and setting it aside. Next, dump the contents into a large pot on the stove to begin warming.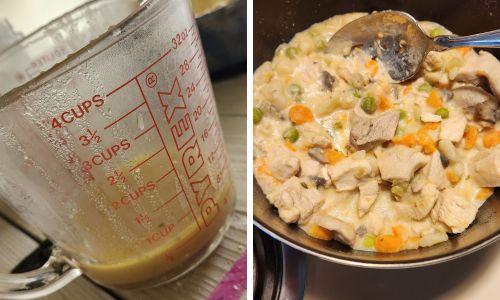
3. Gradually re-add broth, the butter, and enough ½ & ½ to make it creamy, but not soupy. Heat the mixture thoroughly, until it thickens.
4. Add the mixture into your already prepared crust, once the top is on and the sides are crimped, cut slits in the top to allow steam to escape.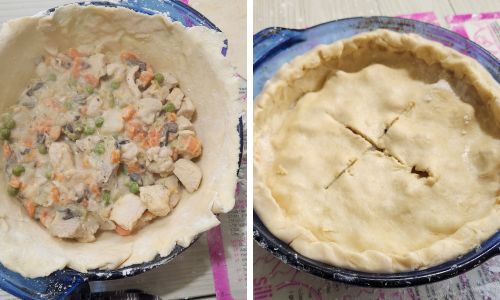
5. Brush the crust with egg wash and place in the oven. Bake at 400 degrees F, for 45-50 minutes until the crust is golden brown and the contents are bubbling.
Let the pie rest for 15 minutes before serving.
By now you should have everything you need to make several delicious styles of hearty pot pie. Simply pop a few cans of your filling and get creative.
While Chicken Pot Pie may be a familiar dish across the United States, the Amish version, known as Amish Chicken Pot Pie or “Slippery Pot Pie,” stands apart in its unique preparation and presentation.
The Amish community’s commitment to self-sufficiency and homesteading is evident in their resourceful use of harvests and their reliance on canned goods.
By canning the filling of Amish Chicken Pot Pie, not only can you extend its shelf life, but you also ensure a valuable food source during emergencies or when fresh ingredients are scarce. This preservation method offers a delicious and nutritious meal, loaded with vegetables and proteins, even in challenging times.
By incorporating the traditions of the Amish into our own culinary practices, we can embrace the importance of having home cooking skills and preserving our own food to ensure the well-being of ourselves and our loved ones.
You may also like:
 An Ingenious Way to Catch Pigeons and Other Birds in Your Own Backyard
The Long-Lasting Food That Amish Pioneers Turned To In Dark Times (Video)
The Best Places in America to Outlive the Upcoming Economic Depression






Chicken pot pies have always been a favorite, never made one, now will try to make one. Yum!
My Mom years ago would make chicken, turkey and beef pot pies during the cooler days of Winter. I tried in the Summer to make the pies. Some days it got too hot to bake them.
This is one tradition I will keep.
The Amish Pot Pie was called “Chicken and Dumplings” in my family.
I can beef with broth which makes a great topping for egg noodles. I start with the toughest, cheapest, leanest roast you can buy. Cut it into 1/2 squares season and brown in pan but don’t cook thru. Place in jars, fill with warm beef broth and pressure can.
Ahhhh, I miss my Mom’s beef and noodles. On of my comfort foods.
In your recipe for the noodles, step 4 is missing.
This looks so good! More like chicken and dumplings, but I never thought about canning them.
Never heard of pie crust made with sour cream. I love sour cream though. Does the sour cream make it flakier?
QUESTION: Instead of using glass jars would vacuum sealing … removing all air work just as well or would it need to be frozen?
Spores of the bacteria Clostridium are abundant everywhere, even in properly treated drinking water. The spores are harmless, you drink some every day, but in a low oxygen non-acidic environment they can go active and grow into the bacteria which produces botulinum toxin, even in low concentrations the toxin is always fatal if eaten. It’s unusual, you can get away with improper preservation techniques hundreds of times but, like Russian Roulette, a little bad luck can kill your whole family.
Meat that is vacuum sealed and frozen will keep for months, but if you lose power for a few days you will lose your frozen foods. Pressure canning disables the bacterial spores, the article says 10 pounds but the better number at sea level is 11 pounds which raises the water temperature to 240F.
I’m canning a boat load of garden tomatoes right now, since they are generally non-acidic I add 1/8 teaspoon of citric acid to each 16oz jar to further discourage Clostridium.
Years ago I lived in Leadville Colorado. Truly a great place to can. The mean elevation is 10,200′. So you adjust the directions for the altitude, which makes it superb for canning up there & taking back down, anywhere literally, below the 10,000′ level. Going to sea level is excellent. I have packed dehydrated foods when I was up there, and all of it is still good 15 years later.
Dennis,
This must be pressure canned or you can vacuum and freeze.
You cannot put this on the shelf just vacuum packed . It will rot.
You could put all ingredients together in a bag or jar IF the ingredients are all dehydrated or freeze dried.
Hope that I understood your question and this helped.
Peace,
MadFab
No, you MUST pressure can!!!!
Where I come from the first is chicken and dumplings!
I am a southerner! Made it all the time.
I grew up on this kind of stuff as my parents were depression babies and knew the value of everything you could save
Excellent article
more of this for the preppers
The more you know, the less you fail and, in the hard times you will have common sense
Survival is the key and making the best of what you have is key
Thank You all for your input