Chemistry is arguably the most practical of all the science subjects. Learning the discipline teaches you a lot of skills that can be put to good use in everyday life, but especially when you need them most – when the SHTF.
I am an ex-chemist. I did my first degree in applied chemistry and worked as a chemist in environmental analysis and then pharmaceutical analysis before teaching chemistry. Although I don’t work as a chemist now, I have never lost my love of the subject. Chemists are often people who like to get their hands dirty. We love to experiment and make things. This is the core of the science and one which I hope to share some of the secrets of here, so you can use them, yourself, if you ever need to. I’ll also throw a little bit of chemistry into the mix too – if you’re anything like me, you’ll like to know the ins and outs of how, what you’re doing, works. So don your white coats and safety glasses and let’s enter the prepper lab!
Experiment 1: How to test if something is an acid or an alkaline
The Science
Acidity or alkalinity (basicity) is also known as the pH of a solution. The H in pH represents a hydrogen ion, as in the element hydrogen with a positive charge represented by the +. Hydrogen naturally holds a positive in its ionic charge so is often written as H+. If there are a lot of H+ ions hanging around in a solution it will show up as being more acidic when tested. Fewer of these ions will show up as more basic. If you have a balance between the H+ and the OH– of the water (H2O) then you’ll have a neutral solution. pH is measured using a scale of 1-14: 7 is neutral, below 7 acidic (the lower the more acidic) and above 7 is basic (the higher the number the more basic).
pH and Soil
It’s often important to know the pH of soil. Certain plants grown better in more acidic soil than alkaline and vice versa. Cops like blackberries and potatoes like a slightly acidic soil (around pH 5) and crops like shallots and pumpkins prefer a more neutral soil pH (around pH 7).
It’s worth keeping a hard copy of it.
Making your homemade pH test kit
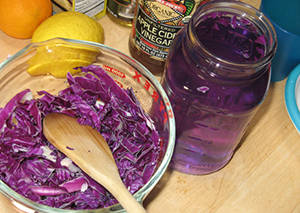 This is based on red cabbage. Red cabbage contains a pigment called anthocyanin, which gives the cabbage its red color. To make a test for pH we need to extract the anthocyanin from the cabbage. You do this by chopping up cabbage and pouring boiling water over to just cover the chopped cabbage. You then leave it to steep until the water turns a red/purple color (this is a solution of anthocyanin).
After about 15 minutes, filter the liquid mix to remove the cabbage, leaving the anthocyanin solution. You can then use this to test your soil.
To test the pH of soil you need to:
- Take some of your anthocyanin solution in a small glass
- Add about a teaspoon or two to the solution
- Shake the mix and wait for the color to form (may take up to 30 minutes)
- Check out the color against the chart below and you can then tell the pH of your soil
The pH range you detect and colors are:
Color Red Purple Violet Blue Green Green/yellow
pH 2 4 6 8 10 12
Adjusting the pH of your soil
If the pH of your soil isn’t good for the plant you want to grow, you can adjust it by digging in lime or sulfur to adjust the pH value. This article shows how much of each you need to add to get an adjustment in pH.
Experiment 2: Saponification or making soap
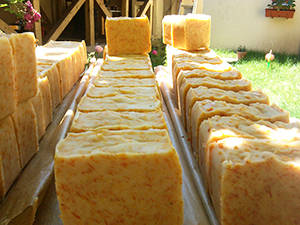 I remember coming across the term saponification as a child and thinking how similar it was to the word soap, and then finding out that it was, in fact, the way you make soap. It was one of those revelation moments that we all have, silly, but nice when they happen.
Making soap is something that has been performed by human beings for thousands of years, the first evidence for soap making being from ancient Babylonia around 2800BC. Soap is important stuff. It keeps you clean, so that the likelihood of infection is reduced, in a word without antibiotics and modern medicine, this could be a lifesaver, so it really is worth learning how to do it. You can also make soap that contains natural anti-septic, making it even more useful for medicinal purposes.
The Science
Soap is made from a chemical reaction between a chemical called a ‘triglyceride’ and example being oil such as olive and an alkaline, such as potassium or sodium hydroxide. Saponification happens when the alkaline causes the oil to break chemical bonds in the oil molecule. This then forms glycerol and ‘soap’.
Making a simple soap
Ingredients:
- 1 pint Oil – you can use a variety, such as coconut and olive – the purer the better
- 3 oz. Lye (which is actually sodium hydroxide) you get instructions on how to make it here.
- 1/3 pint water
- Optional ingredients such as perfumed oil, herbs, tea-tree (antiseptic), etc.
Instructions:
- Slowly add the lye to the water. Do lye into water, NOT water into lye otherwise it’ll splash and you don’t want alkaline solution in your eye, believe me. It’ll warm up, so leave to cool.
- Add the oil to your lye solution. Slowly mix.
- Mix more vigorously, being careful not to splash yourself.
- Once the solution becomes thicker, this is called the ‘Trace’.
- If you’re using any perfumed oil or herbs, etc. add them now.
- Pour the thick ‘soap’ into moulds (ideally flexible plastic ones)
- Leave to set and in about 24 hours it should be ready to remove from the mould.
- Leave to fully set for about another month (turning every few days) and its ready to use.
Experiment 3: Lowering the freezing point
The Science
We all know that water (H2O) freezes at 0C or 32F. But did you know that you could change this so that water freezes at a lower temperature? In chemistry it is called ‘freezing point depression’ and you can do it to all sorts of solutions, including water. What happens is this. When water goes from a liquid to a solid (ice) it goes through a ‘phase transition’. The molecules in the liquid water effectively slow down because the amount of energy available (i.e. the temperature of the air) is reduced. Water molecules are a bent shape, like two splayed legs, and they are oppositely charged, so attract each other. If the molecules start to slow down, because it is colder, the molecules start to line up together and the opposite charges of the H+ (hydrogen) and O– (oxygen) form weak bonds. This eventually forms the solid, ice.
If you add certain other molecules to water, for example, salt, which is also made up of charged atoms, Na+ (sodium) and Cl– (chlorine) then these charged atoms get in the way of the H and O atoms and disrupt ice formation. Alcohol (which has an OH– group) has a similar effect on water; most anti-freezes have alcohol as an ingredient.
Typical uses of melting point depression
The most obvious use and one you’ve no doubt used yourself, is to stop ice forming on roads, to prevent slippery surfaces forming. The trouble with this is that if it is near plants or water, the salt can contaminate.
Perhaps a more fun use of melting point depression is to make ice-cream. If you surround an ice cream mix in a metal pot with ice, then add salt to the ice, the temperature of the ice decreases and draws out heat for the metal containing the ice-cream mix, causes it to freeze faster.
Experiment 4: Making methane gas (coal gas)
Methane gas, which is a very simple molecule made up of one carbon with four hydrogen atoms attached, CH4 can be made from heating coal using a process known as ‘destructive distillation’.
The process involves heating coal in a tube and collecting the resultant gasses in another tube, after bubbling through water. I first did this experiment when I was around 12 years of age. I made the mistake of taking the heat away too quickly and the contaminated water in the collection tube bubbled back up through the tubing in the heating tube, making a big mess –lesson learned, don’t pull the heat away from the coal until you’ve collected your gas and then do it slowly.
When you heat coal up, it decomposes to release a gaseous mixture. This mixture contains, methane (CH4), carbon monoxide (CO), hydrogen (H2) and carbon dioxide (CO2). When you go through the process of heating up coal in this experiment, you also get the by-products of coke, coal tar and ammonium hydroxide.
What you’ll need to make methane gas
- Some ground up coal
- Two vessels, heat proof glass, or metal. The first will hold the coal, the second will hold water
- Tubing
- Something to cover the vessels to make them air tight (e.g. clay or stopper with holes for tubing)
- Heat source
- Gas collection method, this could be a balloon or something similar, like a plastic bag that can be filled then closed tight.
You need to rig up your kit so it looks like this setup below:
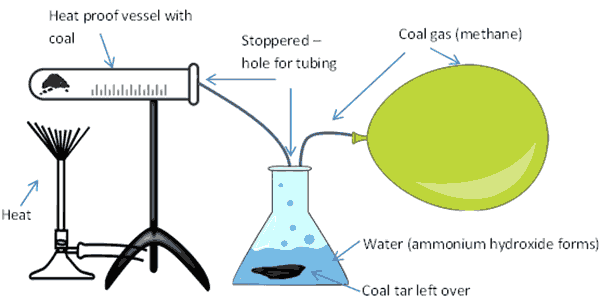
- Heat the coal up, from underneath the container, using a heat source.
- This will eventually start to produce gas. The gas flows along the vessel and enters the tubing where it flows and bubbles through the water (the tubing needs to go under the water).
- Ammonia in the gas dissolves in the water to form ammonium hydroxide (NH4OH) and sediment of coal tar is deposited under the water.
- The rest of the gas bubbles out through the water and passes out of the vessel through the open tube into the collection point (e.g. a balloon or similar).
- Coke is left in the heating vessel.
- You can make use of all of the products of this experiment.
Making use of coal gas
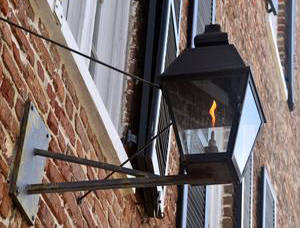 The first commercial use of gas lighting was by the London Gas Light and Coke Company was established in the UK in 1812. This company supplied coal gas to use to light up various ‘modern’ establishments including the houses of parliament. Gas lighting was still used in homes in the USA until the early pat of the twentieth century. We can use coal gas for lighting today too, if we don’t have electricity supply anymore.
It might be tricky to make a lamp out of coal gas without the use of a ceramic burner made especially for the purpose, but coal gas can be used for other purposes.
Coal gas is a good fuel. You can make a coal gas burner by using a small aperture tube and releasing the gas through this tube and burning it off as it comes out. You can also run petrol engines on coal gas too; in fact soldiers used this in WW1 when they ran out of petrol.
If you get the chance, check out “American Mechanics’ Magazine: Containing Useful Original Matter Volume 1” from 1825 as it has some interesting discussions on making and using coal gas.
Experiment 5: Using urine to make potassium nitrate (for gunpowder)
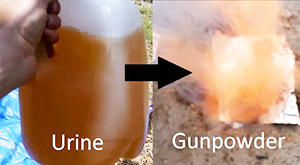 Urine is great stuff; it’s a waste product that shouldn’t be wasted. Although urine is mainly water (95%) it also contains important chemicals that can be used to make gunpowder and fertilizer. The rest of the chemicals in urine are:
- Urea (which is a nitrogen based organic compound)
- Chloride
- Sodium
- Potassium
- Creatinine
- Various small amounts of ions and trace elements
In this experiment, it is potassium we’re focusing on, but many of the other constituents, even the water, can be made use of.
This experiment shows you how to make potassium nitrate or KNO3 The K is the chemical symbol for potassium, N for nitrogen and O for oxygen. So you can see potassium nitrate s a mix of these three elements.
Making the potassium nitrate
Potassium nitrate is one of the main ingredients in gunpowder, so when the SHTF knowing how to make this, may well come in useful. The other ingredients in gunpowder are sulfur and charcoal.
Making potassium nitrate the tradition way involves a lot of manure (to supply bacteria), lots of urine (to supply the potassium) and about 10 months for it to percolate.
How to make your potassium nitrate:
- Collect some manure in large container (needs some way of drawing off liquid like a tap or blocked hole)
- Add wood ash to the manure
- Mix in some straw (this helps to aerate it)
- Add urine, lots of it, over time to the wood ash mix
- Stir every so often
- Near the end of the process (about 10 months) add a good amount of water and drain off, collecting the liquor
What happens?
Step 1: Solution of potassium nitrate
Urea and any metabolized ammonia are oxidized by the bacteria in the manure to nitrate which react with potassium carbonate (in the wood ash). This forms a mix of soluble potassium nitrate and insoluble calcium and magnesium carbonates. The soluble potassium nitrate can then be drawn off from the mix in the liquid.
Step 2: Crystallizing potassium nitrate
To make the solid form of potassium nitrate used in gunpowder you need to crystallize the potassium nitrate out of the solution. To do this:
- Boil up the liquor you’ve drawn off from the mix with charcoal. This removes the color
- Filter off the charcoal through a cloth
- Now reduce down the liquid by gently boiling. You’ll see the liquid reduce in volume.
- Start to cool it when you have reduced the volume by about ¾.
- Using (ideally) a glass rod or long piece of glass, dip it into the solution, pull out and as it cools if you see white crystals forming you know it’s now a saturated solution
- Cool this down as much as possible (surround the container with ice if you have it)
- Filter your saturated solution through a fine cloth, like gauze (or filter paper if you can get some).
- The crystals then need to dry out on the cloth or paper
TIP: When you are forming crystals you can ‘start them off’ by seeding the solution with the crystals on your rod (step 5) and / or scratching the sides of the container with a glass rod. This creates a surface for the crystals to stick to. Once one crystal forms, the rest quickly form around it. One of the most amazing things I’ve ever seen, is the sudden formation of masses of crystals in a saturated solution after scratching the sides of the container, it’s like magic.
NOTE: Saltpetre is the old name for potassium nitrate.
There’s a good text from 1862 on the manufacture of Saltpetre here.
Related: How to Make a Smoke Grenade Using Potassium Nitrate
How to make the Gunpowder
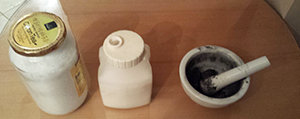 Gunpowder is a mix of 75% potassium nitrate, 15% charcoal and 10% sulfur.
You need to grind each of the components into a fine powder.
IMPORTANT: Grind each one separately! If you grind them together you might end up testing out your gunpowder on yourself.
Once ground up, they need to be very finely mixed together. This is an important part. Ideally you need to put the mix into a tumbler to get the parts well mixed. If you don’t have a tumbler, then just take some time and mix very well (remember – don’t grind at this point).
Once its mixed this is known as ‘meal powder’. The ideal form of gunpowder is in the form of grains; the size of the grain determining the speed at which it burns, the smaller the better. To get small grains you can mix the power with water to form a paste and then press the paste through a fine-grained sieve. You should then (ideally) tumble the grains to make them smooth.
IMPORTANT: If you tumble the meal powder, DO NOT tumble with certain metals like steel and iron (in fact anything that can create a spark, which include many plastics), wood would be OK to use.
Final Word
Like all good alchemists, you must always take precautions when using certain chemicals. For example, alkaline solutions, such as lye, are very corrosive and as someone who has had concentrated sodium hydroxide on her hands before, take it from me, it hurts! So be careful.
You may also like:
E arthbag Homes: The Ultimate Bullet-Proof Retreat
How to Turn Your Home Into an Impregnable Fortress (Video)
Building an Attic Sniper’s Nest
Image credits: Zu Sanchez


Very interesting and very useful, although available many places OTW. You should make this as a pamphlet or booklet suitable for a bug-out bag. Could save lives, easily.
Excellent job, I took particular interest in the production of KNO3. Having many years of production of homemade gunpowder, This filled one of the missing links. The brief allusion to tumbling does need some attention. One of my rototiller customers was throwing out his pyrotechnical books. The larger scale manufacture of gunpowder utilized a standard rock tumbler with brass BB size beads for the grinding. Their recommendation was 75% KNO3, 15% S & 10% charcoal. Tumble the KNO3 first then add the sulfur to the tumbler. The instructions suggested tumbling with sulfur for a few hours before adding the charcoal. Pre-grinding the charcoal to a fine dust reduces the mix time significantly. Keeping it dry is essential, particularly with the triple fine grind from the tumbler. This works well even in the replica black powder weapons.
wow! Thank you for this great info
I have a concern about your soapmaking part. I am a soapmaker (DK Soap Company) and using the recipe above is ok for coconut oil, but using olive oil results in 50% more lye than you need. This will cause the soap to be high pH causing a rash or even blisters and chemical burns on some skin. You only need 2 oz of lye and 4 oz of water if using 16 oz of olive oil to make it safe.
Adding to that, the same ration if you use soybean oil. 2 oz lye, 4 oz water and 16 oz soybean. This makes a really soft bar of soap even after the 14-30 day waiting period. I can gladly answer any preppers questions about making soap using many different ingredients.
@Soapmandan – I really appreciate your comments!
I like the simple method presented in this article, and am going to give it a go.
One question I have is on lye — is it measured by weight or volume? This one comes as powder: https://www.amazon.com/gp/product/B01LZ2IVUO
Do you have anything on the web about this?
RE: Soap
To add to Soap Mandan’s comments eight years later, I can only tell you the very little I know, which is scant.
For those concerned about working with lye, one could go to a site like wholesale supplies plus (all one word dot com), at this spot, one can find numerous articles regarding every detail of all methods of soapmaking, but also, one can buy pre-melted Soap and syn-det and Shave & Shampoo bars; this gives a way to customize fragrance, color, shape, and additions to improve it for specific aspects for specific needs, like allergic dermatitis, a condition that sometimes accompanies auto-immune disorders, eczema, chemical sensitivity and so on.
The pre-made Soap is called ‘melt and pour’ and you can get it in ‘detergent free’ and other varieties. Also, as I previously mentioned, you can get m&p shave and shampoo, which is great stuff! I personally add some of this to every m&p batch I make because regardless of what I tell my spouse, he always washes his hair with it.
If your kid is allergic to scents, you can omit them (although you wouldn’t have to if they were allergic to phthalates, because usually the fragrance in a product is where this ingredient is hidden (the FDA doesn’t require companies to list perfume ingredients because it’s regarded as proprietary;
Also, there is apparently just one phthalate that is used in fragrance and WSP does not carry any fragrance oils containing these ingredients, tmk)
You can omit them, same with colorants, or you could get super funky with it if you so chose.
This company, plus lots of others, (nature’s garden, bramble berry) also carries lye (sodium hydroxide) for solid soap and potassium hydroxide for liquid soap (body wash and shampoo), molds: silicone and plastic (the plastic will totally suffice, no need for the expense of the silicone), soap-safe fragrances, soap-safe colors and other additions, like clays and silk amino acid and lotus extract, etc. Even the stuff to put it all in to store it (I have added antioxidants to my m&p shave and shampoo bars and added agents to pH them closer to human skin (you really want your cleanser to be around pH 5 or so (you can go to 4.3 and up to 6.1 and still be in a reasonable range (4.3 or even more acidic might actually help for long term storage, this is just my theory though)) and put them on a shelf to see how long they’d last and had bars that were still good 5 and 6 years later.
If you think of your bars as the ultimate multi purpose cleanser, one that can wash your face and your body, including the delicate operation of shaving all the bits, plus not only shampoo but condition hair and beards, and hand wash skivvies (specifically the girlie ones), but still being a capable enough cleanser to wash your hands of engine grease and various resins and adhesives without harming the skin, or your plumbing! then, it’s a very useful area of knowledge, especially if you have wives &/or daughters &/or sisters/sisters-in-law & daughters-in-law, etc for whom you might need to make some concessions towards the ‘luxuries’ side of the ledger.
I’m not saying this would prevent complaints, just that it might go further than you think towards harmony in your bunker home.
There is a whole world of very simple to understand articles at that site and others that really explain stuff well and elucidate all manner of personal care items’ creation.
Lastly, let me point out that with the soap bar I was referring to in this comment, you eliminate at least five additional items to that first cleansing bar when you make one like this. Speaking specifically of the females in your household with whom you would like to maintain harmony. A woman used to living in the rough is a whole other creature, but even she would likely appreciate the thought put into it.
A few more points..
When I say ‘eliminate 5 more items’, I mean not having to cost nor store (like finding the money or the space for..) five additional products. Which is not nothing.
Plus, think of the amount of space taken up by a 4 ounce soap bar vs. a four ounce soap bar and a 16 oz bottle of face wash, a 16 oz bottle of shampoo, a 16 oz bottle of conditioner, a 16 oz bottle of Downy lingerie wash, a can of shaving foam and a cake of Lava. Not to mention the cost savings!
Next, I just wanted to clarify that lye, in all forms, is usually weighed on an accurate to 0.1 gram scale (although spending a few bucks more for a 0.01 gram scale that has a capacity for several pounds is so worth it in the long run.) And separately, a mg scale (0.001 gram) is ultimately an excellent purchase for supplements, for the correct antibiotics’ dosage or other medicines and for gunpowder and for precious metals and gems for trading jewelry and bars and coins.
Regarding lye, it has some strange behaviors. For example, it has a super high charge of static electricity. To the point where even the outside of the container in which it’s stored will have lye particulates clinging to it if you don’t intercede.
One way you can lower that static cling is to wipe down the outside of the jar it’s stored in with dry fabric softener sheets and to store it like that (with fabric softener sheets banded around the outside of the jar). Keep your lye in the jar in which it arrives. That jar is not made of metal, which is very good, and all the cautions and info you need is printed right there on the jar and usually there’s nothing reactive in contact with the lye, all of which is pretty crucial.
I guess that’s all for now. I would offer to answer any questions I could but I don’t know if this comment section actually alerts you when you have responses.