Making your own MREs and emergency food is a healthy alternative!
This is one recipe I never thought I’d get right! Actually, it’s not even a dish I thought I would try and develop into a meals-in-a bag-recipe. But I asked my Facebook group what some of their favorite meals were, that they would like to see converted to meals-in-a-bag or jar. It was my daughter who offered this suggestion.
My first reaction to her suggestion was “No way!”. I had no idea how I could make the hamburger gravy the right consistency and get the awesome gravy flavor, using dehydrated/freeze dried shelf stable ingredients. So, I brushed it aside and thought I would just accept defeat and forget about trying to develop a recipe for it.
Well, obviously that was not meant to be. I kept thinking about it and over the course of approximately six months researched ways I could make the gravy, to get that “just right” savory flavor. I know how to make the gravy from scratch because I used to make it for our family meals quite often, when my kids were growing up.
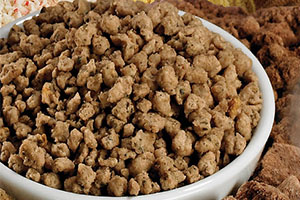 And then, I wasn’t sure how the Mountain House freeze dried hamburger meat would work, mostly because of the shape and texture of it.
Its shape is not anywhere near being the shape of crumbled hamburger meat.
The easy part was the instant mashed potatoes. All I had to do was buy some of those and convert the recipe according to the directions on the box.
My big breakthrough on the gravy part came when my daughter and I were grocery shopping and she said she was looking for gravy to make biscuits and gravy for her husband. I’m like, “there’s no way you’re going to find canned sausage gravy!”. Well, she proved me wrong, for sure! I was dumbfounded!
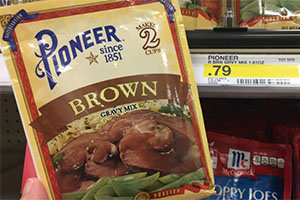 I have rarely ever used a mix or a jar of any kind of gravy because my mom taught me how to make it from scratch.
I added that dry gravy mix item to my grocery list to look it up the next time I got groceries. And guess what?!? I found some!!
Longer story shortened, that’s kind of how I came up with this recipe. I incorporated my make it from scratch skills and knowledge with the new quick mix cooking of today and brought it all together!
I didn’t get it right on the first try, but that’s okay because I got it “right” enough to taste good while I was perfecting that savory flavor and that just right consistency and texture. Taste testing is definitely the payday for developing a new recipe!
I had hamburger gravy and mashed potatoes for 5 glorious days (almost all in a row!). Imagine my disappointment when I felt I had the recipe perfected! No more taste testing! Well, at least not until I purchased some more freeze-dried hamburger meat so I can make some more bags of it, lol.
Well, here you go: the recipe that has taken me the longest to develop so far. But, well worth the work and the wait. I hope you enjoy this meal as much as I do.
Related: Pressure-Canning Hamburger Meat for Long Term Preservation
Meal in a Bag: Hamburger Gravy and Mashed Potatoes
1 Serving (approximately 1-1/2 cups, cooked)
You will need:
- 1 Cup instant mashed potatoes;
- 3 Tbsp country gravy mix (I used Pioneer Country Gravy Mix);
- 1 Tbsp powdered milk – not instant nonfat dry milk (I used Nido Fortificada, which is a dried whole milk);
- 1 Tbsp Butter powder (I used Augason Farms);
- 2 tsp beef broth powder (I used Orrington Farms Broth Base & Seasoning, Beef Flavored);
- ¼ Cup freeze dried ground beef (I used Mountain House);
- 1-1/2 Cups boiling water for “cooking”.
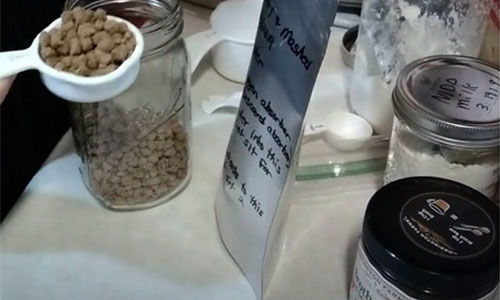
Preparation at Home
#1. Place all ingredients, except ground beef and water, in a zip lock baggie. Do not zip close the baggie; fold it over and roll it from the bottom up to get out as much air as possible.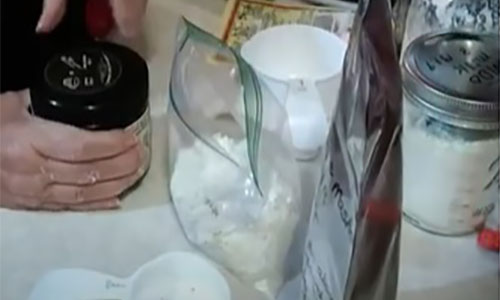 #2. In a mylar bag or vacuum sealer bag put the freeze-dried ground beef and the zip lock baggie with ingredients from Step 1 above.
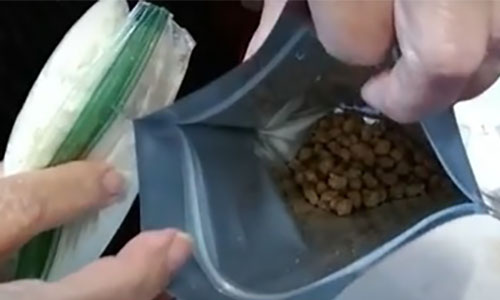 #3. Put oxygen absorber into the mylar bag (not needed if using vacuum sealer bag).
#4. Squeeze out as much air as you can, then seal mylar bag using a household iron, a straight iron (for hair), or an impulse sealer. Seal-vacuum the bag using vacuum sealer.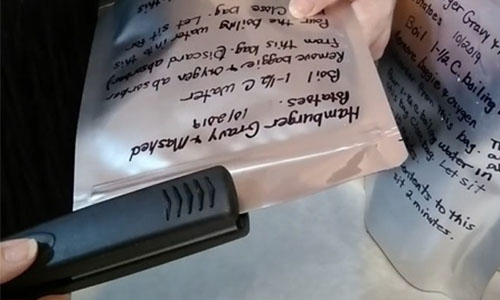
Cooking in Bag Directions
#1. Remove the zip lock baggie (and oxygen absorber if applicable) and set aside.
#2. Boil the water and pour the boiling water into the mylar or vacuum sealer bag with the freeze-dried ground beef and stir.
#3. Zip or clamp close and put into a bag cozy, or wrap with towel/shirt (anything to help keep it hot).
#4. Let sit for approximately 10-15 minutes.
#5. Add ingredients from zip lock baggie and stir. Let it sit for one minute.
Cooking over a Fire/ Cook Stove Directions
#1. Remove zip lock baggie (and oxygen absorber if applicable) and set aside.
#2. Pour 1-1/2 cups water and freeze-dried ground beef into pot.
#3. Bring to a boil.
#4. Remove from heat.
#5. Cover and place in a cozy or wrap a towel/shirt (anything to help keep it hot). Let sit for approximately 10-15 minutes.
#6. Add ingredients from zip lock baggie and stir. Let sit one minute.
Related: Making Your Own MREs at Home
Microwave Cooking Instructions
#1. Remove zip lock baggie (and oxygen absorber if applicable) and set aside. Place freeze dried ground beef in a microwavable bowl and set aside.
#2. Boil 1-1/2 cups of water in microwave.
#3. Add the boiling water to the bowl with freeze dried ground beef and stir.
#4. Cover bowl and microwave for 1 minute.
#5. Let sit, covered, in microwave for approximately 10-15 minutes.
#6. Add ingredients from zip lock baggie and stir. Let sit one minute.
Here’s the video on how to make this delicious and savory recipe:
I do hope you will give this new recipe a try! And, if you do, please leave a comment below and let me know how it turned out and if you liked it. As far as I could find, there aren’t any commercially prepared hamburger gravy and mashed potatoes meals available anywhere. If you happen to run across some, would you please let me know in the comments below? I’m just curious about it.
Editor’s note: This article was gladly contributed by Joy and first appeared on www.christianpreppergal.com. Joy is the founder and owner of the blog site Christian Prepper Gal. She is very active on social media, including her YouTube channel. She is a mother of four, grandmother of 13 and great grandmother of two. It is her heart’s desire to help others in any way she can.
You may also like:
 How To Make Delicious Lard With 2 Years Shelf-Life (+ 5 Tasty Recipes)
How to Make a Year-Round Self-Sustaining Greenhouse (Video)
How to Dry Plums for Long-Term Storage Just Like Grandma
How to Grow Potatoes in Shopping Bags for an Extended Harvest
What Really Happens if You Eat a Bucket of Survival Food When SHTF






I started reading you daily. Not every topic interests me, but lots do and I enjoy learning things and reviewing others.
Great idea, considering current prices for freeze-dried whole meals. What is the expected shelf life of both methods of prep (mylar vs vacuum sealer)? I’ve seen a whole lot of vacuum sealer bags lose seal after an indeterminate amount of time. Thank you.
EssBeeEss, good question and good point. Since originally writing this article I have discovered that there are flaws in the vacuum sealer bags just as you mentioned. I now pretty much only recommend using mylar bags for the bags. You can also use canning jars (with an oxyge absorber or a food saver jar attachment) if you have a lot of space to store those.
I forgot to mention that I do not know how long the meals would keep in the food saver bags. But, I do have some that I made in those bags and I just check on them monthly to make sure they are not gathering any air. So far, so good, and they’ve been stored for a couple of years. I just stopped using them because of what I had heard.
So, I know they will keep at least a couple of years if they were sealed correctly.
Have you, yourself, actually observed vacuum sealed bags to fail or is it an urban legend that has been repeated enough times to become truth?
This list has a lot of readers who have used vacuum sealing for food preservation for many years. Perhaps we should hear from first hand users how frequently they have experienced vacuum sealed bags to fail and over what period of time. It would be very useful information to have if we find a trend toward vacuum bag failure, say, after five years.
It would also be very useful information to know in what conditions the vacuum sealed food was stored. ie., in an uninsulated garage in some especially hot climate; In a chest freezer rarely opened; in an upright freezer that is opened on a weekly or daily basis; in a root cellar type storage facility; in an uninsulated corrugated sheet metal shed in the backyard just outside Tucson — you get the idea.
If there is a periodicity to the failure, five years, ten years, eight years, it would be good to know that information also.
No sense in many of us putting up food in vacuum sealed bags for long term storage if they fail in service in four or five years.
left coast chuck, pretty good point on the vacuum sealer bags! I personally have not experienced any failures other than once some dehydrated rice poked a hole in a vacuum sealed bag and I discovered it within a few days. Personally, I keep my vacuum sealed and mylar bags in plastic tubs (with a locking lids) in an air conditioned room. It’s about about 64 degrees in the room year round.
So, yes, it would be good to hear from others like yourself who have had great success with their vacuum sealer bags!
I am one of those that had vacuum sealer bags fail. I don’t even know why. I had some in the freezer fail as well as some on the shelf with dry goods in them. I have switched to jars and Mylar so I can be sure of the products.
Yes, these were food saver branded bags, kept mostly in a freezer. where the failure could be identified, it was a random part of the bag – not at the seal. Mylar would of course be ideal, but not available (locally) at the moment. Perhaps the plastic was a bad batch, but money (or lack thereof at the moment) dictates that we run with what we have on hand for now.
This was not every bag that failed, just1-3 out of 75 or so made from each roll. Enough to not rely on them for any of the costlier products like meat deals purchased in bulk, etc. When I can get mylar, its mylar all the way…
Gee, I just gave some vacuum sealed steak to a neighbor to feed his dogs that was dated 2007. It’s been the the freezer 13 years, longer than most hollywood folks have been married. I didn’t want to chance it. He reported that his dogs loved it. Worst case, if you suspect the food isn’t fit for human consumption, try the dogs. If they turn up their noses at it, it probably wasn’t any good. If they scarf it down, well, maybe they will be extra alert tonight when on sentry duty.
I regularly use vacuum sealed food products that are several years old and they are perfectly good. If you are having trouble with vacuum sealing not staying sealed, perhaps it is your technique or there is something wrong with your vacuum sealer. Might do to check both out.
Sorry, its late and been long day outside in 100F+ conditions. Thank you to the OP and everyone else for the info.
We raised n sold grass-fed beef yrs. ago. Had to retire in 2017 n had a freezer full. All was vacuum sealed and we still have 1 or 2 packages left. The rest we have eaten! No problem with seals!
Good one, thanks!
This sounds pretty good, but my husband has kidney issues and is on a no-phosphate diet. I have yet to find any instant potatoes without phosphates, and am betting that all the other ingredients have them too. Any ideas for dealing with this–having him need dialysis bc of phosphates when SHTF is not acceptable.
If you have a dehydrator you can dehydrate your own mashed potatoes then break them up in a blender. Mom used to make a potato powder but rehydrated with boiling water they were good mashed potatoes.
I was thinking the same. I do this with sweet potatoes, and they are really handy.
Look up healing kidney disease on the You Tube channel.
Full of MSG from gravy mix & broth, should be a way to make it without the chemicals.
If you have the money to purchase a freeze drying machine you can build up a stash of food pretty quickly using preservative free ingredients. It is well worth the investment if you can do it.
TB Rhodes, if you wanted to take the time to do a little research, I’m sure you could find a dry mix gravy recipe. So many people with so many dietary restrictions or taste factors that it’s hard to develop a recipe for everyone. This recipe still has a lot less sodium and chemicals that you would find in most manufactured emergency food/MREs. I do recipes that my family will eat and enjoy and share them on YouTube and on my blog site. This is not something I would feed my family every day, but as a treat every once in a while 🙂
TB R…
I can tell you that Orrington Farms Broth Base has zero MSG in it, that’s why I choose it over other brands (both Beef and Chicken). I buy mine at my local Mega-Lo-Mart store. Now the gravy mix is another story but I’m sure there is some brand(s) available without MSG but I’ve never searched. I do use the Pioneer brand (products) on occasion and they are good but yes, there is MSG 🙁
sorry to pop your bubble. I have been searching for non msg base for along time. Several years ago people started becoming aware of the danger of msg. In their greed they now allow msg with other names there are several dozen now in use yeast extract is a form of msg. They are even allowed to market it as other spices now as well.
Thanks, Christian Prepper Gal,
I appreciate your detailed explanation of how you did this. It is a good recipe and a good template for alternatives to the commercial MRE’s. I also appreciated Left Coast’s prompts to dive even further re storage. Both of you have given us a roadmap on how to figure out some of this stuff for ourselves.
Govtgirl, glad it was helpful to you 🙂
Why not use a canning jar for all the things and use the same method as doing it with rice and beans? Rehydrate the meat first, put it on the bottom, add the other ingredients then cann. Would that work???
Yes, that would work! I just shared the way that I am making and using them. This meal can definitely be stored in a canning jar, but you want to make sure you use either oxygen absorbers or a food saver jar attachment to get all of the air out. Do whatever works best for you 🙂
This sounds like a good recipe – I would add onion to the gravy, ( or use onion gravy mix) and serve it with corn for a nod to shepherds pie, but that’s just me.
You could also store the ingredients separately and make it up “from scratch” as a quick home meal if there is a concern about any particular component “going bad” before the others.
This would probably be good with chicken, too.
We used to use shrink wrap in our printing business to bundle printed products. We also had a heat sealer that we used to seal items that did not shrink wrap well. I kept the heat sealer after I disposed of the business and have used it for over twenty years, mainly to seal up bags of ammunition.
When I buy bulk ammunition, I seal it in bags of 100 rounds per bag. I do that for a couple of reasons. I found that Federal was shorting their 1,000 round packs of .223. What were supposed to be 1,000 round boxes of .223 were all short over 100 rounds each. “They were having trouble with their weighing machine,” is the excuse I was given.
Which is B.S. We used scales for weighing mailing that we did and for measuring ink to be mixed and a properly maintained scale is scary accurate. I use a scale regularly for reloading. One must really neglect a scale to be off by as much as they were. They never figured some anal purchaser would actually count a thousand rounds. As treasurer, I was buying ammunition for the gun club and in order to be able to maintain inventory, I chose to break it down into 100 round packages. I also store my ammo in 100 round packages for the same reason — inventory.
I heat sealed all those bags of .223. Which is introductory to say that plastic for shrink wrap, heat sealed and vacuum packed packages comes in different thicknesses. If you are buying the cheap economy priced stuff for your vacuum pack food products, it may be false economy. If the food pierces the vacuum pack food package maybe it is time to move up a couple of mils in bag thickness.
If I used cheap thin plastic for the bags of ammo, the tips of the bullets would punch holes in the plastic. Using a thicker plastic eliminated the hole punching propensity. If dried rice punched a hole in your shrink wrap, I would dare say you need to upgrade your plastic material by a few mils.
It is my opinion that most vacuum pack plastic that is sold by the big box stores is on the low end of plastic thickness. They don’t anticipate that the food you are vacuum packing is to be put down for 20 years. For long term storage, investigate vacuum pack plastic that is thicker than what you buy at a discount price at the big box store.
It will still shrink down in the vacuum process and the heat sealer will still melt and seal. If the seal melt is not holding, then the temperature of the sealer needs to be adjusted. If there is no way to adjust the sealer then unfortunately, you need to upgrade your vacuum bag sealer. Check with the manufacturer, there may be a way to adjust the seal temperature that is not easily visible to casual examination. It may be necessary to run the seal function two times.
It may also be necessary to leave the sealed bag clamped for a longer time. My heat sealer is designed to use continuous rolls of bagging material. It is designed to seal and cut the film at the same time. I can adjust the time the heat is applied to the seal. However, how long the sealing arm remains in contact with the seal is determined by how long I hold it down. If I want to make sure I have a good seal, I count to ten before I let up on the seal arm. I then make the cut with a pair of scissors. The impulse time of the heat is predicated on the thickness of the plastic being sealed. Very thin plastic takes only a second of heat. If I want to seal a bubble pack envelope such as one of the blue and white envelopes Amazon uses, I set the dwell time up high because I have to pop the bubbles along the seal and seal four thicknesses of plastic. I also hold that seal for ten seconds to make sure I have an adequate fusing of the material.
Just yesterday I cut down a bubble pack Amazon envelope to mail some books to my daughter. I used the heat sealer to seal along the edges and cut off the excess material with a pair of scissors. I had a nice, tight custom-sized bubble pack envelope courtesy of Amazon.
left coast chuck, Great info! I read once, a while back, that you should use at least 3 mil for vacuum sealer bags and 5 mil for mylar bags for long term food storage. That’s what I go by. The mylar bags I use for the meals are actually a 7 mil. Anyway, with your experience do you think the 3 mil for vacuum sealer bags is sufficient for long term food storage?
Christian Prepper: I do think 3 mil is too thin for long term storage. I would move up to at least 5 mil. Seven mil is even better, although we get into a cost/benefit situation as we move into more expensive material. You have to increase the sealing temperature and the dwell time if you move up to heavier material. If the temperature is too high, it will cut the material and leave a weak seal. I can cure that on my heat sealer if I accidentally set the sealing temperature too high and cut the film which is the way it is supposed to work, but I prefer to work more slowly and assure a good seal as opposed to sealing and cutting in one operation. If I have accidentally created a weak seal, I just reseal adjacent to the first seal. Because of the weight of the contents when sealing ammo, I double seal all my seals for extra security.
I haven’t checked my food vacuum sealer, but I think I can double seal the bags on it as it has a manual cutter. All I have to do if I want a double seal is pull the bagged item out a little bit more, say 3/8 of an inch and seal it again.
While using vacuum sealed jars is the gold standard, perhaps, jars are expensive, heavy and take up a lot of space. There is no perfect system.
Hope the info above helps.
left coast chuck, you got me curious! So, I did check and see what the mil was in the vacuum sealer bags I have been purchasing. I was happy to find that they are 4 mil. I think I’m getting too old to rely solely on memory anymore, lol. I also verified my mylar bags are 7 mil. I then did a quick search on Amazon (where I purchase my bags) for 5 mil vacuum sealer bags and the only ones that came up in the search were for like a 1,000 bags and 200 plus dollars. But, next time I need to replace bags I will definitely try and up the mils on them.
Your information was helpful for me and I’m sure it will be for others as well. I really appreciate that in the prepper world we can learn from one another. Thank you ?.
Hi, I was very interested in this thread between you and LCC. The bags that came with my sealer are probably not heavy duty, but will pull them off the top shelf and check and anytime I seal something pokey like rice will consider double bagging if they’re thin. Just shows it pays not to assume. Thanks!
Hey Govtgirl, another suggestion would be when you do seal something pokey like rice is that you could put the rice (or whatever) inside a brown paper bag (lunch bag size) first and then put the paper bag inside the vacuum sealer bag, or put a paper towel inside the vacuum sealer bag before putting the rice in and the put the rice inside the paper towel. Either of those should help keep the rice from poking through.
If bags are easily punctured, place some cardboard cut to fit (like cereal box,
thin but sturdy) in the bag. This allows the use of cheaper bags especially for non food items.
Or even use the wax bag as a liner which the cereal came in, after all it is food grade!
Thanks, CPG. That sounds way easier and cheaper!
What is the purpose of keeping the dried beef separate from the other ingredients?
I’m not really sure there is one. That’s just the way I learned to do the meals in a bag (putting powdered ingredients in a separate baggie). I suppose you wouldn’t have to.
Midwest Prepper and Christian Prepper Gal,
I remember reading about these premade meals and the explanation for separating ingredients was that if one part of the meal was on the shelf longer than you were comfortable with, you wouldn’t have to toss the entire thing and could just replace the questionable part.
YES, I have had seal a meal bags fail. It has happened 3 times. I switching to a different vacuum sealer (I have 2) and have not had the problem since. Because I haven’t had a problem with the replacement sealer I suspect the old sealer was just no longer creating a good seal consistently.
the recipe sounds good and can easily be converted to a stew with potato shreds or slices, freeze-dried vege’s like peas and carrots, and whatever powdered broth, gravy, and seasonings you like. You can always add some cornstarch as a thickener if needed.
I have heard foodsaver bags are not as durable as mylar bags, so I just did a quick search for “foodsaver bags compared to mylar bags” and one of the first things listed says “Mylar bags are O2 barriers. Food Saver bags are not and will allow air to infiltrate back into the bags over time. Vacuum sealing is mostly designed to prevent freezer burn in wet foods rather than to keep O2 out.”
https://www.bing.com/search?q=foodsaver+bags+compared+to+mylar+bags&form=ANNTH1&refig=9c55a6653cb04b3b86cca49d63547870
I have foodsaver bags on hand and also have mylar bags on backorder from the LDS Home Storage Center. I will use the food saver bags for frozen storage, and mylar bags for longer term storage.
someone mentioned why not use canning jars instead of vacuum swealed bags. I think the bags would take up less space and will not shatter like glass when dropped. I shattered a Pyrex bowl today when I opened the freezer and it slid out and fell onto the concrete garage floor. I have yet to experience a bag shatter if it hits the floor.
I just double checked the LDS Home Storage Center online store for the mylar bags, and this is the description:
Food Storage Foil Pouch
Food storage 7-mil-thick foil pouches each hold one gallon of dry food. Pouches sealed with an oxygen absorbing packet protect food against insects, moisture, and oxygen.
$0.80 USD Each
Item: 14713000
Availability: Temporarily out of Stock
Sold individually. Pouch material is a laminate of polyester, aluminum, and food-grade polyethylene. Inside dimension are 11 x 13.
https://store.churchofjesuschrist.org/usa/en/food-storage-3074457345616678849-1/food-storage-foil-pouch