Some gardeners are sad to see the colder months come as winter approaches, because they feel as though they have to put their hobby into hibernation for the winter. In fact that’s not necessarily true.
Winter sowing allows the opportunity to start preparing our spring and summer crops, all while keeping your hobby alive and well even after the first snowfall. The best news is that you don’t need a fancy greenhouse to do it. In fact, you don’t need a greenhouse at all. Just a few inexpensive items is all it takes to have you all set for spring!
What is Winter Sowing?
The use of plastic jugs, such as milk or water containers, is a great way to do some winter sowing. If set up properly they will act as an individual homemade greenhouse for the seed of your choice.
It’s a great way to sow seeds at low cost and with very little maintenance. It’s a great way of recycling your used milk or water jugs, and you only need a few other simple items.
The Supplies
If you plan on doing this each year, start saving your milk or water jugs. Ask friends to save their for you too and you will have plenty in no time at all. For the demonstration in this article I only used three containers, but you can use as many as you want. Whether you want to start with a couple dozen, or just a couple, it’s all up to you.
Here is what you will need:
- Plastic containers (milk or water jugs are easy)
- Potting soil
- Knife
- Screwdriver
- Seeds
- Tape
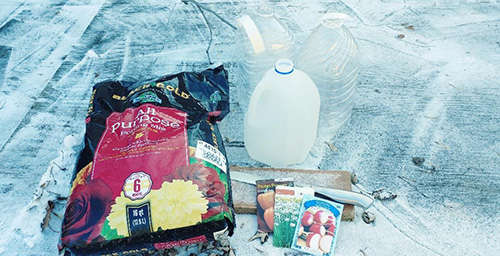 Don’t worry about snow. This can be done before it snows, during a snowstorm, or even when there’s snow on the ground. The best part, perhaps, is that preparation and maintenance are both very simple.
Related: The 5 Seeds That You Need to Stockpile in Your Pantry
How to Prepare the Plastic Containers for Winter Sowing
There isn’t a lot of hard work in turning the jugs into miniature greenhouses, but each step is important.
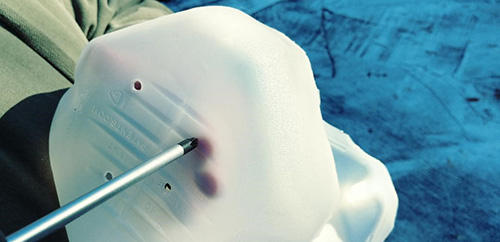
#1. Cut the jug almost all the way through, leaving just enough to act as a hinge. The cut line should be approximately 4” from the bottom.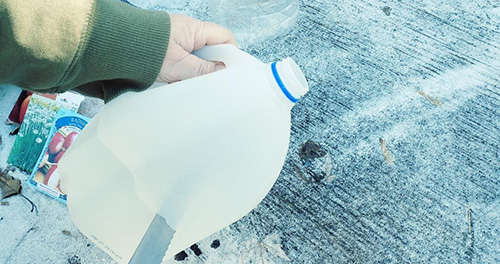 #2. Poke several holes in the bottom of each jug for drainage. You could also poke holes towards the top for more circulation, along with leaving the cap off. Use the tip of a screwdriver to make the holes. You could heat up the tip of the screwdriver to make this a bit easier.
 #3. Fill the bottom half of the jug with about 3” of damp soil.
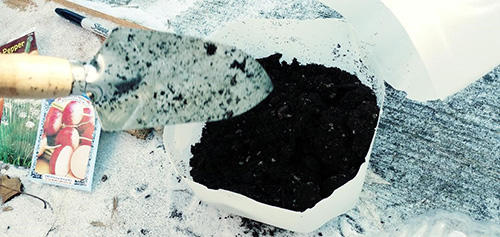 #4. Plant the seeds in the soil, according to the planting suggestions on the seed package regarding depth and spacing. You do have a bit of leniency here, because they will be transplanted in the spring.
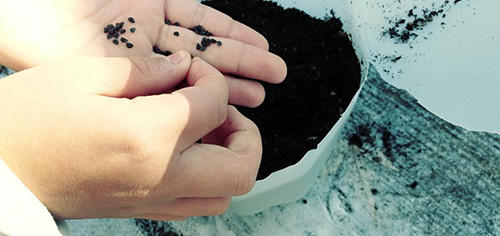 #5. If the soil is not damp, now would be a good time to add some water. The soil I used was quite damp, and some snow will also get inside the jugs with the cap left off. The sun’s warmth will act like a greenhouse and melt it, adding more moisture to the soil throughout the winter. If you don’t get a lot of snow or rain, make sure to water them occasionally.
#6. Close the jugs and tape them closed. Make sure to label each jug with what seed it contains. You could also place a labeled stick inside the jug.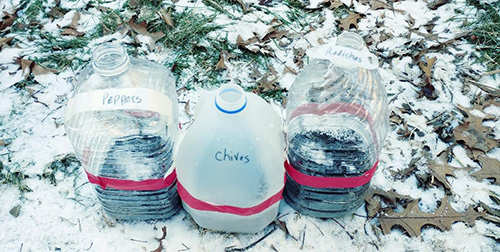
Maintaining Your Winter Sowing Containers
Place the filled containers outside, in a spot where they will get sun as well as snow and rain. It’s important that they are not placed in a covered area, because they will need moisture from the snow and rain, while the sun will warm up the containers just as a greenhouse will do.
Be aware of warmer weather, as most winters will occasionally experience a warm period or two. If they become too warm, it could harm the germinated seeds. All you would have to do in this situation is remove the tape and open the lids until it gets cold again.
In the spring, when the jugs are filled with greenery, it’s time to transplant the plants, just as you would throughout the gardening season.
What Seeds to Use for Winter Sowing
You could try just about anything, from annuals and perennials to veggies and fruits. More sensitive plants such as tomatoes and peppers might not do as well – but I tried peppers anyway, because I like a challenge.
Annuals might do better if you start them in late winter. You don’t have to start the process with any of them in early winter, or even mid-winter. But, if you start anything later in the season, or even early spring, just be cautious of warmer weather and follow the directions mentioned earlier in the article for when it gets too warm.
You may also like:
 24 Lost Gardening Tips from 100 Years Ago
How To Make A Year-Round Self-Sustaining Garden (Video)
What the Pioneers Stockpiled To Survive Winter





Greetings,
Will this technique work in zone 4?
Thank you
That’s a good question. Zone 4 can have some pretty extreme cold temperatures, which are obviously going to be pretty bad for anything exposed to them. The question is how well the containers are going to trap warmer air. Maybe if instead of leaving the cap off, you punched a few holes lower down in the sides for ventilation and to let moist air in. Leaving the cap off is going to let air rise right out the top as the sun warms it. Maybe try it with a few containers and let us all know how it goes?
Here’s something I tried this year and it has worked out well. I bought seven 2mil clear plastic drop cloths. I took tomato cages to use for support, three per drop cloth, and arranged them to fit under the drop cloths, sorta like a mini green house. I use scrap lumber to hold the tarps in place. I planted purple top turnips, carrots, sparkler white top radishes crimson giant radishes, leaf lettuce, white icicle radishes, and spinach. The only thing that didn’t work was the spinach. Everything else is growing good.
I also covered a summer planting of Chard, using two of the drop cloths to cover it. The Chard is better now, than it was all summer. I can honestly say it’s the BEST chard I’ve grown!
I live in south central Indiana in the Hoosier National Forest area, and the only thing I’ve done to provide extra protection from the cold is to bank up loose hay on the north and west sides of these “cage houses” to break the wind. I’ve only had a few nights where it got down into the teens, and on those evenings I added more hay over the tops and the ends that I removed when the temps warmed.
I would encourage everyone to give it a try in your garden. Now that I know it’ll work, I’ll be adding extra plantings this coming fall.
Radishes, turnips, rutabaga, probably potatoes, Japanese daikon most definitely, and perhaps jicama will all do okay growing in the winter if protected as Hoosier has done.
The Japanese leave daikon which is the large radish that they grow in the ground all winter if there is snow on the ground. When they want fresh daikon in the winter they go out and dig one up. I know that not from first hand practice but from watching a program on NHK about growing daikon. Very educational programming. If you can get it on UHF, I highly recommend watching their educational programs. Their pop rock and anime programs don’t do anything for me but right now I am very interested in their PSA spots on simple emergency measures to make life easier in a disaster of which they have had far too many this year. 2018 sucked for me personally too. Here’s hoping for a happy, prosperous and problem free 2019 for all of us. And that we do not have to put into practice any of the emergency measures we talk about on this list.
Thanks to everyone for your input.
I took a closer look and we are in zone 5a-4b
Sunlight is limited and freezing temps would make it pretty much impossible to grow without auxiliary heat.
I’m hoping to put up a high tunnel green house this spring.
We also have a room on the second floor that is not heated, it has glass windows all across south exposure I might do some experimenting there.
Wishing you all a healthy prosperous green thumb New Year!
This method works quite well for seeds that require stratification and anything that you have seen reseed itself in your garden. I’m in zone 7b. I have WS lettuce, tomatoes, peppers, herbs and flowers. Crops like peas and carrots are best direct down.
I guarantee you this method will not work in my 3a temp zone. I read all these wonderful articles about how you can plant in winter, enjoy crops year round, but I guarantee you no matter how many plastic jugs you put out, where even boiling water instantly freezes when you toss it in the air, there is no planting in winter. The ground here freezes 6-8 feet deep.