Meat storage is an essential element of a responsible prepper’s plans. You don’t want to discover that your procedures involved mistakes during an emergency.
Both newbies and veterans slip up now and then, however.
We discuss the oversights that may lead to waste and the rules that apply when you employ the freezing and freeze-drying options.
The Refrigerator/Freezer – A Modern Age Luxury: a freezer will keep your meat 100 percent wholesome, but taste and quality may suffer the longer it stays in there.
Here are the top mistakes when freezing meat:
Buying Too Much for the Available Space
Work out a strategy based on your storage capacity, family needs, and budget before purchasing chicken, steak, beef, fish, and other meats.
Freezing Meats That Are No Longer Fresh
Freeze high-quality cuts that are at their best. Trim the surplus fat beforehand and remove the bones to save space. Consider padding sharp edges to prevent freezer wrap damage.
Related: How to Slaughter and Field Dress a Cow for Year-Round Meat
Not Knowing the Temperature for Storing Meat
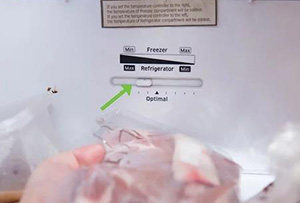
Storing food at a constant zero degrees Fahrenheit keeps it safe because mold, yeast, and bacteria become inactive at that temperature.
Not Checking Temperature Settings
Learn how and set your deep-freeze to the correct temperature so it can do its job – 32 degrees Fahrenheit or less.
Not Paying Enough Attention to Hygiene
Prevent harmful germs from contaminating your food. Ensure that your hands, knives, countertops, and cutting boards are spotless before you start cutting.
Forgetting That Light, Air, Heat, And Moisture Spoil Food Quickly
Stop the process in its tracks, slow down the enzyme activity, and preserve the flavor, texture, and color by utilizing moisture and vapor-resistant freezer material so the meat and poultry will not dry out.
Keeping the Meat in the Refrigerator Too Long
 Lock in the nutrients and flavor to retain its quality for longer. The US Department of Agriculture recommends that you keep seafood, poultry, or raw ground meats in the fridge for two days at most.
Related: How Long Can You Store Food In The Freezer? (Infographic)
Delaying Leftover Freezing
Place cooked leftovers in the fridge-freezer while it’s as fresh as possible. Leaving it on the counter for long periods compromises quality.
Re-Freezing
Moisture content is vital since you will lose taste and quality when you defrost. Leaving rations out too long affects safety. Only re-freeze if you can do so quickly.
Not Wrapping Up Your Food Adequately
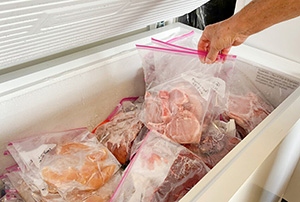 Shop packaging will not protect your steak.
Wrap your food closely in an extra layer of wax paper or aluminum foil and seal it in an airtight container, Mylar, or zip-lock freezer bag.
Try to eliminate all air and leave enough space between packages for air circulation.
An Airtight Container May Still Have Air Inside
No more air can get in, but what to do to remove the air trapped inside? Place the sealed container in boiling water to destroy harmful organisms. Some of the air will turn into steam and escape.
Being Inattentive to Freezer Burn
Ask the butcher to cut, package, and freeze the beef when you buy large quantities at the same time.
A slow home freezing process may result in ice crystal formation, which contributes to freezer burn and may result in meat juice loss when you defrost.
Related: How to Keep a Slaughtered Animal From Spoiling by Eating it in the Right Order
Believing That You Can Freeze All Meats for the Same Amount of Time
- Freeze previously canned seafood, lunch meats, smoked fish, cooked ham, hot dogs, sausages, and bacon for one to two months.
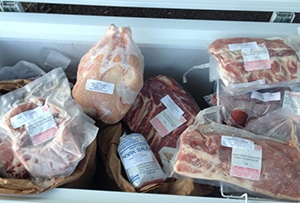 The following should last safely for two to four months: frozen cooked casseroles, stewing meats, meat broth, soups, fresh oysters, mussels, clams, shellfish, fatty fish, chicken nuggets, chicken pieces, fried chicken, raw hamburger, venison, offal, beef, turkey, and pork.
- Clams, squid, scallops, fresh shrimp, crab, lobster, cooked fish, lean fish, cooked poultry, whole turkey and chicken, beef roasts, raw beef, pork roasts, uncooked pork, veal, and lamb should last four to six months.
A Lack of Planning
Make meal preparation as easy as possible. Wrap and freeze portions separately if you are not going to use everything. Divide ground meat into patties or meatballs. Trimmed and pre-portioned cuts save time and thaw more quickly.
Defrosting at Room Temperature
Meat decays quickly once thawed. Defrost it inside the refrigerator or in cold water rather than on the kitchen counter. Bacteria start growing at between 40 and 140 degrees Fahrenheit.
Putting Hot Food in the Freezer
Cool cooked meat down to room temperature before freezing it to preserve texture and quality. Prevent other foods in the compartment from cooling down.
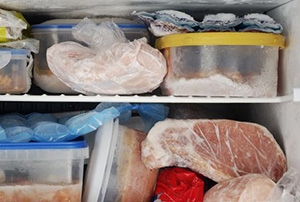 Struggling to Separate Stuck-Together Foods
Put a double layer of waxed paper between chicken pieces, chops, and ground meat patties to make your life easier.
Related: The Ultimate Chicken Meat Processing Guide for Preppers
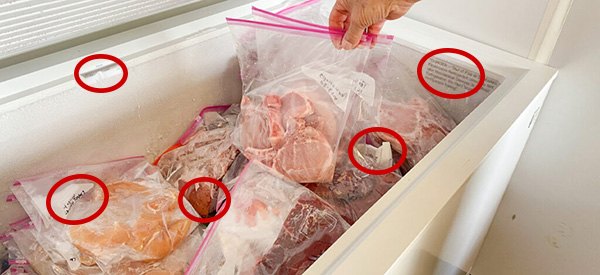
Not Keeping Track of What it is or How Long it’s Been There
Label and date your food. You do not want to guess as you need to know by when to use it to prevent wastage. Eat the food that will expire soon first.
What About Power Cuts?
What to do if there are power cuts and the refrigerator stops working?
Enjoy Freeze Dried Meats
Stock up on pre-packaged flash-dried meats. Unopened flash-frozen fare remains edible for up to 25 years. Stockpile enough drinking water to rehydrate frozen meat in warm or hot water – it only takes in the moisture it needs – and cook as usual.
Use Your Freeze Dryer
A freeze dryer does most of the work.
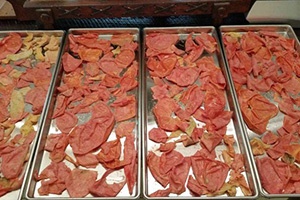
Slice your meat up and place the pieces on the tray inside. The appliance creates a vacuum around the provisions by dropping the temperature inside to approximately 50 degrees below Fahrenheit. Then the inside of the freezer warms up to convert the water into vapor, thus removing the moisture.
Heat-seal the frozen, dried meat in Mylar bags. They protect against moisture and oxygen and are available with oxygen absorber packs.
Related: How To Repackage Foods in Mylar Bags With Oxygen Absorbers For Long Term Survival
Prepare yourself for a power outage – as you would for a natural disaster – whether it lasts for days, weeks, or months. You will be much more comfortable if you are ready for anything.
Plan for a water supply collapse because your electric-powered pump or purification station does not work. Store water in case there is nothing in your faucets and stock up on the appropriate requirements to purify collected water. Each person will need at least one gallon per day and animals should not be discounted.
Consider canning, salting, dehydration, and smoking to preserve your meat and be all set for electricity interruptions. Accumulate more than one week’s supply of non-perishable foods such as dried and canned beans, dried and canned vegetables and fruits, grains, soups, granola and protein bars, nuts and seeds, nut butter, and shelf-stable or non-dairy milk.
Consider acquiring batteries, a crank-powered, diesel or gasoline generator, or solar panels. They all have pros and cons but will make life easier during a power outage.
You may also like:
How To Preserve Your Whole Harvest For Winter Without Refrigeration
This Hidden Survival Garden Will Keep You Well Fed When SHTF (Video)
11 Things You Need to Have Ready for when the Power Grid Fails









All good reminders
I store meat and chicken much longer than advised in this article and have been doing so for 20 years, a vac sealed ribeye is very good after 2 years and I just had one dated 8-2018 and it was terrific. Today is 2-23-2021. Hamburger 1.5 – 2 years vac sealed and if a rare one gets a little burn here and there on the exterior, give that part to the dog and make taco meat out of the rest. Sloppy joes. Chili. Chicken good for 2 years or so if you smoke it, longer.
But I VACUUM SEAL my foods and near pro-quality machines now can be had for under $175 and the bag material by the roll from Amazon for cheap. I’ve had 5 vac sealers over the years and I find Vac-Master to be the best, and they have a GOOD model now that is just $150, and can do soups.
SOUPS store great in flat, square vac seal bags but you MUST get the machine that can do soups with the special “pulse”, or some button that creates a vacuum you can stop and immediately hit the SEAL button. Works GREAT. Set your vac sealer up on 2 little 2 x 2 pcs of wood to elevate it above counter height to make this much easier. Freeze your vac sealed soups and THEN you can stack them up, marked as to what’s inside, standing up on a big freezer shelf and they store fine for 2-3 years!! Use a little skinny bungee cord if you are concerned they might tip over and kick the freezer door open. DO NOT try to freeze 5 of em laying flat as it might take too long for the middle one to freeze and be bad! Freeze laying flat, then store standing up facing you. Sharpies write just fine on the bag material. You do NOT need the white areas. I find the Home Essentials rolls the best value and quality.
Plus, I seal the ammo I bought over the years in vacuum bags for near ideal long term, moisture-free storage and check for the rare but occassional leakers. Never hurts to drop your vac sealed boxes of ammo into a GI Fatboy can for further protection and fire resistance to buy time.
Good advice from someone who has been there and done that. I agree about storage life. It is much longer when stored correctly than is generally reported. This is due to the fact that like everything the govt does, it tries to make rules for 300 million folks which is an impossible task so they wind up with ridiculous rules because of the 10%.
That was the Old Marine Corps saying, “There’s always 10% that never get there word. Green side out, out of 100 there will be 10 with brown side out.”
Ten percent of 300 million is a lot of brown side outs.
I’m a Marine vet and totally agree Chuck. 🙂
Oouurrraaahhhhhh!
Thank you Vulcan for your post and THANK YOU for your SERVICE!!’
I freeze in my vacuum sealer also and meat lasts a long time. I don’t have the money for the dry freezer and they are not cheap. I have a nice dehydrator also that I use.
For the food savers that can’t afford freeze dryers: Vacuum sealer, pressure cooker for canning, smoker and dehydrator are the four I have, and lots of storage area and a big freezer. I would imagine that freeze dried food bought from some vendors isn’t too bad. I use mainly my patriot supply.com and be prepared.com Canned food is good to bye on sale and can be cheap and most stays good indefinitely, except the acidy stuff.
Vulcan – Thank you for this heads up! I have made a note of it. I’m going to have to look into it further and take steps to put this one in place!
I should add about the soups, I just make my own bags out of the roll. When you buy the rolls from Amazon, be sure to get the 25 foot ones as they realized the 50′ rolls won’t fit inside normal home vac machines…. just the bigger pro ones normally.
I used to use the 8″ wide bag material for soups to have a single lumberjack size bowl of soup of about 20 oz, but over the years found it’s just too hard to get the soup in there yet still keep a dry surface where the heat bar needs to seal the plastic sides together, so now I only use the 11″ wide bags and I cut them off using the machines cutter to be pretty square. Easier. Plus, you’re standing there bagging soup forever and it just takes too long. BUT….. you can do that and for some that 8″ wide bag will be ideal as you might not be making 2 gallons of something like I am. I just pour out half the bag into my giant coffee cup looking soup bowls with the handle on one side. Then fold over your remaining soup bag several times and put a nice strong clamp on it and stick it in the fridge. Will be FINE for another 4-5 days so you don’t have to eat it two days in a row with a sandwich at lunch.
You cannot easily get ALL the soup out of a 11 x 11″ bag so I intentionally overfill it a half scoop or so to account for this.
To FILL the bags with my mass produced soups, (been known to make 2 gallons at a time or MORE) I simply use the VERY wide mouth funnel the folks that can fruits and veggies use. Cost a buck. You’ll learn how to hold it and submerge it up to the top rim inside the vac bag you just made.
Then I use the same 6oz ladle every time so I know how much I’m putting in each bag with each full scoop. I basically put 8 full scoops into each 11 x 11″ bag and it yields 2 big honkin lumberjack size bowls of soup.
Fill your ladle and pour that into your measuring cup with graduations on it so you know now much it actually holds for reference. I don’t bother with 4oz ladles as you’d be scooping all day. Use 6 or 8oz. I use one where the cup on the end is situated so I just turn my wrist inward to pour/dump my soup through the wide mouth funnel, rather than having to tip the entire handle over which over time you’ll find is more effort and easier to spill your soup here and there.
I figure I like a 20oz bowl of soup which is likely too big for most, but I’m 6’4″ and 275#, former power lifter and Marine. So adjust your bags and amounts to match your needs. I’d much rather have a couple spoons left over and be full than still being a bit hungry.
My soups, spaghetti sauces, special gravies, seafood soups, beef based soups made from the leftovers of a giant pot roast for a base normally, all store FINE for 3 full years or MORE!
I read online when researching freezers that taking your freezer temp from ZERO to -5 degrees DOUBLES your effective freezer time. Those few degrees must make a difference to the molecular activity inside that bag to do so. This doesn’t seem to be common knowledge.
I do not use chest freezers and only frost free uprights. Chest freezer way better than not having one in the basement though.
My last giant batch of soup was a lobster, clam, affair, started with a 2 cup of flour real butter roux base for a thickener, then a bunch of heavy cream, sauteed onions, sauteed mushrooms, and all the other stuff I put in it including cans of corn WITH the fluid in the corn for the sweetness. It would have ended up being a bisque but I don’t like watery soups and want some thickness to them. ANY flour roux should be browned to a light brown or darkening tan. Cook your roux right, do NOT burn it or over brown it, and that adds tons of flavor to your final product. 1 cup all purpose flour to one stick of butter, brown slowly. About right for a gallon of soup or a little less. Let cool a little before you start stirring in your fluids. Double that roux for big batches of soup.
That batch is now 3 years old and cost me a fortune. I’ve no doubt in New York that bowl of soup would cost $10 or better. Not in Omaha though. 🙂 BUT I had a bowl a few days ago and it was great!!! Remember, any soups you make with milk products will separate a little as it thaws, so just stir it as you warm it up and it goes right back into the form it was in before you vac sealed it. I DO run my freezers at -5, not zero.
Just ask if you have questions.
I agree, Vulcan.
I would like to add that your choice of freezer can play a big part, too. Frost-free freezers are not frost-free. They do a defrost cycle which melts the frost on the coils. This also raises the temp in your freezer, slightly defrosting your food. This is why your ice cubes all become an ice block if you don’t use them fast enough. A very thin layer of ice defrosts, and freezes your cubes together. I use an old-fashioned deep freezer which does not have this feature, so my frozen goods last longer. When my freezer goods get low, I move everything into the smaller freezer in my kitchen and do a manual (unplug the damn thing) defrost. Then I go to the butcher shop and restock.
Other advice to vacuum seal meats in usable portions is quite good. I do that also.
I do not write the dates on freezer stuff because I figured my method of only restocking when supplies become low would take care of this part for me. I need to start doing this, as I have a few packages that I suspect keep getting missed in the rotation and have been in my freezer for too long.
I’m trying to find a reasonable vac-master, all I’m finding are commercial size and very costly. Where did you find one under $200.00 ?
Hi
I just looked and I’ll be darn. Looks like they might have exited the home market to focus on the pro side. I just looked at one on Amazon 6 months ago and almost bought it as my ARY Pro 260 which I LOVE (ARY and Vac-Master same company) is getting long in the tooth.
I found one with excellent reviews on Amazon for you and you could save $20 by buying the plastic looking cover OR it’s $201 with the much nicer brushed stainless cover. Here: https://www.amazon.com/gp/product/B08BRCMK51/ref=ox_sc_act_title_1?smid=AXQREEJBX208R&psc=1
Plus you could check the Webstaurant Store for more options. I have bought bulk spices there with good results.
I had 4 of the big name brand home vac sealers, one even cost $300, and none of them were as strong, POWERFUL suction, and had the controls to do soups as the ARY/Vac-Master. But I again, note high reviews on Amazon for the one I linked you to above.
Sorry. I didn’t know that from just 6 months ago Vac-Master exited the home market.
Lastly, here is one on Amazon that has even higher ratings but it’s huge. https://www.amazon.com/FoodSaver-Machine-Automatic-Detection-Certified/dp/B00DI342IW/ref=sr_1_21?_encoding=UTF8&c=ts&dchild=1&keywords=Vacuum+Sealers&qid=1615221956&s=kitchen&sr=1-21&ts_id=1090768
I stuck 4 rubber feet on one end of my Ary and to conserve counter space in my smaller kitchen, I just stood it on end in the corner of the food prep area, out of the way.
Given a single pound of ribeye is SO expensive now as are all meats, AND considering their help to all preppers sealing ALL KINDS of foods like powdered milk, etc, it only makes sense to get a quality machine despite their cost. My butcher cuts and wraps my ribeyes first in plastic, THEN butcher paper on the outside, ……. THEN I vac seal that. That extra wrapping I think helps prevent freezer burn too and anyone can buy that. Or if nothing else, wrap a layer of any clear cheap brand of syran wrap around each steak for about a penny. That adds a layer to prevent any freezer burn one might get way down the road. Would help anyway. I also pre-make burgers using the thickness adjustable press and papers from amazon, and FINISH a 10# tube of 80% beef into vac sealed burgers, 2 to a bag and vac seal and date those too! With the press I can FINISH the entire job in half an hour including sealing. You could salt and pepper or teriyaki or whatever before you seal em too. Wrap cheap brand Syran wrap around em, vac seal em, and for over 2 years ya want a burger for you or the kids, all ready for you! Can thaw FAST if you need to by just dunking them in warm water for 20 minutes or so. Endless what you can do with a GOOD vac sealer and you WILL pay for that machine in food savings in no time. Can’t put a dollar value on having dry, edible, not spoiled vac sealed DRY GOODS you stored if the SHTF either and the grocery is closed for 3 months.
Hope this helps. 🙂
Be sure to get one that says it CAN do soups if that function is interesting to you. I LOVE it and use it for sloppy and wet foods too OR you’re pulling that moisture up into where it’s trying to SEAL it and that’s not ideal. You can control WHEN the vacuum is applied while drawing the air out, so you can stop it at will and go straight to the seal. Tricky at first but you’ll get it fast. Elevating your sealer on 2 custom cut to fit the length of your machine, pcs of 2 x 2 wood helps a LOT when doing soups. Most have some of that wood in their scrap bin in the shop. Pro tip.
Thanks so much for all your helpful information. I’ll check it out soon.
I actually freeze my soup in take out containers overnight before i vacuum seal them. Just flip the container over and run water on it to make the frozen soup drop out and place it in the vacuum seal bag and then seal it. Don’t need to worry about hitting the seal button at the right time. I dry age meats to get the blood out of them then freeze them 60-90 min too before sealing. They keep a nice stackable shape that way. I just wish there was a way to NOT waste so much bag with every seal.
some of them are really good suggestions… thanks April!
I have a quick question for you. I am interested in buying a freeze dryer. Do you have any suggestions… what get and what not to get?
My wife and I do a lot of freeze drying with a Harvest Right. It’s pretty spendy, but will pay for itself in time. The unit we use is owned by friend who keeps it going almost full time. She has the 5 tray model. We can dry about 18 eggs on a tray. You will be amazed at the things you can freeze dry (we started a couple of Costco cherry pies today and have done sour cream and cream cheese). Here’s a link to the Harvest Right web site: https://harvestright.com/home-freeze-dryers/
“No more air can get in, but what to do to remove the air trapped inside? Place the sealed container in boiling water to destroy harmful organisms. Some of the air will turn into steam and escape.”
Yes, the steam and moisture will escape as the package explodes. If the package is sealed there is only one way for the steam and pressure to escape via abrupt disruption of the integrity of the package is what the engineers call it. Us plain folk merely say, “The dang thing blew up. Near scart me to death.”
Do not try boiling a seal package at home. Leave that to those idiots who do stupid things on video. What is it called, “Jackass TV”?
I was thinking the same thing, how is moisture escape from a air-tight container, it cannot without exploding, I’ve had chicken, beef, steaks, soups, chili’s in the freezer for 1-2 even maybe 3 years and it’s perfectly good, I reheated a batch of pea soup up the other day that was made 2 years ago & tasted like it was just made, potatoes are the only thing I’ve found that doesn’t freeze to good in stews, soups or whatever, gets muushy.
I’ve been storing meat for the freezer for many years. You can use freezer type bags, close them almost all the way
with just a drinking straw stuck into the corner. You can then suck the rest of the air out, put your finger over the end of the straw and close the zipper the rest of the way as you yank the straw out. Sounds awful but works very well.
Yes, Edi, the drinking straw suck out works. Not quite as good as my Costco el cheapie vacuum sealer but does get most of the air out. How much depends on how powerfully you can draw through the straw and how quickly you can move to seal the bag after you pull the straw out. Would help to have another hand or two while performing the trick.
I’ve done the straw technique before and works just fine but if you want it to work really good is use a computer vacuum and a straw and you’ll suck all the air out & make it just like a vacuum sealed set up with the store baughten sealers.
Straw:
You can also use any Vac Sealer machine that has an accessory port. Plug the extra tubing into the accessory port, the straw on the other end and it will do the job for you (unless you likes that sort of thing… I prefer to save my air for other things – like Breathing). Also, many common plastic bags are not designed to hold a vacuum. They will leak air over time.
Personally, I only use this method if I just want to take the air out of something that is going in the freezer for short term preservation like cooked bacon or cooked sausages and I am feeling too lazy to get the vacuum sealer out.
I wouldn’t use this system for something that I expected to remain in the freezer for a couple of month or longer.
Instead of using a straw, I submerge the bag, (except the corner) and let the water push out the air. Then I seal the last little corner. Works great, and I don’t have to worry about sucking raw meat into my mouth.
I’ve read of this method of removing air too but have not tried it as of yet.
you could just almost completely seal the bag and put it in water to get the air out too. Put the item in the bag, submerge until almost the whole bag is submerged then if you can do it without getting water in the bag (it takes a little practice) seal the “zipper”. This will get all the air out.
As a follow along on boiling sealed bags, a friend of my wife recently posted not to boil vinegar and water in the microwave because it will cause an explosion and fling open the door. Luckily she was not injured and the microwave survived the mini explosion.
The principle is the same. The microwave must be sealed shut in order to keep from frying everything within range of the MICROWAVES which cause molecules to vibrate rapidly resulting in the generation of heat. It would also excite your heart monitor causing your heart to race at really dangerous speeds. You shouldn’t stand too close anyway to a microwave in operation as the seals may be less than perfect.
When one boils water the volume of the water is increased and it release water vapor into the atmosphere. In a sealed chamber that pressure increases rapidly. That’s why one has a pressure relief valve on one’s water heater to keep it from blowing up should the gas or whatever heats the water not shut off at the selected temperature. Otherwise you have a pressure vessel with no means of allowing the excess pressure to bleed off. The result of such increased pressure is — KABOOM ! ! ! !
So it wasn’t the combination of vinegar and water that cause the explosion, it was the continued boiling of water in a pressure vessel without a safety valve that caused the explosion. The lady was very lucky nothing was damaged and nobody was hurt. It could have been far worse that it turned out to be.
So, if you want to have fun in the kitchen, drop a sealed bag into a pot of boiling water and step back and watch the fun. Try this when your wife is going to be gone for several hours so you have time to clean up the mess.
Women have better sense than to do dumb stuff like this.
I use a vacuum sealer for freezing meats. Works great. Always write dares on the package.
Jeri: What kind of dares? “I dare you to guess how long this has been in the freezer?”
“This has been in the freezer since I got married 25 years ago. I dare you to eat it?”
Sorry, I know it is a case of predictive striking again but my evil twin took over and made me do it.
I turned predictive off on my phone and my typos where predictive decided it knew English better than I, have dropped significantly and what’s more I catch them as I type them.
I still get spell check and the phone let’s me know if it thinks I have made a mistake but it doesn’t presume to edit my writing for me.
Wow… you guys are pros.. I am trying to upgrade in all ways wtshtf. I have been rotating meats between 2 freezers.. unfortunately i cannot afford 4 years out yet..
I am currently eating out of the box freezer, and trying to fill the other freezer atm. I color code outside bag to get oldest grouping…
I will look to upgrade in this area, as I am for all shtf scenarios.. Thank you all..
A woman taught me this about 11-12 Years ago. buy your meat pat dry with a paper towel wrap it no less that 3 times tightly of course with plastic wrap insert into a freezer bag push as much air out or suck and seal 🙂 I lie not I have had meat 3 years long forgotten still red and very tasty. water/ice never touched the meat. I think it works as good as my seal meal with the expensive plastic bag material. fish pork chicken beef,.