Dehydrated potato flakes are a highly portable, convenient source of nutrition. They are fairly easy to cook, don’t weigh much and keep for a long time without refrigeration. Also, you know what’s in them when you make them from scratch and they taste better.
Preparing the Potatoes
Peel the potato and cut it up into medium-size pieces.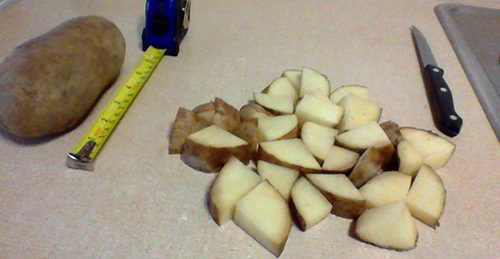
You can wait until after you boil the potatoes to peel them, if you prefer. The skin will come off of some of the pieces while they boil. Let the potato pieces cool off a little, slide a butter knife or fork under the edge of the peel and pull it off. It should come off easily.
Put the potato pieces into a pot and add enough water to generously cover them. It takes about 4 cups of water to cover 1 large baking potato in a medium-size pot.
Add a pinch of salt, if you like. It isn’t really necessary but many people prefer the flavor. I use 1 to 2 grinds of sea salt.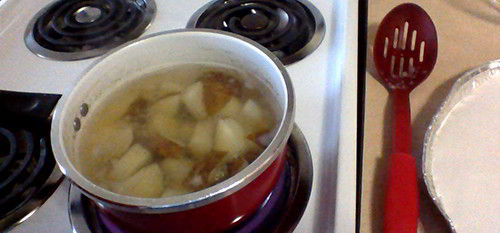
Bring the water to a full, rolling boil. Turn the heat down to about medium so the water stays at a steady boil and boil the potatoes for 15 to 20 minutes. They are done when a fork slides through them easily.
Take the peeled, cooked potato pieces out of the pan with a spoon and put them into a large bowl. Do not throw out the potato water. Mash the potatoes with a fork or hand potato masher.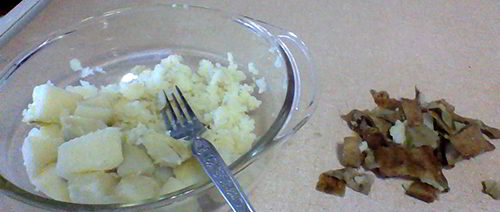
Add 1/2 cup of the potato water and blend it into the potatoes. A mixer works best for this part. Blend them until they are completely smooth. Add another 1/4 cup of potato water and blend them some more. They should be the consistency of runny pudding. Add more water, if necessary, until they are the right consistency.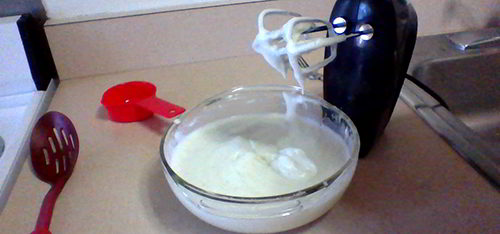
While adding water to the potatoes doesn’t make much sense, it does need to be done. The potatoes must be thin and a little runny or they will not dehydrate and break down properly.
Related: Preserving Potatoes Year Round; A Solid Choice for Preppers
Dehydrating in the Oven
Line a baking pan or pizza pan with parchment paper. Cut the parchment paper down to size so it fits neatly on the bottom of the pan. Parchment paper that extends beyond the edges of the pan will scorch.
Spread the mashed potatoes out evenly in a thin layer (no thicker than 1/4 inch) on the parchment paper. Place another piece of parchment paper on top and lightly smooth it over the potatoes.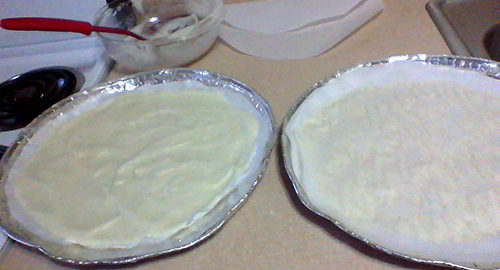
Dehydrate the potatoes for 6 to 8 hours in a 170-degree Fahrenheit or 75-degree Celsius oven. Leave the oven door open slightly to allow the moisture to escape.
Dehydrating in a Dehydrator
If you are using a dehydrator, use the fruit leather tray or the pans/sheets designed for use with your dehydrator.
Set your dehydrator at 130 to 145 degrees Fahrenheit or 55 to 65 degrees Celsius and leave the potatoes in for 6 to 36 hours, depending on how quickly your dehydrator works. Check them after a few hours and turn over the chunks that are getting dry.
Related: How to Keep Grains Edible and Fresh for Over 40 Years With Nitrogen
Making Potato Flakes
The potatoes will be dry, crunchy and white-gold to golden-brown when they are done.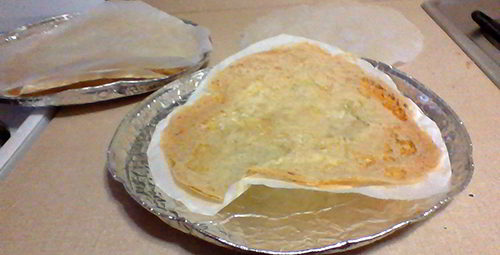
Put the dehydrated potato pieces into a food processor or blender to crunch them up into flakes. Grind them up as much as you can. The finer the grind the smoother the mashed potatoes.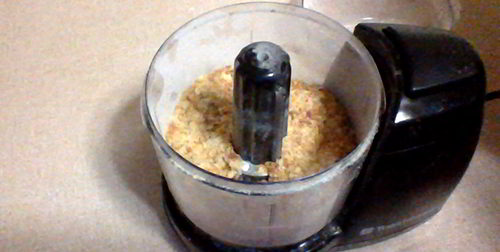
Using Homemade Potato Flakes
Reconstitute the potato flakes with about twice as much water as flakes. For example, 2/3 cup water and 1/3 cup flakes makes 1 serving. The amount of water required will vary so you may want to experiment. Add a little salt, 1 to 2 teaspoons of butter and about 1/4 cup of milk to the potatoes to improve flavor and texture. Put the salt in the pan with the water, bring it to a boil, remove from heat, mix in the flakes, milk and butter. You can also use coconut oil or olive oil instead of butter.
Shelf Life
If you keep the potatoes flakes in a regular container they will last between 6 months to a year. The best way to store them would be in Mylar bags, add oxygen absorbers, keep them in a cool, place and the flakes could last for 5 maybe 8 years.
You may also like:
 How to Make 2400 Calorie Emergency Ration Bars Designed to Feed You for a Full Day
H2O Dynamo – The Awesome DIY Device That Turns Air Into Fresh Water! (video)






Thank you for the the wonderful information. This will help keep you independent of others and possibly out of danger in case of an emergency, man-made or natural disaster. Keep it coming. Being smart will help you not be a victim during a vulnerable time.
Thank you for your article. Very well written with good information. I am going to have to try to make some, I use potatoe flakes for cooking different items. If I can figure it out and make my own, i wont have to worry about buying them from the store.
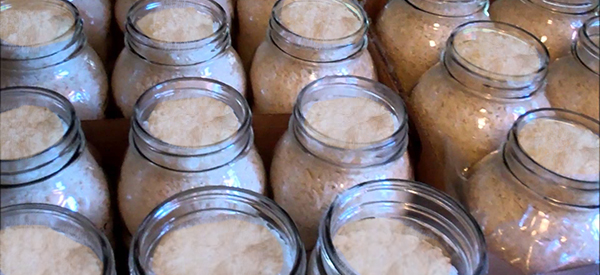
The article recommends long term storage in mylar bags. But, the lead photo shows canning jars. Can the processed flakes be stored long term using “Mason” jars and modified canning processes??
I have used mason jars. Just be sure you add the oxygen absorbers and use the lids the same as regular. You don’t have to do any additional processing.
Thanks Jackie …
I dry can many items to keep them for years, flour, pasta, oats, rice. I am thinking that if you did not flake up the potatoes before you put them in the canning jars, just break the dehydrated potatoes into pieces…. you could dry can in the oven for 1 hour at 200 degrees the same as rice or oats, without over cooking. Then break them down into flakes when you open to use. Dry canning uses regular rings and lids and creates a tight seal.
Thank You so very much for your informative comment. I knew you could dry can but had never done it. Now I shall many many times. Just to keep from throwing stuff out that has gone stale.Thank you again.
i tried the dry canning flour which seemed to work. but when i tried to dry can dry beans and rice they jars had condensation on the inside and you could tell some of the beans and rice were damp. i reprocessed them and the same thing happened. I would like to also can some instant potato flakes but scared they will be ruined… btw i ended up cooking the beans and rice and freezing them in freezer bags
There is a lady on UTube that says you should never “can” rice or beans. She has a degree in this sort of thing. I think you could find her easily if you search. Meanwhile, I am going to boil a couple of potatoes and see what happens. I dehydrated 6 large red onions yesterday and that filled a 1/2 gallon jar about 2/3 full. I am pleased. Thanks everyone for all the great information.
Mason jars work great, but you have to put them in a cardboard box or any dark place after you fill them with whatever food you are saving, remember light is one of those things that destroy the nutrition of the food.
What is meant by “add oxygen absorbers”? What are they, ?
They look like those little tiny packages that you find in the shoe box when you buy new shoes (which you should never throw out). The problem I see is that oxygen packs will be almost instantly useless if exposed to air. How in the heck do you get them from the sealed package to wherever you want them, I don’t know. They are not reusable. That said, I would use Desiccant packs (contains Silica gel or bentonite clay) can stop mold from growing. They can also keep products dry and humidity free. That means no spoiled products or damage from moisture. You could not use them in a container containing any form of liquid like canned tomatoes. Dried tomatoes would be ok. They are reusable. Neither product would be safe around small children or dogs and cats. You can order them off the internet and you can find out how many to use with how much in your preferred storage unit.
I replied in another comment to try to clear up the oxygen absorber question – however, I unintentionally left out a few factors. Oxygen absorbers are primarily to be used for dry packing of low moisture bulk foods. They remove available oxygen from air in contact with the food packed and sealed within mylar bags, inside of let say, a 5 gallon bucket that will have a lid place on top. Their function is to remove oxygen, thus killing insect larva. Perhaps the desiccant is appropriate in a dry canning glass jar – I don’t do that, but I will not negate it either.
In that application, any food you dry can in an oven will be sufficiently cooked/heated to kill any insects making oxygen absorbers unnecessary. Also in a previous reply, I discussed storage of brown sugar not mentioning that I would store it in a closed 5 gallon bucket – NOT using the oxygen absorber & mylar bag sealing method as for most dry packed foods. Because there is a greater level of moisture, which could create, however slight, a risk for botulism. The risk occurs in a no oxygen, low acid food – like green beans, which must be pressured canned instead of a water bath used for most fruits and tomatoes.
Brown sugar is slightly acidic, but not likely enuf to fully negate the risk. So again, given those factors I store brown sugar in their original plastic packaging in the 5 gallon bucket with a lid and leave it at that. I DO NOT apply sealing in a mylar bag with oxygen removers. I hope that clarifies my earlier comment.
Thank you! I recently bought a 10 lb bag of potatoes for $2.00. Can’t use them all quick enough, so this recipe comes in handy right now!
TheProvidentPrepper.com has excellent home tutorials on dry packing bulk food.
However, as follows are the basic steps to doing it properly.
Oxygen absorbers are packets of Iron shavings, that will warm up when exposed to air. They are specifically for removing oxygen from the mylar bag with the contents of the food you have sealed inside. You would 4 or5 packets of them at the bottom of the bag, large enuf to go into a 5 gallon plastic “Home Depot” type bucket. Then you heat seal the top of the mylar bag – this will ,over a day or two, remove the oxygen remaining in the bag, thus killing any insect larva present. A total vacuum is not necessary- remember ‘air’ is only partially composed of oxygen. Silica desiccants are not adequate for any long term storage. they do not remove oxygen – they only guard against moisture. When packing low moisture bulk products like wheat, oats, sugar, dry beans and white rice not only are desiccants not necessary but of no value in this instance. because the dry goods mentioned above and the like, are inherently low moisture. Personally, I like to store bags of brown sugar, which does have some moisture. But in this instance I will NOT seal it in a mylar bag as above – that’s is inviting other problems – no oxygen in a dark, moist environment, unless pressure canned, invites botulism. If the sugar gets hard, its not hard to soften it up again, with a few slices of apple or similar.
I forgot – you would also of course need to place a lid to fit the 5 gallon bucket.
Do you have to remove the skins? Aren’t many of the important nutrients there?
Why not dehydrate the peels and store them separately? Break them into small pieces and add them to soups, stews and casseroles, or back into the potatoes when re-hydrated, for extra nutrition.
That’s a good idea.
Where can I get parchment paper?
In any grocery store, or walmart.
Got mine at Albertsons
Got mine at the Dollar Tree. Yeah!
How long do you think they’d last if you put them in Mason jars and sucked the air out with a Food Saver vacuum-sealing attachment?
The dry canning method appeals to me more than bags except for a short term buggout bag. I’m too old to run anywhere roughing it. Home storage is better for my life.
Un obvious storage solutions along with a home garden and indoor salad garden are more along my lines of thought. Cactus and brush along fence lines so you understand where I’m coming from.
Wondering why you just don’t use a food dehydrater think that would be easier will have to try this sounds like a good thing to do if you have a lot of potatoes
The article does give directions on how to use a dehydrator. I am thinking it describes the oven method in such detail since most people do not have dehydrators.
Would it be feasible to purchase store bought potato flakes and storing them in vacuum sealed bags or hot canning them in mason jars?
Can Sweet Potatoes be processed the same way (without skins)? What would their estimated shelf life be?
Not sure about sweet potatoes but more than likely they can be done. Will have to experiment to get them just right. I have seen sweet potato flakes same as the Idaho potatoes they seem to work the same, but I found some purple sweet potatoes the other day at a Natural Grocery store.
Sweet potato flakes sound interesting. I’d like to hear about what works and what doesn’t work.
I’m dehydrating sweet potato slices today as an experiment.
Could this technique work for other vegetables or roots?
With stage 3 diabetes I have to minimize potassium and sodium. One way would be to lightly boil thin sliced potatoes or let them soak overnight, hich would leach out about 50% of the bad stuff into the water. It would then be a simple matter to toss the water and proceed with the dehidration and flaking. Reconstitution would be via fresh water, with plant butter and pepper for flavor.