While it might not be as exciting or sexy as some of the survival gadgets on the market today, a good pair of boots is an essential piece of survival equipment. If you ever find yourself bugging out, forget your tennies, they won’t survive. You’ll need a good pair of hiking boots or work boots to help you on your trek through the wilderness. For that matter, some scenarios might make boots a much more practical solution even while bugging in.
If you’re like me, you’re hard on boots and shoes. I can go through a pair of dress shoes in six months. But that won’t work out all that well in a survival situation. It’s doubtful that I’ll be able to replace them and just about as doubtful that I’ll be able to find a cobbler who can work on them.
Good boots are an investment. Properly cared for, they will last. But if you don’t care for them, then you can count on their life being considerably shorter. That could very well leave you in a position where you don’t have any footwear; not something you want to contemplate in a survival situation. Going without good footwear in such a situation could see your feet cut to ribbons.
Of course, a lot depends on the quality of boots you buy. Like many other things, you tend to get what you pay for with boots. Good ones are better made, with higher quality materials and greater comfort. But the quality of the boots themselves doesn’t matter as much as how well you take care of them. Proper care can add years to the life of a pair of boots.
Related: 25 Tips for Post Apocalyptic Needs
Break Them In
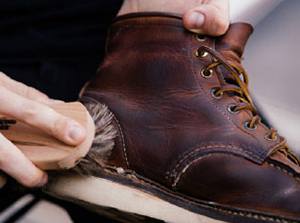 Proper break in may not add years to the life of your boots, but they will add years to the life of your feet. Actually, it will help your boots to last too, as painful feet cause people to walk improperly, causing unnecessary wear on soles and heels. Keep in mind that new boots are typically uncomfortable if worn for a long time, even if they felt like the most comfortable thing you ever wore, back when you were trying them on.
Breaking in should be done in small stages. Don’t try to wear your boots for a whole day, until you’ve gotten them well broken in. Until then, only wear them for a couple of hours at a time. That will give your feet a chance to recover, so that you don’t end up limping or walking improperly.
Some boots are made with harder, stiffer leathers. If there is a part of the boot which your foot needs to be flexible, but it is not, it can help to work that area by hand, bending it over and over to remove the stiffness from the leather. Do this as you are oiling the boots, and it will do a world of good for your feet.
Waterproof Them
 Boots need to be waterproofed; they don’t come that way from the factory. Even if your boots say that they are waterproofed, don’t believe it. The sprays they use at the factory aren’t very good and will wear off quickly.
Waterproofing is either done with wax or oil, depending on the way the leather was tanned. If your boots are made of oil-tanned leather, then you’ll need to use an oil to waterproof them. If they are chrome-tanned, you’ll need to use silicone spray or shoe wax to waterproof them. One of the best products around for waterproofing boots is mink oil. This paste product works for both oil and chrome tanned leathers, as it is a combination of oils, lanolin and silicone.
Be extra careful to waterproof the boots where the tops meet the soles. This just happens to be one of the easiest access points for water to get into the boots. Yet, it is often overlooked, allowing water to get in.
No waterproofing product will last forever. You will need to reapply waterproofing every six months or so, as long as you are using the boots. If your boots are exposed to a lot of water, you may even need to do it more often.
Condition the Leather
Full-grained leather boots need to have the leather conditioned from time to time. This is essentially a moisturizer which you work into the leather, preventing it from drying out. Just like skin, leather that dries out tends to crack and get flaky. If you are regularly waterproofing your boots with oil, it will take care of this need. But if you don’t waterproof them for some reason, you should use a quality conditioner, working it into the leather well.
Keep Your Boots Dry
The biggest enemy of leather is water. Walking through a stream or even in wet snow can cause the leather to get wet, especially if you aren’t waterproofing them regularly. This drives out the natural oils, allowing the leather to crack.
The other way that boots get wet is from perspiration. If you’re the kind of person whose feet sweat a lot, you might want to consider buying your boots a little large and wearing two pairs of socks. That gives more to absorb the sweat, reducing the amount of your sweat that makes it to the leather. There are also some types of shoe inserts which help with this. But just like two pairs of socks, you need to take the space they use into account when you buy the shoes.
If your boots get wet, you’ll want to dry them naturally. Don’t use heat to dry them, as heat can cause the leather to crack. If you want to speed up the drying process, you can fill socks with either oatmeal or rice, both of which are great moisture absorbers.
Related: Waterproof Socks – One Step Further In Terms of Outdoors Living
Polish Your Boots
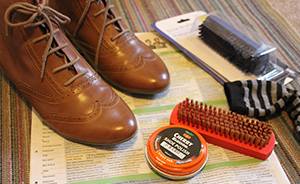 Many people avoid polishing their boots, deeming that something to be reserved for dress shoes. Of course, not all boots should be waxed; but if you are wearing full-grained leather boots or have boots which are partially full-grained leather, they should be polished. Shoe polish does more than make shoes and boots look nice, it helps to protect the leather, especially in the toe and heel areas, where the leather tends to get damaged by abrasion. Leaving these areas unpolished could damage the waterproofing of the boots, between the regular waterproofing sessions.
Always brush your boots well before polishing them. Dirt left on the boots when the polish is applied mixes in with the polish, degrading the quality of the finish. You might also have places where there is enough dirt, that the polish doesn’t stick to the leather, but rather only polishes the dirt. Then, when the dirt flakes off, it takes the polish with it.
Clean Your Boots
Any boots are going to be cleaned from time to time, especially if you wear them out in the wilderness. Mud and dirt will hold a lot of water, which could ultimately seep into the leather. You can either clean this off with a damp cloth or wait until the mud dries and then brush it off with a stiff shoe brush. Either way, getting that mud off will help to keep your boots not only looking good but lasting well too.
Use Shoe Trees
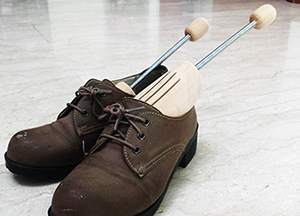 Shoe trees seem like something out of the past, or maybe something only the rich would use. But putting shoe trees into your boots every time you take them off will help restore their original shape; keeping them fitting comfortably.
Have you ever seen a pair of boots that seemed curled up? That’s because the leather wash shrinking as it dried and the owner of those boots didn’t bother with shoe trees. The regular use of trees would prevent that curling, even if the leather was drying out. Of course, regular moisturizing along with using the shoe trees is even better.
Keep an Eye on the Heels
Heels of boots and shoes tend to wear down faster than the soles, especially for people whose feet turn outwards. For most people, the soles of the boots last twice the time of the heels. So, replacing the heels extends the life of the boot.
Of course, some types of boots are easier to re-heel and re-sole than others. You’ll have to check with your local cobbler about the ones you have. But in general, you’re better off replacing heels sooner, rather than later. Waiting too long just accelerates the damage.
In a survival situation, boot heels and soles can be replaced with thick leather, even if the boots originally had rubber soles. The trick is having an adhesive which will stick to the shoe. I keep a product called “Shoe Goo” on hand, for just this reason. It’s a thick adhesive, designed specifically for making your own repairs on shoes and boots. I’ve stuck many a shoe sole or heel back on with this product.
You can also cut out new soles for hiking boots out of an old tire. The carbon-filled rubber they use on tires is extremely durable. It can be attached to the soles and heels of old boots with Shoe Goo, making them essentially as good as new.
You may also like:
Do You Make These Fatal Mistakes In A Crisis? (video)
How to Make Colloidal Silver and How to Use it
How to Make Firebricks (fire logs) and Wood Stove Logs for Free!

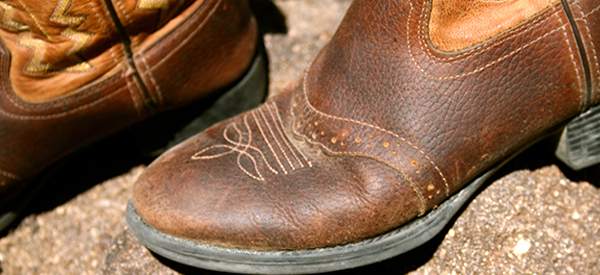




If you have colored boots, do the following:
(1) Get a small tin cup
(2) Fill it with equal amounts of Mink Oil (paste) and your favorite colored shoe polish (paste)
(3) Heat the contents, slowly, until they both turn to a mild bubbly liquid – stirring occasionally.
(4) Apply the heated liquid to your boot with a one inch paint brush – cover every surface including the stitching and seams
(5) After letting the mixture set on the boots, remove the excess with a cloth rag – this makes the surface smooth, shiny and waterproof.
(6) Reapply only as needed – once every 6 months to a year is good. If you wear your boots a lot, reapply as needed.
**NOTE** Doing this procedure MAY darken your leather color permanently!
I worked in a ready mix concrete plant for decades. Wet Portland Cement, used to make concrete, is so caustic that it literally eats the stitching and leather of good work boots. I learned very early on to melt a jar full of Vaseline on the stove or in the microwave, take a one or two inch paintbrush and work the Vaseline into every surface, nook and cranny on the outside of the boots. Rub it in and do it again. This treatment not only waterproofs the boots, but generally triples their lives. You have to repeat it every few months, but it is SO worthwhile
I purched a pair of Herman 8″ hunting boots in 1975. The soles still look new but are hard as nails. Is there any treatment I can use to soften them somewhat?
The upper leather, while cracked a lot,
I clean with Saddle Soap then Mink Oil. The leather remains somewhat stiff but pliable.
Take your boots to a shoe repair shop and ask him to oil them for you. Not all shoe repair shops can do that work but if you look around, you may be able to find one. A shop that has been in business for a long time is your best bet as so many people are wearing nylon or other artificial material on their feet these days a newer shop may not have the equipment to do it.
I’ve worn Tony Lama cowboy boots for 30+ years. I use a liquid silicone for waterproofing, black shoe polish, and elbow grease. This is for keeping them clean, waterproof, and polished. But the best thing I was ever told was buying two pairs of boots cost less than only buying one. The trick is to alternate which ones you’re wearing & which ones have that sweat drying out. Because (unfortunately) that waterproofing works both directions (in & out), and getting the sweat out is a main factor in how long boots last. Best advise I ever got (boot wise anyway).
In 1966, I was drafted. My drill sergeant made us all take a pay advance and buy a pair of Corcoran boots. They were, in those days at least, made in the U.S.A. of 100% leather. We put them on and went swimming with them until the leather was fully saturated and felt like it was about to come apart. Then we wore them on a hike until they were dry. Then, we spit-shined them. They had formed themselves to fit our feet perfectly! I wore those boots for three years in Vietnam and for the rest of my 20-year Army career. I still wear them occasionally.
wow!
Leather CPR is very good on dried leather and molded leather products, It reconditions the material so it is usable again. It is VERY expensive, though.
While mink oil is excellent for softening and water-proofing leather, it should not be used too frequently as it will soften the leather too much and weaken it. For regular water-proofing and conditioning, bees wax is superior. Leather should be cleaned well before applying any conditioner or polish. Murphy’s Oil Soap (the thick liquid, not the spray type) on a damp sponge does an excellent job cleaning leather and is far cheaper than saddle soap. Mud is leather’s worst enemy as it draws oils out of the leather when it dries, and will continue to do so each time that dried mud is re-moistened, so removing mud as soon as possible is important. Pure neatsfoot oil and lanolin are the best oils to nourish leather. This should be applied after cleaning and before applying beeswax. Allow enough time between steps. Let the leather dry a bit after cleaning before applying oil, then let the oil soak in well before applying wax. Warm leather will let both the oil and wax go deeper into the leather. Full sunshine or a blow-dryer on low setting will warm the leather enough. Do not leave excess wax on the leather surface as it will attract grit and be abrasive to the leather. Water is not harmful to leather by itself. How you let the leather dry is what harms it. Leather is shaped by casing which involves soaking the leather in water and letting it dry in the intended shape. After it is dry oils and wax are added. If footwear is totally dried out, don’t bend it. Dampen it with water and apply soap until it is flexible, then oil and wax.
I’ve been making and repairing leather goods for 50 years and my suggestions are based on that experience.
Wow!! Thank you so much for that!
All great thoughts and good information. One enemy of boots/shoes/gloves that I don’t believe was mentioned is sunshine. If you leave boots/shoes/gloves out on the porch for much more than a day, you can be sure you’ve shortened their useful life. Dry these items indoors, even if they’re muddy/manured/wet. I live on a farm in the northwest, so we get plenty of rain and snow and cow poop. We keep a large tray in the hallway, which can be dumped out and washed with ease, rather than leaving expensive work boots out in the sun. A garbage can lid or the lid off one of those big plastic storage tubs would work also. Further we have fabbed boot racks that hold a pair of boots upside down to dry, which seems to help since excess water is draining out instead of pooling at the bottom. We went all out and used some salvaged table legs, 2×4’s and deck screws. Each rack only took a few minutes to make. They’re pretty handy and earn their keep for sure.
I just washed my catapillar 8 in
Construction boots,dried them and polished em with black kiwi shoe polish , then coated them with some vaseline .