Weeds aren’t just a nuisance if you’re trying to keep your yard tidy and attractive. They can reduce the yield of your crops and even encourage the spread of disease and parasites.
The trouble is, unless you’re talking a very small yard pulling up weeds by hand is just too labor intensive. To control them you need herbicides. Unfortunately many herbicides can be bad for the environment, including other plants and livestock – and anyway, what do you do if a crisis has already hit and none are available?
This is where a versatile household substance comes in. Vinegar is a great product to use to get rid of your weeds, and it’s as effective as any store-bought product. A herbicide with vinegar kills weeds, and although there are a few exceptions and limitations, vinegar usually does the trick.
Vinegar is a natural product, and the typical acidity is 5%. That is the acidity you want. Do not go over or below this. The number indicates the amount of acetic acid in the vinegar.
Acetic acid, from any source, will kill all weeds by extracting the moisture from the plant. Besides 5% vinegar you can also find it at strengths of 10% or 20%, but these may be too aggressive.
Due to the high concentration they are considered strong acids, and they’re only recommended for mature and firm weeds. If using these products you need to be very careful and treat them the same as you would other caustic substance.
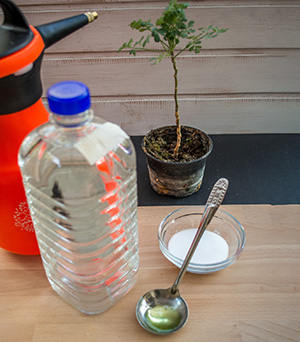 Besides vinegar, you can also use salt. It is one of the safest and most natural herbicides you can use.
Salt is great because it is super cheap, works quickly, and suppresses regrowth, and overuse will not harm the environment. But it has some flaws: you cannot use it on lawns or for large weeds.
It is best to spray the solution of vinegar and salt over the weed on a hot day. The effect of the sun and heat will increase the effect of the vinegar solution and kill your weeds within 24 hours.
Although this is a powerful combination, some plants are not as susceptible to vinegar. A waxy coating or fuzzy surface may interfere with the vinegar solution’s effect. This is the part where dish soap comes in.
Just one tablespoon of dish soap per gallon will make the solution “stick” to the plant and allow the vinegar to do its magic. Although the dish soap will not have a major impact on the weed itself, it helps the other ingredients to dehydrate the weed.
Once you have your solution ready, you can use it with a spray bottle for small areas or a pressure sprayer for wide areas.
Related: Making Raw Apple Cider Vinegar at Home
NOTE:
When it comes to safety you can wear gloves and glasses, but this is a natural product (except for the dish soap), and there is no need to use safety gear. Of course, if your skin is sensitive you should protect yourself.
Preparation time: 10 minutes
Makes: 1 gallon
Ingredients:
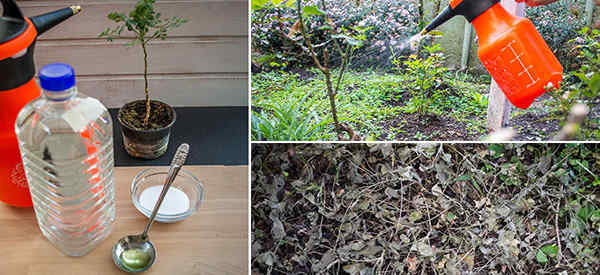
- 1 gallon distilled white vinegar (5% acidity is enough)
- 1 cup table salt
- 1 tablespoon liquid dishwashing soap
- Standard garden sprayer (available in any garden store)
How to Make the Herbicide
#1. Pour the vinegar into the container.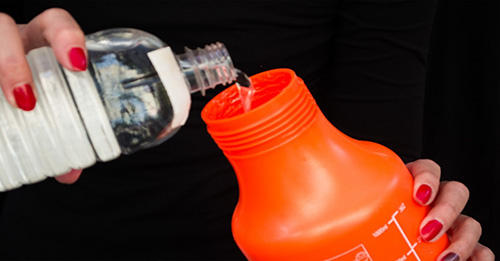 #2. Add salt and stir until the salt is dissolved.
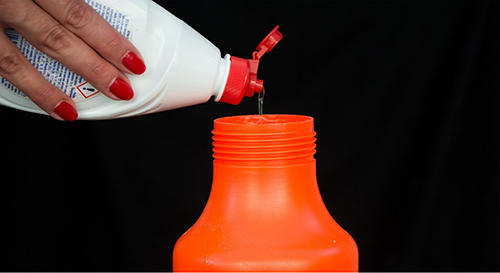
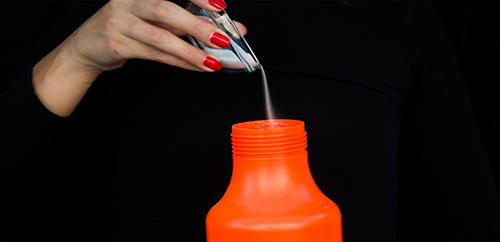 #3. Once the salt dissolves, add the liquid dishwashing soap. The dishwashing soap allows the other two ingredients to stick to the weed and kill it.
 #4. Spray the mixture over the weed just like any store-bought product.
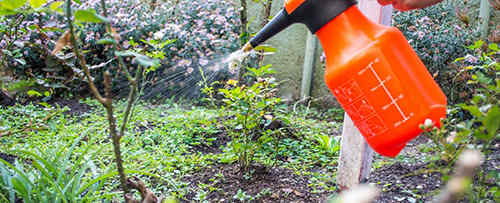
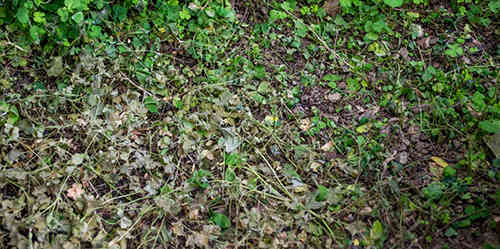
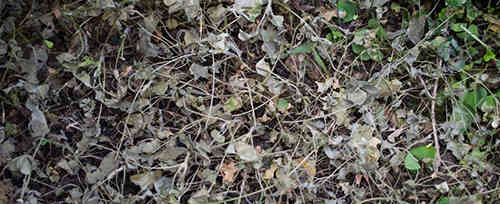
 #5. Allow it to stand for a few days. The weed will start to dry out within 24 hours. After a few days, it will be completely dead.
How Does This Work?
The vinegar and salt both work against the weed by dehydrating it. The dish soap will help these two stick to the plant, making them more effective. The solution also prevents any future growth from occurring.
NOTE: This solution may destroy other delicate plants, so you cannot spray all over the lawn as your grass will be destroyed as well. You can try using a smaller spray bottle to get more specific spraying, but still, caution is necessary. The best application is for sidewalks, driveways, and other areas without any flowers or lawn.
You may also like:
 10 Beautiful Plants That Are Secretly Killing Your Garden
This Bug Will Kill Most Americans During The Next Crisis (Video)
Make Your Own Peppermint Oil – The Best Insect Repellent






This works. It is the herbicide that I use around my house. However, it isn’t a soil sterilizer such as Triox was. This weed killer is only good for one season. It doesn’t get down deep enough to kill a large tap root.
I hate using chemicals. So when I have to kill weeds on walking paths or rock beds, I’ve only used salt. This makes sense and sounds like a better solution. Thanks!
I don’t spray anything on the lawn, it ain’t bad looking, there is a lot of autumn aster (weed!) this fall and when mowed it blooms a little white carpet level with the grass, the Monarch butterflies are all over it.
I’m lazy and spray a bit of RoundUp on the hardscape.
The vegetable and butterfly gardens are never sprayed, if you keep improving the soil with compost it will be loose enough to pull everything by hand with little effort.
Basting chicken with vinegar while grilling it over an open fire is a good and different flavor, if SHTF am saving my vinegar for cooking and pickling.
Somebody please post a recipe for making vinegar at
home!
Random: While I am not sure of the quality of the vinegar, but if you leave a bottle of red or white wine open on the kitchen counter long enough, eventually you will have a bottle of red wine vinegar or white wine vinegar.
How about this recipe:
1 Get your starter. The starter’s job is to provide acetic acid bacteria, which converts ethanol into acetic acid (the primary ingredient in vinegar). Unpasteurized, unfiltered vinegar. It’s important to use vinegar that hasn’t been processed in a way that interferes with the acetic acid bacteria. Mother of vinegar. This slimy looking thing consists of acetic acid bacteria and cellulose. It’s a natural product of the vinegar-making process. If you have a friend who makes vinegar, you may be able to get a piece of theirs, or you can make your own. You can make your own by mixing unpasteurized and unfiltered vinegar with an alcoholic liquid and putting the mixture in a sunny spot for two weeks, but in that case, you might as well use the vinegar itself as a starter; a mother will form with your vinegar that you use next time. Mycoderma aceti. You may be able to find it in a wine-making store. It’s clear and comes in a jar.
2 Prep the container. Choose a container made from glass or enameled earthenware. You don’t want the container material to react with the vinegar. Aluminum, iron and plastic will ruin the vinegar. Clean it thoroughly. Pour in the starter and swirl it to coat all the surfaces so that the vessel is inoculated with the acetic acid bacteria.
3 Pour in the alcoholic liquid. Since oxygen is necessary for this process, try to ensure as much liquid surface area as possible. Fill the container up to its widest point.
◦ wine
◦ cider (referred to as hard cider in the US and parts of Canada)
◦ beer
◦ fermented fruit juice
4 Cover the opening with cheesecloth. Tighten the cheesecloth around the opening with a rubber band or string. This will allow oxygen in while keeping flies and other contaminants out.
5 Wait. Put the container in a warm, dark place and let nature do its thing. Keep the mixture between 60 degrees and 80 degrees Fahrenheit (around 15 to 27 degrees Celsius). During the course of about 3-4 weeks, it should start forming a mother of vinegar; you can observe this if you used a glass container. The amount of time it takes for the vinegar making process, however, depends greatly on the type of alcoholic liquid you used, and how much of it you’re converting. The range is anywhere between 3 weeks to 6 months. Some sources suggest stirring the mixture daily in order to provide oxygen, and taste testing a little bit at a time towards the end of the 3-4 week period to see if the vinegar’s ready. Other sources recommend leaving the mixture undisturbed, so that the mother doesn’t sink. If you decide to leave the mixture undisturbed, it’ll be a little trickier to see if it’s ready. Smell it through the cheesecloth; it’s done when there is an intense vinegary smell that almost burns in your nostrils. If, based on this, you taste it and it’s not ready after all, let it ferment undisturbed for another period of time, depending on how close it is to your desired vinegar flavor. A container with a spout at the bottom would make this much easier, since you can taste the vinegar without disturbing the mother at the top.
6 Bottle and store your delicious, homemade vinegar! Strain out the vinegar through cheesecloth or a coffee filter, separating the mother, which can be kept for making more vinegar. Unless you ferment the vinegar for a very long time, there is probably alcohol still left in it, which you can remove by boiling. While you’re at it, you can pasteurize and reduce the vinegar, so that you can store it for longer and concentrate the flavours, respectively. To achieve pasteurization, heat the vinegar to 170 degrees Fahrenheit (77 degrees Celsius) and hold it there for 10 minutes. Crock Pots are perfect for holding food for a long time below the boiling point. Use a thermometer to check your crock pot’s temperature at each setting to determine which setting is closest to 170 degrees. Unpasteurized vinegar can be stored in sterilized, capped jars in the refrigerator for a few months. Pasteurized vinegar can be stored in sterilized containers with tight-fitting lids at room temperature for more than a few months, as long as they are kept out of direct sunlight.
Recipe is from Wikihow, a website devoted to teaching folks how to do stuff.
We do nothing except mow our yard. Dandelions and clover are just considered bee food, or on occasion we’ll pick a handful of them as treats for the chickens. The only time we try to kill plants would be poison ivy, and for that we chop the vine close to the ground and cover with a pile of salt, although the vinegar may help here also.
Fir pests, you can make a natural pesticide by making a strong tea from tobacco, straining out the chunks and simmering it down to a deep brown liquid, which is concentrated nicotine. Applied to bugs with a spray bottle will kill them, and the water soluble substance can then be rinsed with water.
Now to play the devil’s advocate.
While this is a helpful hint for every day present living, I am having a hard time seeing how this helps me prepare for the end of the world or something short of an apocalyptic event. In the event of such an event, I wouldn’t be wasting salt, vinegar and soap on weeds. I would be hoarding them for their original purposes. I would be digging out weeds the old fashioned way, with a steel weed digger or chopping them off at the surface with a hoe. More likely, I would be trading such labor for clean water or a bowl of soup.
No more standing on the corner with a sign that says, “Will work for food.”
They will have a chance to put their backs where their mouth is.
Amen to that. It is a way to save money and develop a skill.
Uh, dude!! I have 5 gallon buckets of salt.
Vinegar?? I have a shelf just for the gallons.
Am I really gonna miss that teaspoon of Dawn?? Nope!
If you want to spray a small area while protecting surrounding plants, take a plastic bottle, cut the bottom off, place the bottom over the weed you want to spray, and spray through the small top opening. You can use a gallon bottle, or a much smaller one to limit the area you spray.
You forgot Borax. Keeps weeds like poison ivy down much longer.
What is the solution? How much Borax to how much water?
Add 1/4 cup per gallon. My solution is
2 gal. Water
1 gal vinegar
1/4 cup Borax
1/4 cup salt.
Is it safe to use around Fruit trees?
I had someone ask about my solution used around fruit trees. I can’t speak to that only it has never harmed full sized sugar maple trees. I keep all of my (weeds). I use it to kill poisonous plants like poison oak, ivy and Virginia creeper. Hope that helps. I use most of the weeds on the property for other things.
I use sodium hydroxide for weed killer, I can get all I want from where I work, we off load railroad tanker cars full of this stuff. It comes in at 50% so I dilute it with water down to round 25% strength, no weed can stand up to this stuff!
Wow! Sodium hydroxide is potent stuff. It used to be sold in a mild solution as Draino but the grease white father (I was planning on typing “great” but somehow predictive beat me to it and substituted “grease”. Like that better so didn’t correct it. Anyway, our masters in Washington district of corruption decided we weren’t smart enough to use it as drain cleaner and so now we use strong sodium hypochlorite commonly known as Clorox.
Sodium hydroxide is exothermic, so one has to be careful when diluting it so that it doesn’t splatter. When diluting, do not add water to the hydroxide, but add the hydroxide slowly to the water.
Yeah, it will kill weeds and lots of other stuff too. Don’t let your local pollution folks know you are using it. They will have a tremendous hissy fit and it may cost you big bucks.
Also a great wasp killer that won’t have that chemical smell is 1cup of water and some dish soap. Just make a small batch and douse them varmits on their nest. The soap surffercates the wasp and they fall because it also plugs the air paths in their wings. It DONT work so well on hornets.
Ray,
We keep a couple of spray bottles of this mixture on hand and use it often. The wasps generally paper wasps or mud daubers love to nest in the covers of our propane tanks, so when we ligt the covers to read the gauges, we always go armed. When you wet them down thoroughly, it not only suffocates them; but, make them for heavy to fly. My propane delivery giy also carries this in his kit.